Woodworking equipment is the foundation of every project, from simple crafts to intricate furniture. Whether you’re a seasoned artisan or just starting out, understanding the tools at your disposal is essential. This guide will take you through the essential tools, power tools, and specialized equipment that will help you bring your woodworking visions to life.
We’ll explore everything from basic hand tools like chisels and saws to powerful machinery like table saws and routers. You’ll learn about the functions, applications, and safety considerations for each piece of equipment. By the end, you’ll have a comprehensive understanding of the tools needed to embark on your woodworking journey.
Essential Woodworking Equipment
Starting your woodworking journey can be exciting, but it’s important to have the right tools to get you going. There are many tools available, but some are essential for beginners and experienced woodworkers alike. This guide will help you identify and understand the core tools every woodworker should own.
Hand Tools
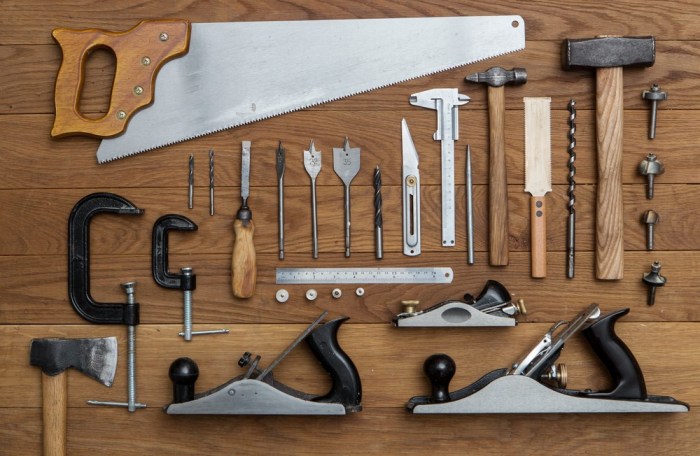
Hand tools are versatile and often used for intricate tasks. They provide precise control and can be used in situations where power tools are not practical.
- Measuring Tools: Accurate measurements are crucial in woodworking. A tape measure is essential for measuring lengths and distances. A combination square is used for measuring angles, marking lines, and checking for squareness. A ruler is helpful for measuring smaller distances and making precise markings.
- Marking Tools: Pencil, pen, or marker: For transferring measurements and marking lines on wood. A marking gauge is used for marking parallel lines at a specific distance from an edge.
- Cutting Tools: A handsaw is used for cutting wood to length and making basic cuts. A chisel is a versatile tool for shaping, carving, and removing wood. A block plane is a small hand plane used for smoothing and shaping wood.
- Clamps: Clamps are used to hold pieces of wood together during assembly or for securing workpieces while cutting or sanding. A variety of clamp types are available, including bar clamps, spring clamps, and C-clamps.
- Sanding Tools: Sandpaper is used for smoothing and finishing wood surfaces. A sanding block is used to hold sandpaper and provides a more consistent finish.
Power Tools
Power tools provide speed, efficiency, and power for various woodworking tasks.
- Power Drill: A power drill is essential for drilling holes in wood. A cordless drill is convenient for portability, while a corded drill offers more power. Choose a drill with a variety of speed settings and a chuck that accepts different drill bit sizes.
- Circular Saw: A circular saw is used for making straight cuts in wood. Choose a saw with a blade guard and a depth adjustment mechanism. Consider a saw with a laser guide for more accurate cutting.
- Jigsaw: A jigsaw is used for making curved cuts and intricate shapes. It is also useful for cutting out shapes from plywood or other sheet materials. Select a jigsaw with adjustable speed settings and a variety of blade options.
- Router: A router is a powerful tool used for shaping edges, creating grooves, and making decorative cuts. It can be used for a wide range of woodworking tasks, including making dadoes, rabbets, and moldings.
- Belt Sander: A belt sander is used for sanding large surfaces quickly and efficiently. It is a good choice for removing rough spots and creating a smooth finish. Consider a belt sander with a dust collection system to minimize mess.
Hand Tools for Precision and Detail
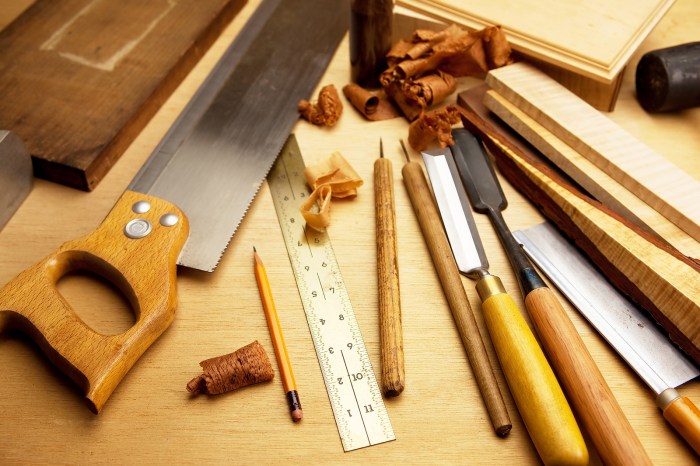
Hand tools are the backbone of woodworking, offering unparalleled control and finesse for achieving precise cuts, intricate shapes, and meticulous finishes. Unlike power tools that rely on speed and force, hand tools empower you to engage with the wood on a more intimate level, allowing you to feel the grain and understand its unique characteristics.
Measuring Tools
Measuring tools are essential for laying out accurate dimensions and ensuring precise cuts.
- Measuring Tapes: Used for measuring long distances, they come in various lengths and have clear markings for easy reading.
- Rulers: Ideal for measuring shorter distances and making precise lines. Choose rulers with clear markings and a sturdy construction.
- Combination Squares: Versatile tools that combine a ruler, a protractor, and a try square. They’re useful for checking angles, marking lines, and ensuring squareness.
- Calipers: Used for measuring the thickness and diameter of objects. They offer high precision and are particularly helpful when working with small details.
- Marking Gauges: Used for transferring measurements to wood. They have a sharp point for marking and an adjustable depth gauge for consistent results.
Cutting Tools
Cutting tools are crucial for shaping and sizing wood.
- Hand Saws: Versatile saws used for making straight and curved cuts. Choose saws with sharp blades and comfortable handles for optimal control.
- Backsaws: Designed for making precise crosscuts, they feature a stiff back that prevents the blade from flexing. Backsaws are ideal for creating clean, straight cuts.
- Dovetail Saws: Specialised saws with fine-toothed blades for cutting dovetail joints. They offer precise cuts and intricate details.
- Chisels: Used for carving, shaping, and removing wood. Choose chisels with sharp blades and comfortable handles for precise control.
- Planes: Used for smoothing and shaping wood. They come in various sizes and configurations, each suited for specific tasks.
- Block Planes: Small planes for smoothing edges and shaping small pieces.
- Jack Planes: Larger planes for smoothing surfaces and removing significant amounts of wood.
- Jointer Planes: Used for creating flat surfaces and ensuring accurate jointing.
Shaping Tools
Shaping tools allow you to create intricate curves, rounded edges, and custom designs.
- Spokeshaves: Used for shaping curved surfaces and smoothing edges. They’re ideal for creating rounded profiles and refining details.
- Rasp and Files: Used for shaping and smoothing wood. Rasps have coarse teeth for removing material quickly, while files have finer teeth for more precise work.
- Sandpaper: Used for smoothing and finishing wood. Choose sandpaper with different grits for achieving different levels of smoothness.
- Gouges: Used for carving concave shapes and creating intricate details. They come in various sizes and shapes, each suited for specific tasks.
Finishing Tools
Finishing tools are essential for applying finishes and enhancing the appearance of wood.
- Brushes: Used for applying paint, stain, and varnish. Choose brushes with soft bristles and appropriate sizes for the task at hand.
- Scrapers: Used for removing imperfections and creating smooth surfaces. They’re particularly useful for preparing wood for finishing.
- Sanding Blocks: Used for sanding surfaces evenly and consistently. Choose blocks with comfortable grips and appropriate sizes for the task.
Power Tools for Efficiency and Speed
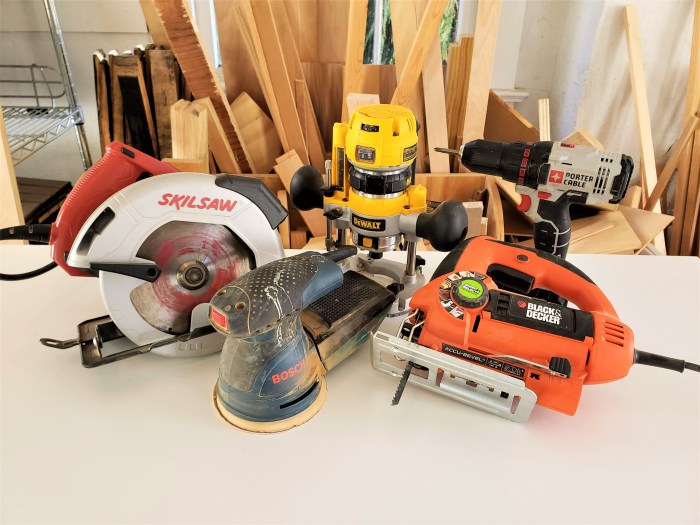
Power tools are essential for any woodworker, as they significantly increase efficiency and speed, enabling you to complete projects faster and with greater precision. From cutting and shaping wood to sanding and finishing, power tools provide a wide range of functionalities that simplify and enhance the woodworking process.
Types of Power Tools
Power tools are classified based on their functionalities and applications. Here is a table outlining some of the most common power tools used in woodworking, their primary purpose, and potential applications:
| Tool | Description | Primary Purpose | Applications |
|---|---|---|---|
| Circular Saw | A circular saw features a rotating blade that cuts through wood, making straight and angled cuts. | Cutting wood to length and making precise straight cuts. | Cutting plywood, lumber, and other sheet goods, ripping boards, making crosscuts, and cutting dadoes. |
| Table Saw | A table saw is a stationary power tool with a rotating blade that cuts wood, allowing for precise cuts and adjustments. | Cutting wood to length and making precise straight cuts. | Ripping boards, making crosscuts, cutting tenons and dados, and performing joinery. |
| Miter Saw | A miter saw features a rotating blade that cuts wood at precise angles, making it ideal for cutting molding, trim, and picture frames. | Cutting wood at precise angles. | Cutting molding, trim, picture frames, and other components requiring angled cuts. |
| Band Saw | A band saw features a continuous band of blade that cuts wood, enabling intricate curves and shapes. | Cutting intricate curves and shapes in wood. | Cutting curves, resawing boards, and creating unique shapes. |
| Jig Saw | A jig saw features a reciprocating blade that cuts wood, allowing for intricate cuts and curves. | Cutting intricate curves and shapes in wood. | Cutting out shapes, making interior cuts, and creating decorative elements. |
| Router | A router features a rotating bit that cuts wood, allowing for precise shaping and edging. | Shaping, trimming, and edging wood. | Creating decorative edges, routing grooves, and making rabbets. |
| Planer | A planer features a rotating blade that smooths and flattens wood, removing uneven surfaces. | Smoothing and flattening wood surfaces. | Planing rough lumber, creating a consistent thickness, and preparing wood for finishing. |
| Jointer | A jointer features a rotating blade that flattens and straightens the edge of wood, creating a smooth and even surface. | Flattening and straightening the edge of wood. | Preparing wood for joinery, creating smooth edges, and removing irregularities. |
| Drill Press | A drill press features a rotating drill bit that drills holes in wood, providing accuracy and control. | Drilling holes in wood. | Creating precise holes for dowels, screws, and other fasteners. |
| Belt Sander | A belt sander features a continuous belt of abrasive material that sands wood, removing irregularities and creating a smooth finish. | Sanding wood surfaces to remove irregularities and create a smooth finish. | Sanding rough wood, removing imperfections, and preparing wood for finishing. |
| Random Orbital Sander | A random orbital sander features a rotating sanding disc that sands wood, creating a smooth finish without leaving swirl marks. | Sanding wood surfaces to create a smooth finish. | Sanding between coats of finish, removing scratches, and preparing wood for painting. |
Using Power Tools Safely and Effectively
Power tools can be dangerous if not used correctly. It is crucial to prioritize safety and follow proper operating procedures to prevent accidents. Here are some essential safety tips:
Always wear safety glasses or goggles to protect your eyes from flying debris.
Use hearing protection to prevent noise-induced hearing loss.
Ensure that the power tool is properly plugged in and grounded.
Always disconnect the power tool from the power source before making any adjustments or cleaning it.
Keep your fingers away from the cutting edge of the blade or bit.
Use a push stick to guide wood through the saw or router.
Use a clamp to secure the workpiece to the table or workbench.
Avoid using power tools in wet or damp conditions.
Always follow the manufacturer’s instructions for operating and maintaining the power tool.
Woodworking Machinery for Large-Scale Projects
Stepping up from hand tools and power tools, woodworking machinery takes large-scale projects to a whole new level. These machines are designed for speed, precision, and efficiency, enabling you to tackle complex projects that would be impossible or extremely time-consuming with smaller tools.
Types of Woodworking Machinery
Woodworking machinery can be categorized based on its specific functions and capabilities. Each type of machinery is tailored to a specific task, contributing to the overall efficiency and quality of large-scale woodworking projects.
- Planers: Planers are used to flatten and smooth wood surfaces, creating a uniform thickness and consistent finish. They are essential for preparing lumber for projects requiring flat, even surfaces.
- Thickness Planers: Similar to planers, thickness planers are specifically designed to bring wood to a precise thickness. They are crucial for ensuring consistent dimensions in projects where accuracy is critical.
- Jointers: Jointers are used to create perfectly straight edges on wood boards, ensuring that pieces fit together seamlessly. This is particularly important for projects involving joinery and precise alignment.
- Table Saws: Table saws are versatile machines used for cutting wood to precise dimensions. They are equipped with a rotating blade that can cut straight lines, angles, and intricate shapes, depending on the type of blade and the setup.
- Band Saws: Band saws utilize a continuous blade that runs around two wheels, providing the flexibility to cut intricate curves and shapes in wood. They are commonly used for cutting out patterns, creating decorative elements, and shaping wood.
- Radial Arm Saws: Radial arm saws are powerful machines with a rotating blade that can be moved along a radial arm. They are used for making crosscuts, rip cuts, and bevel cuts, offering versatility and accuracy in woodworking.
- Shapers: Shapers use a rotating cutter to create decorative profiles and shapes in wood. They are essential for creating molding, trim, and other decorative elements.
- Moulders: Moulders are similar to shapers, but they are designed for creating consistent profiles and shapes on larger pieces of wood. They are often used for producing furniture components, moldings, and other decorative elements.
- Lathes: Lathes are used for turning wood into round shapes. They hold the wood securely and allow the user to rotate it while using various tools to shape it. Lathes are commonly used for creating bowls, vases, and other round objects.
- Sanders: Sanders are used for smoothing and finishing wood surfaces. There are various types of sanders, each with specific capabilities and applications. Belt sanders are suitable for large areas, while orbital sanders are used for smaller areas and contours.
Safety Protocols and Maintenance Requirements
Woodworking machinery can be dangerous if not used properly. Safety protocols are essential to prevent accidents and ensure safe operation. Regular maintenance is crucial for keeping machines in optimal working condition and extending their lifespan.
- Always wear appropriate safety gear: This includes safety glasses, ear protection, dust masks, and gloves.
- Inspect the machine before each use: Ensure all guards, safety devices, and blades are in place and functioning properly.
- Clear the work area of obstructions: Ensure there is ample space around the machine for safe operation.
- Use proper feeding techniques: Feed wood into the machine slowly and steadily, avoiding sudden movements or pushing too hard.
- Never reach across the machine: Always stop the machine before reaching across the blade or cutter.
- Clean and lubricate the machine regularly: This helps prevent wear and tear and ensures smooth operation.
- Replace worn parts promptly: Worn parts can lead to malfunctions and accidents.
Woodworking Equipment for Specific Techniques
Woodworking is a diverse craft, and mastering specific techniques requires specialized equipment. This section delves into essential tools and machinery for common woodworking techniques, enabling you to create intricate joinery, smooth curves on a lathe, or bring your designs to life through carving.
Joinery
Joinery refers to the techniques used to connect pieces of wood together. These techniques are essential for building sturdy and durable furniture, structures, and other woodworking projects. Different types of joinery require specialized tools and techniques.
- Hand-Cut Joints: For traditional joinery, hand tools like chisels, saws, and planes are essential. These tools require skill and precision but offer a unique aesthetic and connection to traditional woodworking practices.
- Router: A router is a powerful tool for creating precise cuts and shaping wood. It is widely used for creating various joinery techniques, such as rabbets, dadoes, and grooves, which are essential for creating strong and durable joints.
- Dovetail Jig: A dovetail jig is a specialized tool that helps create strong and aesthetically pleasing dovetail joints. These joints are often used for drawer boxes and other furniture components.
- Mortise Machine: A mortise machine is a specialized tool that creates precise mortises for traditional mortise-and-tenon joints. This machine offers efficiency and accuracy, particularly for large-scale projects.
Turning, Woodworking equipment
Woodturning is the art of shaping wood on a lathe, creating cylindrical and symmetrical forms. This technique is used to create bowls, vases, spindles, and other decorative or functional objects.
- Lathe: A lathe is the fundamental tool for woodturning. It spins a workpiece against a cutting tool, allowing for precise shaping and contouring.
- Turning Chisels: Turning chisels are specialized tools designed for shaping wood on a lathe. They come in various shapes and sizes, each suited for specific tasks, such as roughing, smoothing, or creating details.
- Turning Gouges: Turning gouges are U-shaped chisels used for creating curves and hollows on a lathe. They are essential for shaping bowls, vases, and other curved forms.
- Turning Tools: Other essential tools for woodturning include calipers for measuring, sanding tools for finishing, and a variety of accessories for specific turning tasks.
Carving
Woodcarving is a traditional art form that involves shaping wood with hand tools. This technique allows for intricate details and three-dimensional designs, creating decorative pieces, sculptures, and functional objects.
- Carving Knives: Carving knives are essential tools for shaping and detailing wood. They come in various shapes and sizes, each suited for specific carving techniques and styles.
- Chisels: Chisels are used for removing larger amounts of wood and shaping intricate details. They are available in various sizes and profiles, depending on the carving task.
- Gouges: Gouges are U-shaped chisels used for creating curves and hollows in wood. They are essential for carving bowls, vases, and other curved forms.
- Mallet: A mallet is used to strike chisels and gouges, providing the force needed to shape the wood.
- Carving Tools: Other essential carving tools include carving saws, rasps, files, and sanding tools for finishing.
Specialized Woodworking Equipment Comparison
| Equipment | Features | Cost |
|—|—|—|
| Hand-Cut Joinery Tools | Traditional, versatile, requires skill and precision | Low |
| Router | Powerful, precise cuts, versatile for various joinery techniques | Moderate |
| Dovetail Jig | Specialized for creating dovetail joints, increases accuracy | Moderate |
| Mortise Machine | Creates precise mortises for mortise-and-tenon joints, efficient for large-scale projects | High |
| Lathe | Fundamental for woodturning, spins workpiece for shaping | High |
| Turning Chisels | Specialized for shaping wood on a lathe, various shapes and sizes | Moderate |
| Turning Gouges | Used for creating curves and hollows on a lathe, essential for shaping bowls and vases | Moderate |
| Carving Knives | Essential for shaping and detailing wood, various shapes and sizes | Low |
| Chisels | Used for removing larger amounts of wood and shaping intricate details, various sizes and profiles | Moderate |
| Gouges | Used for creating curves and hollows in wood, essential for carving bowls and vases | Moderate |
| Mallet | Used to strike chisels and gouges, provides force for shaping wood | Low |
Woodworking Equipment for Finishing and Refinishing
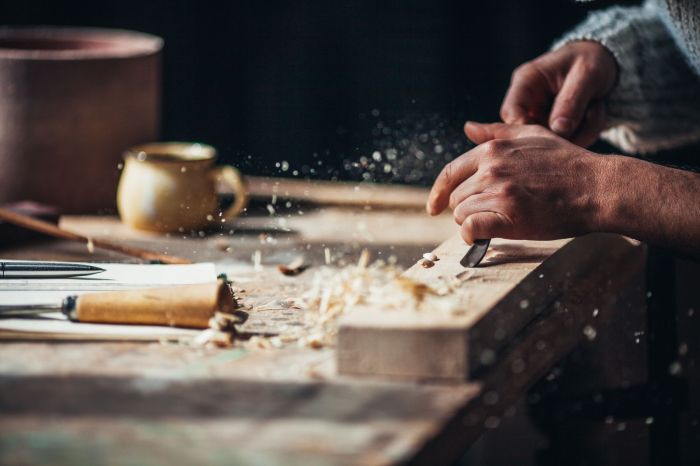
The final step in any woodworking project is finishing and refinishing. This process protects the wood from damage, enhances its appearance, and adds a unique character to the piece. A wide range of finishes are available, each with its own properties and applications, allowing woodworkers to achieve desired results.
Types of Wood Finishes
Wood finishes are categorized based on their properties and applications. Understanding the different types of finishes is crucial for selecting the right one for a specific project.
- Oil-Based Finishes: Oil-based finishes, such as tung oil, linseed oil, and Danish oil, penetrate the wood’s pores, providing a durable and water-resistant finish. They are known for their natural appearance and enhance the wood’s grain pattern. Oil-based finishes are easy to apply and require minimal preparation, making them suitable for beginners.
- Varnish: Varnish is a resin-based finish that forms a protective layer over the wood. It provides a hard, durable, and water-resistant finish, making it ideal for furniture, floors, and outdoor projects. Varnish comes in various gloss levels, from high gloss to matte, allowing for customization.
- Lacquer: Lacquer is a fast-drying finish that forms a hard, durable, and moisture-resistant coating. It is available in both spray and brush-on forms and is often used for furniture and musical instruments. Lacquer offers excellent clarity and a smooth finish.
- Polyurethane: Polyurethane is a synthetic finish that provides exceptional durability and resistance to scratches, water, and UV rays. It is available in both oil-based and water-based formulas and is widely used for furniture, floors, and other high-traffic areas. Polyurethane offers a wide range of gloss levels and can be applied in multiple coats for added protection.
- Shellac: Shellac is a natural finish derived from the secretions of the lac insect. It provides a durable and moisture-resistant finish with a warm, amber hue. Shellac is known for its ability to seal pores and prevent staining. It is commonly used for furniture, antiques, and musical instruments.
- Wax: Wax is a natural finish that provides a protective and water-resistant layer on wood. It is available in various forms, including paste wax, liquid wax, and spray wax. Wax is easy to apply and provides a soft, natural sheen. It is commonly used for furniture, floors, and other wood surfaces.
Applying Wood Finishes
Applying wood finishes is a crucial step in achieving a beautiful and durable finish. The process involves several steps, ensuring a smooth and even application.
- Prepare the Surface: Before applying any finish, it is essential to prepare the wood surface properly. This involves sanding the wood to remove imperfections and create a smooth surface. The sanding process should be done with progressively finer grit sandpaper, starting with a coarser grit and finishing with a finer grit.
- Clean the Surface: After sanding, it is crucial to clean the wood surface thoroughly to remove any dust or debris. This can be done using a tack cloth or a damp cloth.
- Apply the Finish: The method of applying the finish depends on the type of finish used. Oil-based finishes are typically applied with a brush or cloth, while varnish, lacquer, and polyurethane can be applied with a brush, spray gun, or roller.
- Allow the Finish to Dry: After applying the finish, it is essential to allow it to dry completely before applying another coat. Drying times vary depending on the type of finish and environmental conditions.
- Sand Between Coats: For most finishes, sanding between coats is recommended to create a smooth and even finish. This involves lightly sanding the surface with fine-grit sandpaper to remove any imperfections or dust particles.
- Apply Additional Coats: Multiple coats of finish are often applied to achieve a desired level of protection and durability. The number of coats required depends on the type of finish and the desired level of protection.
- Final Finishing: After applying the final coat of finish, it is essential to allow it to dry completely. Once dry, the finish can be polished or buffed to achieve a desired sheen.
Choosing the Right Finish
Selecting the right finish for a woodworking project is crucial for achieving the desired results. Consider the following factors when choosing a finish:
- Type of Wood: Different wood species have different properties, which affect how they react to finishes. Some woods are more porous than others, requiring a finish that can penetrate the pores effectively.
- Intended Use: The intended use of the finished product will determine the type of finish required. For example, a piece of furniture that will be used indoors may not require the same level of protection as a piece that will be used outdoors.
- Desired Appearance: Wood finishes can create a wide range of appearances, from a natural matte finish to a high-gloss shine.
- Durability: The durability of a finish is essential, especially for high-traffic areas or pieces that will be subjected to wear and tear.
- Ease of Application: Some finishes are easier to apply than others. Consider your skill level and experience when choosing a finish.
Maintaining and Caring for Woodworking Equipment
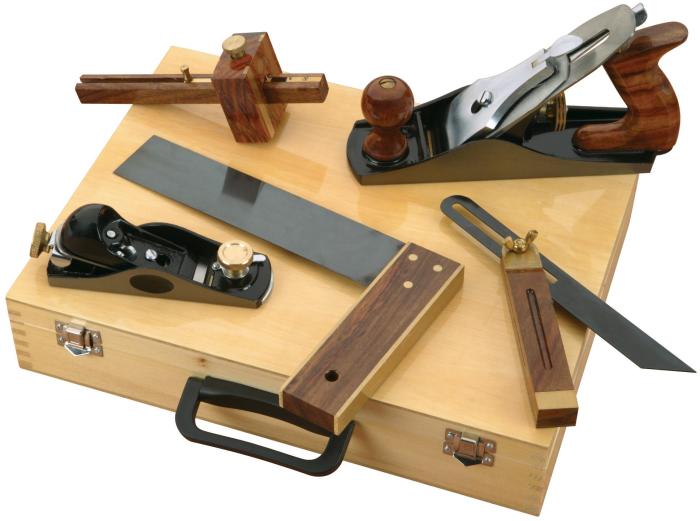
Keeping your woodworking equipment in top shape is crucial for both safety and productivity. By investing time in regular maintenance, you can ensure your tools function optimally, produce high-quality work, and last longer.
Importance of Regular Maintenance
Regular maintenance is essential for woodworking equipment. It helps to prevent unexpected breakdowns, ensure accuracy and precision, and extend the lifespan of your tools. Neglecting maintenance can lead to costly repairs, safety hazards, and inconsistent results.
Routine Maintenance Checklist
- Cleaning: Remove sawdust and debris from all tools and machinery after each use. Use compressed air, brushes, or vacuum cleaners to access hard-to-reach areas.
- Lubrication: Apply appropriate lubricants to moving parts, such as bearings, slides, and gears, according to the manufacturer’s instructions. This reduces friction, wear, and tear.
- Sharpening: Sharpen blades, bits, and cutters regularly to maintain cutting efficiency and prevent damage to your workpieces.
- Inspection: Visually inspect tools for signs of wear, damage, or loose parts. Replace or repair any damaged components immediately.
- Testing: Test the functionality of all tools and machinery to ensure they operate correctly.
- Storage: Store tools in a clean, dry, and organized manner. Avoid storing tools in damp or corrosive environments.
Proper Storage and Handling
Proper storage and handling of woodworking equipment are essential for maintaining their condition and preventing damage.
- Storage: Store tools in a designated area, away from moisture and dust. Use tool organizers, racks, or cabinets to keep them organized and easily accessible.
- Handling: Handle tools with care, avoiding dropping or mishandling them. Use appropriate lifting techniques for heavier tools and machinery.
- Safety: Always wear safety glasses and other protective gear when using woodworking equipment.
Closing Notes: Woodworking Equipment
With the right tools and knowledge, woodworking can be a rewarding and fulfilling hobby or profession. Whether you’re building a simple birdhouse or a complex piece of furniture, the journey is just as important as the destination. So, equip yourself with the right tools, learn the techniques, and let your creativity flow. Happy woodworking!
Question & Answer Hub
What are the most essential woodworking tools for beginners?
Essential tools for beginners include a measuring tape, pencil, hand saw, hammer, screwdriver, chisel, and clamps. These tools will allow you to perform basic tasks like measuring, cutting, and assembling wood.
What safety precautions should I take when using woodworking equipment?
Always wear safety glasses, ear protection, and a dust mask. Use tools with caution, follow manufacturer instructions, and never operate machinery while tired or under the influence of drugs or alcohol.
Where can I find woodworking equipment?
Woodworking equipment can be purchased from online retailers, hardware stores, and specialty woodworking shops. You can also find used equipment at garage sales, flea markets, and online marketplaces.
How do I choose the right woodworking equipment for my needs?
Consider the types of projects you plan to create, your budget, and your level of experience. Research different brands and models to find the best fit for your needs.
What are some good resources for learning more about woodworking?
There are many online resources, books, and woodworking classes available. You can also find helpful information from woodworking communities and forums.
Woodworking equipment can be a bit overwhelming for beginners, but don’t worry, there are tons of resources available to help you get started. Check out this website on woodworking for some great tips and tricks. Once you’ve got a handle on the basics, you can start investing in some quality equipment, like a good saw, drill, and sander.
With the right tools and a little practice, you’ll be building beautiful projects in no time.
