Small woodworking project plans offer a fantastic way to explore your creativity and learn valuable skills. Whether you’re a beginner or a seasoned woodworker, these projects provide a rewarding experience, allowing you to build something beautiful and functional with your own hands. From simple birdhouses to intricate shelves, small woodworking projects are perfect for honing your techniques and gaining confidence.
This guide will delve into the world of small woodworking projects, exploring everything from finding the right plans to mastering the essential tools and techniques. We’ll provide tips for choosing projects that match your skill level and time commitment, ensuring you have a successful and enjoyable woodworking journey.
Introduction to Small Woodworking Projects

Small woodworking projects offer a fantastic way to dive into the world of woodworking, learn new skills, and create beautiful and functional pieces for your home or as gifts. They’re perfect for beginners because they’re manageable in size and complexity, allowing you to build confidence and master basic techniques before tackling larger projects.
Types of Small Woodworking Projects
Small woodworking projects are typically defined by their size and complexity. They are generally designed to be completed within a reasonable timeframe, using a limited number of tools and materials. These projects are often focused on specific functionalities or decorative elements, making them ideal for showcasing your skills and creativity.
- Simple Shelf Units: These are incredibly versatile and can be used in various spaces, from kitchens and bathrooms to living rooms and bedrooms. They are relatively easy to build, requiring basic woodworking skills and tools.
- Cutting Boards: These are essential kitchen tools that can be customized with different shapes, sizes, and wood types. They are a great way to practice basic cutting and finishing techniques.
- Picture Frames: These are a classic small woodworking project that allows you to showcase your favorite photos or artwork. They are relatively simple to build and offer endless possibilities for customization with different wood species, sizes, and embellishments.
- Wooden Boxes: These are practical and decorative storage solutions that can be used for jewelry, tools, or other small items. They are a great way to learn about joinery techniques and wood finishing.
- Birdhouses: These are charming additions to any backyard and provide a safe haven for feathered friends. They are a fun and rewarding project for beginners, as they involve basic construction techniques and decorative elements.
Popular Small Woodworking Projects
Here are some examples of popular small woodworking projects that are both fun and functional:
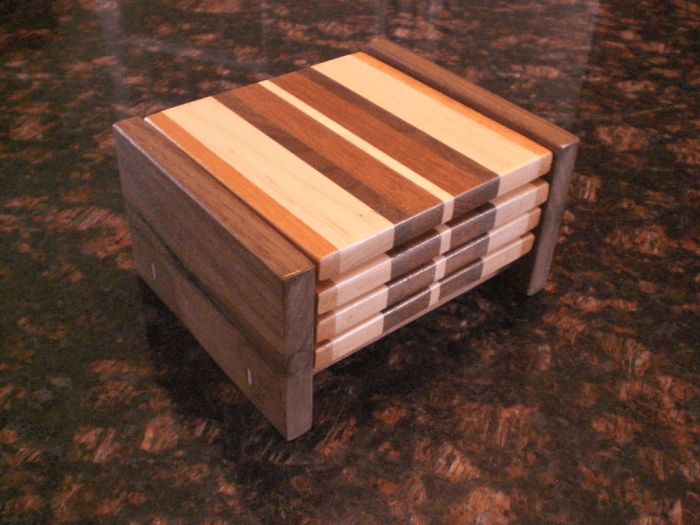
- Wooden Coasters: These are a great way to protect your furniture from condensation rings and add a touch of personalization to your home decor. They are simple to build and can be customized with different wood types, shapes, and finishes.
- Small Storage Boxes: These can be used to organize small items like jewelry, tools, or craft supplies. They are a great way to practice basic joinery techniques and learn about different wood finishing options.
- Wooden Toys: These are a great way to tap into your creativity and create fun and engaging toys for children. They can be as simple as a wooden puzzle or as elaborate as a dollhouse.
- Wooden Signs: These are a great way to add a personal touch to your home or to create unique gifts for friends and family. They can be customized with different wood types, shapes, sizes, and lettering styles.
Finding Small Woodworking Project Plans
Finding the right woodworking plans is crucial for a successful project. Whether you’re a seasoned woodworker or just starting out, having a clear plan to follow will make your project more enjoyable and less stressful. There are many resources available for finding woodworking plans, both free and paid, each with its own benefits and drawbacks.
Free Woodworking Plans
Free woodworking plans offer an accessible and budget-friendly option for beginners and experienced woodworkers alike. They provide a great way to explore different woodworking styles and techniques without a significant financial commitment. Many websites and online communities offer a vast collection of free woodworking plans, covering a wide range of projects.
- Online Woodworking Communities: Many online forums and communities dedicated to woodworking offer a treasure trove of free plans shared by fellow woodworkers. These communities provide a platform for sharing knowledge, tips, and project plans, fostering a collaborative environment. Examples include Lumberjocks, WoodworkingTalk, and Ana White.
- Woodworking Blogs and Websites: Numerous woodworking blogs and websites feature free project plans as part of their content. These platforms often showcase projects ranging from simple beginner-friendly projects to more complex and challenging builds. Popular woodworking blogs include The Wood Whisperer, Shanty2Chic, and Instructables.
- Free Plan Databases: Several websites are specifically dedicated to hosting free woodworking plans. These databases typically categorize plans by project type, skill level, and material requirements, making it easier to find the perfect plan for your needs. Popular free plan databases include Free Woodworking Plans, Woodworking for Mere Mortals, and Woodworking.org.
Paid Woodworking Plans, Small woodworking project plans
While free woodworking plans offer a convenient option, paid plans often provide more comprehensive and detailed instructions, ensuring a smoother and more successful project. Paid plans typically include detailed cut lists, step-by-step instructions with high-quality images or illustrations, and sometimes even videos to guide you through each stage.
- Subscription-Based Services: Subscription-based woodworking plan services provide access to a vast library of plans for a monthly or annual fee. These services often offer a wide range of project types, skill levels, and design styles, catering to diverse woodworking interests. Examples include Rockler Woodworking and Woodcraft.
- Individual Plan Purchases: Many woodworking plan designers offer individual plans for purchase. These plans typically focus on specific projects and provide detailed instructions, ensuring a high level of accuracy and detail. These plans can be found on websites like Etsy, Amazon, and specialized woodworking plan websites.
- Woodworking Books and Magazines: Woodworking books and magazines often feature project plans as part of their content. These resources provide a tangible and comprehensive approach to woodworking, offering detailed instructions, illustrations, and tips. Popular woodworking magazines include Woodworking Magazine, Fine Woodworking, and Popular Woodworking.
Choosing the Right Woodworking Plan
Selecting the right woodworking plan is essential for a rewarding and successful project. Consider the following factors when choosing a plan:
- Skill Level: Choose a plan that aligns with your woodworking skills and experience. Beginners should start with simple projects, gradually increasing complexity as they gain experience. Advanced woodworkers can explore more challenging projects that push their skills.
- Time Commitment: Factor in the time required to complete the project, ensuring it fits your schedule and available time. Choose projects that align with your time constraints, avoiding projects that require extensive time or effort.
- Materials and Tools: Consider the materials and tools required for the project. Ensure you have access to the necessary materials and tools or are willing to invest in them. Avoid projects that require specialized or expensive tools that you may not have.
- Design Style: Select a plan that aligns with your personal design preferences and style. Consider the overall aesthetic of the project and whether it complements your existing furniture or decor.
- Project Complexity: Choose a plan that aligns with your desired level of complexity. Beginners may prefer simpler projects, while experienced woodworkers can tackle more intricate designs. Consider the number of steps, joinery techniques, and overall project scope.
Essential Tools and Materials for Small Woodworking Projects

Before you start your woodworking journey, it’s essential to gather the right tools and materials. Having the necessary tools will make your projects easier, safer, and more enjoyable. Selecting the right wood will ensure your project is durable and aesthetically pleasing.
Essential Tools
Here’s a list of essential tools for most small woodworking projects:
- Hand saw: Used for cutting wood to size. Choose a crosscut saw for cutting across the grain and a ripsaw for cutting along the grain.
- Measuring tape: Essential for accurately measuring wood before cutting.
- Pencil: Used for marking wood before cutting.
- Chisel: Used for shaping and carving wood.
- Hammer: Used for driving nails and other fasteners.
- Screwdriver: Used for driving screws.
- Clamps: Used for holding pieces of wood together while gluing or assembling.
- Sandpaper: Used for smoothing wood surfaces.
- Safety glasses: Essential for protecting your eyes from wood chips and debris.
Choosing the Right Wood
The type of wood you choose will depend on your project and your budget. Here are some popular wood choices for small projects:
- Pine: A softwood that is easy to work with and affordable. It is often used for furniture, crafts, and construction projects.
- Oak: A hardwood that is strong and durable. It is often used for furniture, flooring, and cabinetry.
- Maple: A hardwood that is known for its beautiful grain pattern. It is often used for furniture, cutting boards, and musical instruments.
- Cherry: A hardwood that has a rich reddish-brown color. It is often used for furniture, cabinets, and decorative projects.
- Walnut: A hardwood that has a distinctive dark brown color and a beautiful grain pattern. It is often used for furniture, cabinets, and decorative projects.
Tips for Choosing Materials
Here are some tips for choosing the right materials for your project:
- Consider the project’s purpose: What will the project be used for? Will it be exposed to the elements? What kind of wear and tear will it experience?
- Think about the desired look: What kind of grain pattern or color are you looking for? Will you be staining or painting the wood?
- Consider your budget: Some woods are more expensive than others. Decide how much you are willing to spend on materials.
- Ask for advice: Talk to a knowledgeable woodworking professional for advice on choosing the right wood for your project.
Step-by-Step Guide to Building a Small Woodworking Project
This section will walk you through the process of building a simple small woodworking project. We’ll use a basic birdhouse as our example, but the steps can be applied to many other small projects. Each step will be explained in detail, and troubleshooting tips will be provided to help you overcome common challenges.
Materials and Tools
You’ll need a few basic materials and tools to build a birdhouse. Here’s a list of what you’ll need:
- Wood: You can use various types of wood for your birdhouse, but cedar, pine, or redwood are good choices as they are naturally resistant to rot and insects. You’ll need pieces of wood for the base, sides, roof, and a small piece for the entrance hole.
- Wood glue: Wood glue is essential for joining the pieces of wood together.
- Screws: Use screws that are long enough to securely attach the pieces of wood without going through the other side.
- Saw: A handsaw or a jigsaw is necessary to cut the wood to size.
- Drill: A drill with a bit that is slightly smaller than the screws you are using is needed to pre-drill holes in the wood. This helps to prevent the wood from splitting when you screw it together.
- Measuring tape: A measuring tape is essential for accurately cutting the wood to the right dimensions.
- Pencil: Use a pencil to mark the wood where you need to make cuts or drill holes.
- Sandpaper: Sandpaper is used to smooth out the rough edges of the wood and give your birdhouse a finished look.
- Paint or stain: You can paint or stain your birdhouse to protect it from the elements and give it a personal touch.
Cutting the Wood
- Begin by carefully measuring and cutting the pieces of wood for the base, sides, roof, and entrance hole. Use a saw to make your cuts, ensuring they are accurate and square.
- For the base, you’ll need a piece of wood that is slightly larger than the bottom of the birdhouse. The sides should be cut to the height of the birdhouse. The roof should be cut to a shape that will overhang the sides.
- For the entrance hole, you’ll need to cut a small circle or square in one of the sides. The size of the hole will depend on the type of bird you want to attract. A 1-1/2 inch hole is a good starting point.
Assembling the Birdhouse
- After cutting the pieces of wood, you can begin to assemble the birdhouse. Start by gluing the sides to the base. Use wood glue to secure the sides to the base. Apply glue to the edges of the sides and the base and clamp them together until the glue dries.
- Once the sides are glued to the base, you can attach the roof. Use wood glue to attach the roof to the sides, ensuring that it overhangs the sides slightly. You can also use screws to secure the roof to the sides.
- After the glue has dried, you can use sandpaper to smooth out any rough edges.
Finishing Touches
- Once the birdhouse is assembled, you can add the finishing touches. This includes painting or staining the birdhouse.
- You can also add a perch for the birds to land on. To make a perch, you can simply drill a small hole near the entrance hole and insert a small branch or dowel rod.
Troubleshooting
- If the wood splits when you are drilling or screwing it together, you can try pre-drilling the holes. This will help to prevent the wood from splitting.
- If the glue doesn’t hold the pieces of wood together securely, you can try using a stronger glue or adding screws to reinforce the joints.
- If the birdhouse doesn’t look quite right, you can always take it apart and start over. Woodworking is a process of trial and error, so don’t be afraid to experiment.
Finishing Touches for Small Woodworking Projects: Small Woodworking Project Plans

The final step in any woodworking project is applying a finish. This not only enhances the look of your project but also protects the wood from damage and wear. There are numerous types of finishes available, each with its own unique properties and application techniques.
Types of Wood Finishes
Choosing the right finish depends on the type of wood, the desired look, and the project’s intended use.
- Oil-based finishes, such as tung oil, linseed oil, and Danish oil, penetrate the wood, enhancing its natural grain and providing a durable, water-resistant finish. They are easy to apply and can be refreshed over time.
- Varnish creates a hard, protective layer that resists scratches and moisture. It comes in various gloss levels, from matte to high gloss. Varnish is a good choice for furniture and other items that will receive heavy use.
- Polyurethane is a durable, water-resistant finish that offers excellent protection against scratches, dents, and UV damage. It is often used on floors and furniture.
- Lacquer is a fast-drying finish that creates a hard, durable, and glossy surface. It is often used on furniture and musical instruments.
- Shellac is a natural finish made from the resin of the lac bug. It is easy to apply and creates a warm, amber-colored finish. Shellac is often used on furniture and antiques.
- Waxes, such as beeswax and carnauba wax, provide a protective layer that enhances the wood’s natural beauty. They are easy to apply and can be refreshed as needed.
- Stains are used to change the color of wood. They come in a variety of colors and can be used to create a natural or more dramatic look.
Achieving a Professional-Looking Finish
Applying a finish can seem daunting, but with the right techniques and a little practice, you can achieve a professional-looking finish.
- Sanding is crucial for a smooth, even finish. Start with coarse sandpaper and gradually work your way to finer grits.
- Cleanliness is essential. Dust and debris can cause imperfections in the finish. Wipe down the surface with a tack cloth before applying the finish.
- Thin coats are better than thick coats. Apply thin, even coats, allowing each coat to dry completely before applying the next.
- Proper application is key. Use a brush, roller, or spray gun, depending on the finish and the project. Practice on a scrap piece of wood before applying the finish to your project.
Creative Finishing Techniques
- Distressed finishes create a vintage look by adding scratches, dents, and other signs of wear and tear.
- Two-tone finishes combine two different colors or finishes to create a unique and eye-catching look.
- Glazing adds depth and dimension to the finish by applying a thin layer of translucent color.
- Crackle finishes create a textured, antique look by applying a layer of crackle medium over a base coat of paint.
- Metallic finishes add a touch of glamour to small woodworking projects.
Inspiring Ideas for Small Woodworking Projects
With the basics covered, you’re ready to dive into some inspiring small woodworking projects. There’s a world of possibilities, from functional pieces for your home to decorative accents that showcase your craftsmanship. The key is to find projects that spark your interest and match your skill level. We’ve compiled a selection of project ideas categorized by function or style to help you get started.
Functional Woodworking Projects
These projects offer practical solutions for everyday life, combining functionality with aesthetic appeal. They are perfect for beginners looking to build confidence and experience the satisfaction of creating something useful.
- Cutting Board: A classic woodworking project that is both functional and beautiful. You can experiment with different wood species and designs to create a unique piece for your kitchen. Estimated time: 2-4 hours, Skill level: Beginner.
- Coasters: Simple yet elegant, coasters are a great way to protect your furniture and add a personal touch to your home décor. They are also a fantastic project for practicing your woodworking skills. Estimated time: 1-2 hours per set, Skill level: Beginner.
- Small Shelf: A simple shelf can add extra storage space to any room. You can choose from various designs and materials to create a shelf that complements your existing furniture. Estimated time: 2-4 hours, Skill level: Beginner.
- Birdhouse: A charming and practical project that provides a home for our feathered friends. You can choose from various designs and sizes to attract different bird species. Estimated time: 2-4 hours, Skill level: Beginner.
- Wooden Utensil Holder: A simple yet functional project that keeps your kitchen organized. You can choose from various designs and wood species to create a unique piece for your kitchen. Estimated time: 1-2 hours, Skill level: Beginner.
Decorative Woodworking Projects
These projects focus on creating beautiful and eye-catching pieces that add a touch of personality to your home or as unique gifts. They allow you to explore different woodworking techniques and experiment with various finishes.
- Wooden Wall Clock: A classic and timeless piece that can be customized with different wood species and designs. You can even incorporate your favorite quote or design into the clock face. Estimated time: 4-6 hours, Skill level: Intermediate.
- Wooden Picture Frame: A simple yet elegant project that allows you to showcase your favorite photos or artwork. You can experiment with different wood species, sizes, and designs to create a unique frame. Estimated time: 1-2 hours, Skill level: Beginner.
- Wooden Jewelry Box: A thoughtful and practical gift for someone special. You can customize the box with different wood species, finishes, and designs to create a unique piece. Estimated time: 4-6 hours, Skill level: Intermediate.
- Wooden Ornaments: A fun and festive project that allows you to create unique ornaments for your Christmas tree or for gifts. You can experiment with different shapes, sizes, and designs to create a unique set of ornaments. Estimated time: 1-2 hours per ornament, Skill level: Beginner.
- Wooden Signs: A versatile project that can be used to create personalized signs for your home, garden, or business. You can experiment with different wood species, fonts, and designs to create a unique sign. Estimated time: 2-4 hours, Skill level: Intermediate.
Unique Woodworking Projects
These projects offer a chance to push your creative boundaries and explore unique designs and techniques. They are perfect for woodworkers who are looking for a challenge and want to create something truly special.
Small woodworking project plans are a great way to get started with woodworking. They’re usually simpler and less time-consuming than larger projects, making them perfect for beginners. If you’re looking for some inspiration, check out these beginning woodworking projects for ideas.
Once you’ve got a few small projects under your belt, you’ll be ready to tackle more complex woodworking plans.
- Wooden Puzzle: A fun and challenging project that allows you to create a unique puzzle for yourself or as a gift. You can choose from various shapes, sizes, and designs to create a puzzle that is both beautiful and challenging. Estimated time: 4-6 hours, Skill level: Intermediate.
- Wooden Mobile: A beautiful and whimsical project that adds a touch of whimsy to any room. You can experiment with different shapes, sizes, and designs to create a mobile that is truly unique. Estimated time: 4-6 hours, Skill level: Intermediate.
- Wooden Game: A fun and engaging project that allows you to create a unique game for yourself or as a gift. You can choose from various games, such as checkers, tic-tac-toe, or even your own custom game. Estimated time: 4-6 hours, Skill level: Intermediate.
- Wooden Pen: A practical and elegant project that allows you to create a unique pen for yourself or as a gift. You can experiment with different wood species, finishes, and designs to create a pen that is truly special. Estimated time: 4-6 hours, Skill level: Intermediate.
- Wooden Lamp: A unique and eye-catching project that adds a touch of warmth and style to any room. You can experiment with different wood species, shapes, and designs to create a lamp that is truly unique. Estimated time: 8-10 hours, Skill level: Advanced.
Final Thoughts
With a little planning, the right tools, and a dash of creativity, you can turn your woodworking dreams into reality. Start with a small project, and you’ll be amazed at what you can achieve. Remember, the joy of woodworking lies not just in the finished product but in the process itself. So, grab your tools, select a plan, and embark on a rewarding journey of crafting something special.
FAQ
What are some good beginner woodworking projects?
Simple projects like cutting boards, picture frames, or small boxes are great for beginners. These projects help you practice basic woodworking techniques without being overly complex.
Where can I find free woodworking plans?
Many websites offer free woodworking plans, including Ana White, Woodworking for Mere Mortals, and Instructables. You can also find plans on YouTube and Pinterest.
What are the essential tools for small woodworking projects?
Essential tools include a saw, a drill, sandpaper, clamps, measuring tape, and a hammer. You can gradually expand your tool collection as you gain experience.
What type of wood is best for small woodworking projects?
Softwoods like pine and cedar are easier to work with for beginners. Hardwoods like oak and maple offer durability and a beautiful finish but are more challenging to work with.
