Woodwork projects offer a rewarding way to create beautiful and functional items. Whether you’re a complete novice or have some experience, this guide will equip you with the knowledge and skills needed to embark on your woodworking journey.
We’ll delve into the essential tools and techniques, safety precautions, and design principles that will help you bring your woodworking ideas to life. From selecting the right wood to mastering joinery techniques and applying finishing touches, this comprehensive guide will be your trusted companion.
Woodworking Project Basics: Woodwork Project
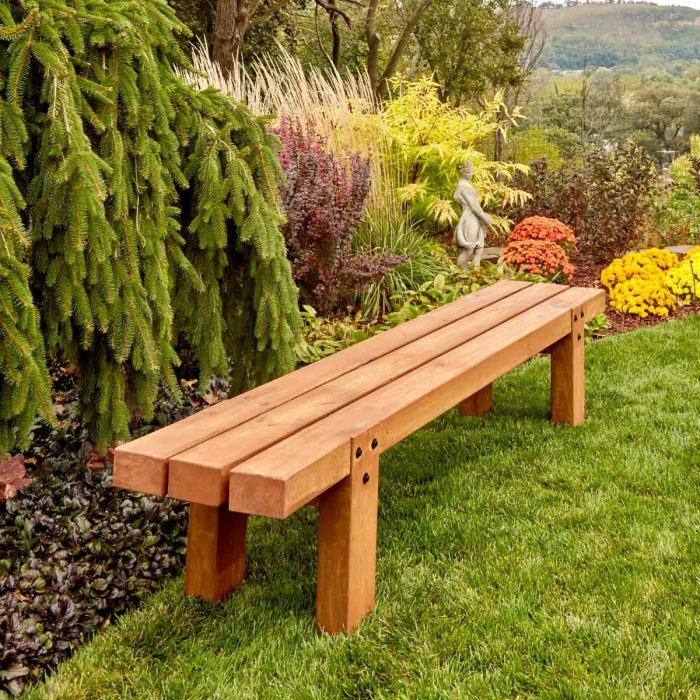
Woodworking is a rewarding hobby that allows you to create beautiful and functional items. It’s a craft that can be enjoyed by people of all ages and skill levels. However, it’s important to understand the basics before you begin any project. This section will cover essential tools, safety precautions, and wood selection.
Essential Tools and Equipment
Having the right tools is crucial for successful woodworking. Here’s a list of fundamental tools you’ll need:
- Hand Tools: Hand tools are essential for various tasks, including measuring, marking, and shaping wood. Some basic hand tools include:
- Measuring Tape: Accurately measure the length, width, and depth of wood.
- Pencil: Mark lines on wood for cutting and shaping.
- Combination Square: Create accurate 90-degree angles and measure lengths.
- Chisels: Shape and carve wood by removing material.
- Hammer: Drive nails and secure wood pieces.
- Screwdriver: Drive and remove screws.
- Clamps: Hold wood pieces securely in place during assembly or cutting.
- Sandpaper: Smooth wood surfaces and remove imperfections.
- Power Tools: Power tools can significantly speed up the woodworking process and provide more precision. Some essential power tools include:
- Circular Saw: Cut straight lines through wood, often used for cutting sheets of plywood or lumber.
- Jigsaw: Cut curved and intricate shapes in wood.
- Drill: Create holes in wood for fasteners or other purposes.
- Router: Shape and trim edges of wood with precision.
- Belt Sander: Sand large areas of wood quickly and efficiently.
- Orbital Sander: Sand smaller areas and achieve a smooth finish.
Safety Precautions
Safety should always be a top priority when working with wood. Here are some essential safety precautions:
- Wear Protective Gear: Always wear safety glasses, hearing protection, and a dust mask to protect yourself from flying debris, loud noises, and wood dust.
- Use Sharp Tools: Sharp tools are less likely to slip and cause injury. Dull tools require more force, increasing the risk of accidents.
- Keep Work Area Clean: A clean work area reduces the risk of tripping over tools or debris.
- Use Proper Lifting Techniques: Lift heavy items with your legs, not your back, to avoid injury.
- Avoid Distractions: Focus on your work and avoid distractions like phones or conversations.
- Store Tools Properly: Store tools in a designated area, away from children and pets, to prevent accidents.
Choosing the Right Wood
Wood comes in various types, each with unique properties and characteristics. Choosing the right wood for your project is crucial for success. Here’s a guide to selecting the right wood:
- Hardwoods vs. Softwoods: Hardwoods, like oak and maple, are typically denser and stronger than softwoods, like pine and cedar. Hardwoods are often used for furniture, flooring, and other durable applications. Softwoods are typically lighter and easier to work with, making them suitable for projects like crafts and construction.
- Grain Pattern: The grain pattern of wood can significantly affect its appearance and strength. Some woods have a straight grain, while others have a more intricate or swirling grain. The grain pattern can also affect the way the wood reacts to sanding and finishing.
- Durability: Some woods are naturally more resistant to rot, insects, and moisture than others. Consider the intended use of the wood and choose a type that will withstand the elements or wear and tear.
- Cost: Wood prices vary depending on the type, availability, and quality. Consider your budget and choose a wood that fits your financial constraints.
- Availability: Some woods are readily available, while others are more rare and expensive. Research the availability of the wood you want to use before starting your project.
Planning and Design
Planning and design are crucial for successful woodworking projects. They lay the foundation for a well-executed project, ensuring efficient use of materials, tools, and time.
Creating Detailed Plans and Sketches
Detailed plans and sketches are essential for visualizing the final product and understanding the construction process. They serve as a roadmap, guiding you through each step of the project.
- Dimensions and Measurements: Accurate dimensions and measurements are vital for ensuring the project fits its intended purpose and space.
- Material Selection: Sketches help you determine the quantity and type of wood needed for each component.
- Construction Techniques: Plans illustrate the joinery methods, cuts, and assembly procedures required for building the project.
- Visual Representation: Sketches provide a visual representation of the project, allowing you to identify potential design flaws or areas that need adjustments before starting construction.
Woodworking Project Ideas for Beginners
Several woodworking projects are suitable for beginners. These projects are relatively simple to build, requiring basic tools and techniques.
- Cutting Board: A cutting board is a practical and useful project that involves basic cuts and sanding.
- Birdhouse: Building a birdhouse is a fun and rewarding project that allows you to experiment with different shapes and designs.
- Simple Shelf: A simple shelf is a great way to learn about basic joinery techniques, such as dado cuts and pocket holes.
- Wooden Box: Constructing a wooden box is a straightforward project that involves basic cuts, assembly, and finishing techniques.
Cutting and Shaping Wood
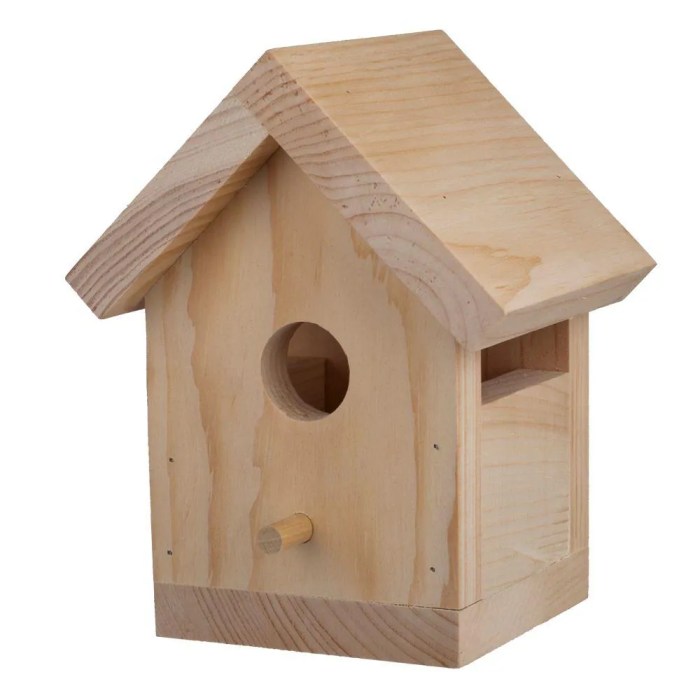
Cutting and shaping wood are fundamental skills in woodworking. You’ll need to be able to accurately cut wood to size and shape it to your desired form. There are many different methods for cutting and shaping wood, each with its own advantages and disadvantages. You’ll need to choose the right method for the job based on the type of wood you’re working with, the size and shape of the piece, and the desired level of precision.
Hand Saws
Hand saws are a versatile and essential tool for any woodworker. They come in various sizes and designs, each suited for specific tasks. Hand saws allow for precise cuts and can be used in tight spaces where power tools are not feasible.
Hand saws work by using a toothed blade to cut through wood. The teeth are angled to create a sawing action that removes wood with each stroke. The angle of the teeth, known as the “set,” determines the type of cut the saw will make.
Here are some common types of hand saws:
* Crosscut saw: A crosscut saw has teeth that are angled to cut across the grain of the wood. This is the most common type of saw used for general woodworking.
* Rip saw: A rip saw has teeth that are angled to cut with the grain of the wood. This type of saw is ideal for ripping boards into long strips.
* Backsaw: A backsaw is a fine-toothed saw with a stiffening “back” that provides stability for precise cuts. Backsaws are often used for cutting tenons and dovetails.
* Coping saw: A coping saw has a narrow blade that is held in a frame. This saw is used for intricate cuts and curves.
When using a hand saw, it is important to use a firm grip and to push the saw forward with even strokes. Keep your fingers behind the blade to avoid injury.
Power Saws
Power saws are a more efficient and faster way to cut wood. They can be used to make a variety of cuts, including straight, curved, and angled cuts. Power saws come in a wide variety of types, each designed for specific tasks.
Here are some common types of power saws:
* Circular saw: A circular saw has a circular blade that rotates at high speed. This saw is ideal for making straight cuts and can also be used to make bevel cuts.
* Jigsaw: A jigsaw has a narrow blade that moves up and down. This saw is ideal for making curved cuts and can also be used to cut intricate shapes.
* Table saw: A table saw has a circular blade that is mounted in a table. This saw is ideal for making precise straight cuts and can also be used to make dado cuts.
* Miter saw: A miter saw has a circular blade that is mounted on an arm that can be angled. This saw is ideal for making precise angled cuts and can also be used to make crosscuts.
* Band saw: A band saw has a continuous blade that runs over two wheels. This saw is ideal for making curved cuts and can also be used to cut intricate shapes.
When using a power saw, it is important to wear safety glasses and ear protection. Always use a saw guard to prevent the blade from coming into contact with your body.
Shaping Wood
Shaping wood is the process of giving wood a specific form or contour. There are many different methods for shaping wood, each with its own advantages and disadvantages. The method you choose will depend on the type of wood you are working with, the desired shape, and the level of detail you want to achieve.
Chisels
Chisels are hand tools used for shaping wood by removing material. They consist of a sharp blade with a handle. Chisels are used for a variety of tasks, including carving, mortising, and shaping.
There are many different types of chisels, each designed for a specific task. Some common types of chisels include:
* Paring chisel: A paring chisel has a thin blade that is used for delicate carving and shaping.
* Mortise chisel: A mortise chisel has a wide blade that is used for cutting mortises, which are rectangular holes that are used to join pieces of wood.
* Bevel-edged chisel: A bevel-edged chisel has a blade that is angled, which allows for more efficient cutting.
* Butt chisel: A butt chisel has a blade that is perpendicular to the handle, which is used for cutting straight lines.
When using a chisel, it is important to use a sharp blade and to hold the chisel securely. Always use a mallet or hammer to strike the chisel, never your hand.
Planes
Planes are hand tools used for shaping wood by removing thin shavings. They consist of a blade that is held in a body with a handle. Planes are used for a variety of tasks, including smoothing, leveling, and shaping.
There are many different types of planes, each designed for a specific task. Some common types of planes include:
* Jack plane: A jack plane is a general-purpose plane that is used for smoothing and leveling wood.
* Block plane: A block plane is a small plane that is used for smoothing and shaping small pieces of wood.
* Jointer plane: A jointer plane is a large plane that is used for flattening and smoothing the edges of boards.
* Smoothing plane: A smoothing plane is a small plane that is used for smoothing and finishing wood.
When using a plane, it is important to use a sharp blade and to hold the plane securely. Always use a smooth, even stroke and avoid forcing the plane.
Other Shaping Tools, Woodwork project
In addition to chisels and planes, there are other tools that can be used to shape wood. These tools include:
* Sandpaper: Sandpaper is used to smooth and finish wood. It comes in a variety of grits, from coarse to fine.
* Files: Files are used for shaping and smoothing metal and wood. They come in a variety of shapes and sizes.
* Rasp: A rasp is a coarse file that is used for shaping and smoothing wood.
* Gouges: Gouges are carving tools that are used to create concave shapes in wood.
Joining Wood
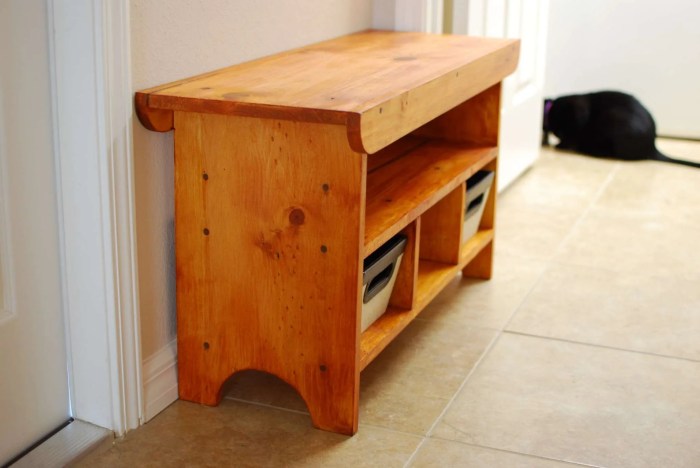
Joining wood is a crucial step in woodworking, allowing you to create sturdy and functional structures. Whether you’re building furniture, cabinets, or intricate decorative pieces, understanding the different types of wood joints and their applications is essential for success.
Wood Joints
Different wood joints offer varying levels of strength, stability, and aesthetic appeal. Here’s a breakdown of some common types, their strengths, and typical applications:
| Joint Type | Strengths | Applications |
|---|---|---|
| Butt Joint | Simple and quick to assemble. | Joining boards end-to-end for straight edges, like in picture frames. |
| Lap Joint | Stronger than a butt joint due to overlapping surfaces. | Joining boards at a right angle, like in drawer sides and bottoms. |
| Dado Joint | Strong and stable, ideal for joining boards at right angles. | Creating shelves, drawers, and cabinet frames. |
| Mortise and Tenon Joint | Very strong and durable, often used for furniture construction. | Joining boards at right angles, like in table legs and rails. |
| Dovetail Joint | Extremely strong and visually appealing, often used in fine furniture. | Joining drawer sides and fronts, ensuring a tight fit. |
| Spline Joint | Provides additional strength and stability, often used in larger projects. | Joining boards at right angles, like in table tops and shelves. |
Using Glue, Screws, Nails, and Other Fasteners
Gluing, screwing, and nailing are common methods for joining wood. Each method has its advantages and disadvantages:
Glue
Glue is a primary method for joining wood, offering a strong bond when applied correctly. It’s essential to choose the right type of glue for your project, considering the wood species, moisture content, and intended use. Wood glue, for example, is ideal for general woodworking projects, while epoxy resin is more suitable for high-strength applications.
Screws
Screws provide a strong and durable mechanical connection. They are typically used for joining wood at right angles, such as in cabinet construction. Screws come in various sizes and materials, with the choice depending on the thickness of the wood and the desired strength.
Nails
Nails are another common fastener for woodworking, often used for temporary or decorative purposes. They can be driven straight into wood or hammered through pre-drilled holes to prevent splitting. Nails come in various sizes and materials, with the choice depending on the wood species and the desired strength.
Creating a Mortise and Tenon Joint
The mortise and tenon joint is a classic woodworking joint known for its strength and durability. Here’s how to create one:
1. Mark and Cut the Mortise: Using a chisel or router, cut a rectangular recess, called a mortise, into one piece of wood.
2. Mark and Cut the Tenon: On the other piece of wood, mark and cut a protruding rectangular piece, called a tenon, that fits snugly into the mortise.
3. Test Fit: Test fit the mortise and tenon to ensure they fit together smoothly. Adjust as needed.
4. Glue and Assemble: Apply wood glue to the tenon and insert it into the mortise. Clamp the pieces together and allow the glue to dry completely.
Finishing Techniques

The final step in any woodworking project is finishing. This involves applying a protective coating to the wood, enhancing its appearance, and providing durability. There are various techniques and finishes available, each with its unique characteristics and application methods.
Sanding
Sanding is a crucial step in preparing wood for finishing. It removes imperfections, creates a smooth surface, and helps the finish adhere better. Different grit sandpaper is used for different stages of sanding, with finer grits used for final sanding.
- Rough Sanding: This step uses coarse grit sandpaper (80-120 grit) to remove any major imperfections or rough spots on the wood surface. This is done with the grain of the wood to avoid scratches.
- Intermediate Sanding: This step uses medium grit sandpaper (150-220 grit) to smooth out the surface and remove any remaining scratches from the previous step.
- Fine Sanding: This step uses fine grit sandpaper (240-400 grit) to create a very smooth surface, ready for finishing.
- Ultra-Fine Sanding: This step uses very fine grit sandpaper (600-1200 grit) for a super smooth finish, often used for high-end projects or when applying a clear finish.
Staining
Staining is a technique used to change the color of wood without obscuring its grain pattern. It is applied to enhance the natural beauty of the wood or to create a desired color.
- Oil-based stains: These stains penetrate deep into the wood, resulting in a rich, even color. They are typically slower drying and may require multiple coats for a deeper color.
- Water-based stains: These stains are easier to clean up and dry faster than oil-based stains. However, they may not penetrate as deeply into the wood, resulting in a less intense color.
- Gel stains: These stains are thick and gel-like, making them ideal for vertical surfaces. They provide good color coverage and are less likely to run.
Painting
Painting is a technique used to cover the wood surface with a solid color, completely hiding the grain pattern. It is often used for durability and protection, as well as for aesthetic purposes.
- Primer: A primer is applied before the paint to create a smooth, even surface for the paint to adhere to. It also helps to prevent the wood from absorbing the paint, resulting in a more even color.
- Paint: There are various types of paint available, each with its own properties and characteristics. For example, latex paint is water-based and dries quickly, while oil-based paint is more durable and provides a smoother finish.
- Topcoat: A topcoat is applied over the paint to protect it from scratches, UV rays, and other damage. There are various types of topcoats available, including polyurethane, varnish, and shellac.
Wood Finishes
Wood finishes are protective coatings applied to wood to enhance its appearance, durability, and resistance to wear and tear.
- Polyurethane: A durable and versatile finish that provides excellent protection against scratches, water, and UV rays. It comes in gloss, semi-gloss, satin, and matte finishes.
- Varnish: A thin, transparent finish that enhances the natural beauty of wood while providing a protective layer. It is often used on furniture and floors.
- Shellac: A natural finish made from the resin of the lac bug. It provides a hard, durable finish with a warm, amber tone.
- Oil: A natural finish that penetrates the wood, providing protection and enhancing its natural beauty. It is often used on cutting boards and other surfaces that come into contact with food.
- Wax: A soft, natural finish that provides a protective layer and enhances the wood’s natural shine. It is often used on furniture and floors.
Applying a Protective Coating
Once the wood is sanded, stained, or painted, a protective coating can be applied to enhance its durability and appearance.
- Preparation: Ensure the surface is clean and free of dust or debris.
- Application: Apply the finish in thin, even coats using a brush, roller, or spray gun.
- Drying: Allow the finish to dry completely according to the manufacturer’s instructions.
- Sanding: Sand between coats with fine-grit sandpaper to smooth out any imperfections.
- Topcoat: Apply additional coats of finish as needed, sanding between coats.
Inspiration and Resources
Woodworking is a craft that can be both challenging and rewarding. Finding inspiration and resources is essential for woodworking projects, whether you’re a beginner or a seasoned professional.
There are many ways to find inspiration and resources for woodworking projects. You can explore websites, books, magazines, and online communities. You can also visit woodworking shows and attend workshops. By exploring these resources, you can learn new techniques, discover new project ideas, and connect with other woodworkers.
Websites
There are many websites dedicated to woodworking projects. These websites provide information on a wide range of topics, from basic woodworking techniques to advanced joinery methods. You can find plans for projects, articles on different types of wood, and videos demonstrating woodworking techniques. Some popular woodworking websites include:
- Woodworking for Mere Mortals: This website provides a wealth of information on woodworking projects, techniques, and tools. It also features a forum where you can connect with other woodworkers and ask questions.
- Popular Woodworking: This website offers plans for a variety of woodworking projects, as well as articles on woodworking techniques, tools, and finishes.
- Fine Woodworking: This website is a great resource for experienced woodworkers. It features articles on advanced woodworking techniques, as well as plans for challenging projects.
Books
There are many books available on woodworking projects. These books provide detailed instructions, plans, and illustrations for a wide range of projects. Some popular woodworking books include:
- The Complete Illustrated Guide to Woodworking: This book covers all aspects of woodworking, from basic techniques to advanced joinery. It includes step-by-step instructions and illustrations for a variety of projects.
- The Woodworker’s Bible: This book is a comprehensive guide to woodworking. It covers everything from choosing the right tools to finishing your projects. It also includes plans for a variety of projects.
- Woodworking for Dummies: This book is a great resource for beginners. It covers the basics of woodworking, including choosing tools, safety, and basic techniques.
Magazines
There are many magazines dedicated to woodworking projects. These magazines provide inspiration for new projects, articles on woodworking techniques, and reviews of new tools and products. Some popular woodworking magazines include:
- Woodworking Magazine: This magazine features plans for a variety of woodworking projects, as well as articles on woodworking techniques, tools, and finishes.
- Fine Woodworking Magazine: This magazine is a great resource for experienced woodworkers. It features articles on advanced woodworking techniques, as well as plans for challenging projects.
- Popular Woodworking Magazine: This magazine offers plans for a variety of woodworking projects, as well as articles on woodworking techniques, tools, and finishes.
Joining a Woodworking Club or Online Community
Joining a woodworking club or online community can be a great way to learn from other woodworkers, share your projects, and get feedback on your work. You can also find inspiration for new projects and learn about new techniques. Many woodworking clubs offer workshops and classes, which can be a great way to improve your skills.
Woodwork projects are a great way to express your creativity and build something unique. If you’re looking for inspiration, check out some modern woodworking projects that blend classic techniques with contemporary designs. You’ll find everything from sleek minimalist shelves to intricate geometric patterns, perfect for adding a touch of modern style to your home.
- Woodworking clubs often meet regularly to discuss projects, share tips, and work on projects together. Many clubs also offer workshops and classes, which can be a great way to learn new skills.
- Online woodworking communities provide a forum for woodworkers to connect with each other, share projects, and ask questions. Many online communities also offer resources, such as plans, articles, and videos.
Conclusion
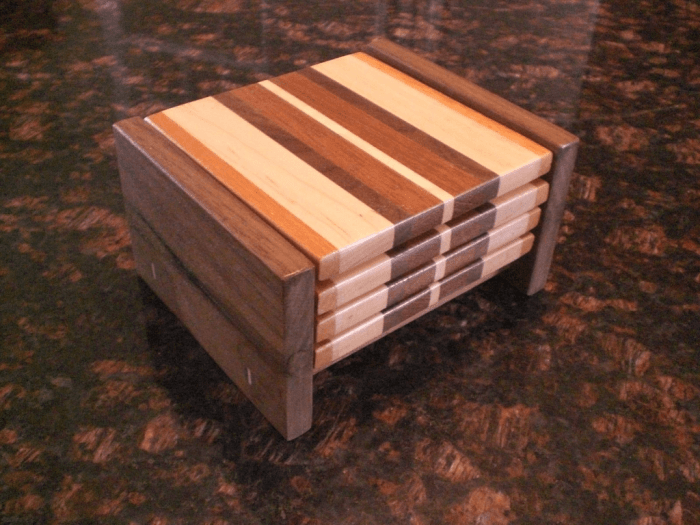
With dedication and practice, you’ll find woodworking to be a fulfilling and creative endeavor. As you progress, you’ll discover a sense of accomplishment with each project you complete, and your woodworking skills will continue to grow. So, grab your tools, gather your materials, and let’s get started!
Helpful Answers
What are some good beginner woodworking projects?
Simple projects like cutting boards, picture frames, and small shelves are great for beginners. These projects introduce basic woodworking skills and techniques without being overly complex.
How do I choose the right type of wood for my project?
Consider the project’s purpose, desired look, and budget. Hardwoods like oak and maple are durable and attractive, while softwoods like pine and cedar are more affordable. Research different wood species to find the best fit for your needs.
What safety precautions should I take when woodworking?
Always wear safety glasses, hearing protection, and a dust mask. Use clamps to secure your workpieces, and keep your workspace clean and organized. Learn how to use your tools safely and never operate machinery without proper training.
