Mirror woodworking plans offer a unique opportunity to create stunning reflections and elevate your woodworking skills. From simple designs to intricate masterpieces, incorporating mirrors into your projects adds a touch of elegance and functionality. Whether you’re a seasoned woodworker or a curious beginner, this guide will provide you with the knowledge and inspiration to craft beautiful mirror frames.
Explore the history of mirrors in woodworking, discover different mirror types, and understand the benefits of integrating them into your designs. We’ll guide you through the process of choosing the right wood, selecting essential tools, and designing your own mirror woodworking projects. From precise cuts to finishing techniques, we’ll cover every step, ensuring you achieve a professional finish.
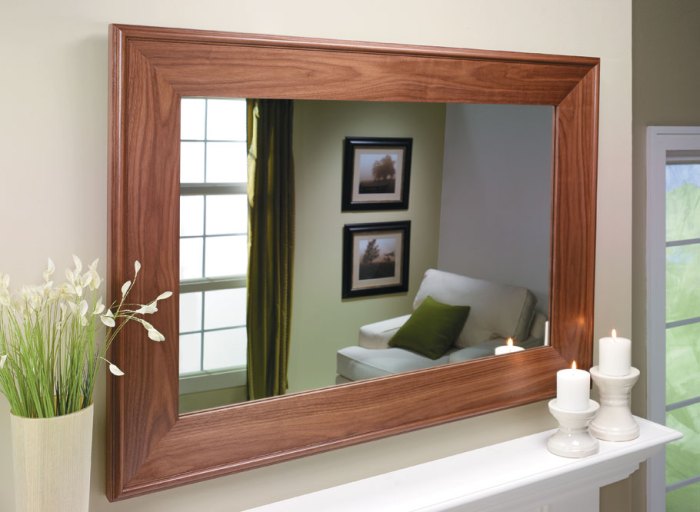
Introduction to Mirror Woodworking
Mirrors have been a part of woodworking for centuries, evolving from simple reflective surfaces to intricate design elements. The combination of wood and mirror creates a unique aesthetic that adds depth, dimension, and visual interest to any space.
Types of Mirrors Used in Woodworking
Mirrors come in various forms, each offering distinct characteristics and applications in woodworking projects. Understanding these types is crucial for choosing the right mirror for your design.
- Plate Mirrors: These are the most common type, consisting of a flat sheet of glass with a reflective coating on one side. Plate mirrors are versatile and readily available in various sizes and shapes. They are often used in simple framing projects or as decorative accents within larger woodworking designs.
- Beveled Mirrors: These mirrors have edges that are angled or beveled, creating a more sophisticated and elegant look. The beveling adds depth and dimension to the mirror, making it a popular choice for statement pieces or ornate furniture designs.
- Antique Mirrors: These mirrors have a distinctive aged or distressed appearance, often featuring tarnished or weathered coatings. Antique mirrors add a touch of history and character to woodworking projects, making them ideal for vintage or rustic styles.
- Specialty Mirrors: This category encompasses mirrors with unique properties or designs, such as tinted mirrors, mirrored tiles, or mirrors with etched patterns. Specialty mirrors offer creative possibilities for woodworking projects, allowing you to incorporate unique visual effects and textures.
Benefits of Incorporating Mirrors in Woodworking Designs
Mirrors offer numerous benefits when incorporated into woodworking projects, enhancing both aesthetics and functionality.
- Visual Expansion: Mirrors create the illusion of more space, making rooms appear larger and brighter. This effect is particularly useful in smaller spaces or rooms with limited natural light.
- Increased Light Reflection: Mirrors reflect light, enhancing the overall brightness of a room. They can be used to strategically direct natural light or amplify the effect of artificial lighting.
- Enhanced Depth and Dimension: Mirrors add depth and dimension to woodworking designs, creating a more dynamic and engaging visual experience. They can be used to highlight specific features or create a sense of movement within the design.
- Style and Decoration: Mirrors are versatile decorative elements that can complement various design styles. They can be incorporated into traditional, modern, or contemporary woodworking projects, adding a touch of elegance or a bold statement.
Mirror Woodworking Plans

Mirror woodworking plans provide detailed instructions and blueprints for creating beautiful and functional mirrors using various woodworking techniques. These plans cater to different skill levels, from beginners to experienced woodworkers, allowing you to build a wide range of mirror projects.
Common Mirror Woodworking Plans
These plans are popular among woodworkers due to their versatility and appeal.
- Framed Mirror: A classic and elegant design, framed mirrors involve creating a custom frame to encase the mirror glass. This plan allows for various frame styles, from simple to ornate, depending on your desired aesthetic.
- Vanity Mirror: Designed for bathrooms or dressing areas, vanity mirrors often incorporate features like shelves, drawers, or lighting for added functionality and convenience. These plans can range from simple to elaborate, depending on your needs and skill level.
- Medicine Cabinet Mirror: Combining storage and reflection, medicine cabinet mirrors are perfect for bathrooms. They often feature a recessed compartment for storing toiletries and medications. These plans usually involve detailed instructions for creating a secure and functional cabinet.
- Wall-Mounted Mirror: These plans offer a variety of designs, from simple rectangular mirrors to more intricate shapes like ovals or circles. They are ideal for adding visual interest and depth to any room.
- Floor Mirror: Floor mirrors are typically larger than wall-mounted mirrors and often feature a sturdy stand or base for stability. They can be used for full-length reflection and are a popular choice for dressing areas or hallways.
- Mirror Doors: This plan involves creating custom mirror doors for cabinets, closets, or other furniture pieces. It requires precise measurements and attention to detail to ensure proper fit and functionality.
- Mirror Tiles: This plan involves creating individual mirror tiles that can be used to create a larger mosaic-like mirror or incorporate into other woodworking projects. This plan often requires advanced woodworking skills and attention to detail.
Mirror Woodworking Projects
This table showcases a range of mirror woodworking projects, highlighting their key features and requirements.
| Project Name | Description | Skill Level | Materials | Tools | Estimated Time |
|---|---|---|---|---|---|
| Framed Mirror | A classic and elegant design, featuring a custom frame around the mirror glass. | Beginner | Wood, mirror glass, glue, finishing materials | Saw, sander, drill, router, clamps, finishing tools | 1-2 days |
| Vanity Mirror | A functional mirror for bathrooms or dressing areas, often incorporating shelves or drawers. | Intermediate | Wood, mirror glass, hardware, finishing materials | Saw, sander, drill, router, clamps, finishing tools | 2-3 days |
| Medicine Cabinet Mirror | A recessed mirror with a compartment for storing toiletries and medications. | Advanced | Wood, mirror glass, hardware, finishing materials | Saw, sander, drill, router, clamps, finishing tools | 3-4 days |
| Wall-Mounted Mirror | A simple or intricate mirror design, suitable for various wall applications. | Beginner | Wood, mirror glass, finishing materials | Saw, sander, drill, router, clamps, finishing tools | 1-2 days |
| Floor Mirror | A larger mirror with a sturdy stand or base for stability. | Intermediate | Wood, mirror glass, hardware, finishing materials | Saw, sander, drill, router, clamps, finishing tools | 2-3 days |
| Mirror Doors | Custom mirror doors for cabinets, closets, or other furniture pieces. | Advanced | Wood, mirror glass, hardware, finishing materials | Saw, sander, drill, router, clamps, finishing tools | 3-4 days |
| Mirror Tiles | Individual mirror tiles for creating a larger mosaic or incorporating into other projects. | Advanced | Wood, mirror glass, finishing materials | Saw, sander, drill, router, clamps, finishing tools | 4-5 days |
Techniques and Tools for Mirror Woodworking
The specific techniques and tools required for each mirror woodworking project vary depending on the design and complexity.
- Cutting and Shaping: For creating the frame or other components, you’ll need a saw (e.g., table saw, miter saw, circular saw) and a sander (e.g., belt sander, orbital sander) to achieve the desired shape and finish.
- Joining Techniques: Depending on the project, you may use various joining techniques, such as mortise and tenon, dovetail, or pocket holes. These techniques require specialized tools like a router, drill press, or jig saw.
- Mirror Installation: Securely attaching the mirror glass to the frame or backing requires proper tools and techniques. This may involve using mirror clips, adhesive, or a combination of both.
- Finishing: Applying a finish to the wood frame or other components protects the wood and enhances its appearance. This can involve sanding, staining, painting, or applying a clear coat.
Materials and Tools for Mirror Woodworking
Mirror woodworking projects require careful material selection and the right tools to achieve a professional finish. This section explores the various materials and tools you need to successfully complete your mirror woodworking project.
Types of Wood for Mirror Frames
The type of wood you choose for your mirror frame will significantly influence its appearance, durability, and overall cost.
- Hardwoods are known for their strength, durability, and attractive grain patterns. Popular hardwoods for mirror frames include oak, maple, walnut, cherry, and mahogany.
- Softwoods are generally less expensive and easier to work with than hardwoods. Pine, fir, and cedar are common softwoods used for mirror frames. These woods are typically lighter in color and may not be as durable as hardwoods.
- Engineered Wood: Plywood, MDF (medium-density fiberboard), and particleboard are cost-effective alternatives to solid wood. These materials offer stability and are often used for creating intricate designs or achieving a specific finish.
The choice of wood depends on the style of your mirror, your budget, and the desired level of durability.
Essential Tools for Mirror Woodworking
Having the right tools is crucial for precise cuts, accurate joinery, and a smooth finish. Here’s a list of essential tools for mirror woodworking:
- Measuring Tools: A tape measure, ruler, and combination square are essential for accurate measurements and ensuring precise cuts.
- Cutting Tools: A miter saw, table saw, or circular saw are necessary for cutting wood accurately and efficiently. A jigsaw is useful for intricate cuts and curves.
- Joinery Tools: A biscuit joiner, dowel jig, or pocket hole jig are used to create strong and secure joints in the frame.
- Sanding Tools: A belt sander, orbital sander, and sandpaper are essential for achieving a smooth and consistent finish on the frame.
- Clamps: Various types of clamps are needed to hold pieces together while gluing or assembling the frame.
- Finishing Tools: A paintbrush, roller, or spray gun are necessary for applying paint, stain, or varnish to the frame.
Additional Materials for Mirror Installation and Finishing
Besides wood and tools, several other materials are needed for a successful mirror woodworking project.
- Mirror: Choose a mirror that fits your frame dimensions and desired style. Mirror sizes vary, so ensure you select the right size for your project.
- Mirror Clips: These are used to securely attach the mirror to the frame. Mirror clips come in various styles and sizes, so choose those that fit your frame and mirror thickness.
- Adhesive: A strong adhesive, such as construction adhesive or mirror mastic, is needed to bond the mirror to the frame.
- Finishing Supplies: Wood filler, primer, paint, stain, varnish, and finishing hardware (hinges, brackets, or D-rings) are needed for finishing the frame and preparing it for installation.
Designing Mirror Woodworking Projects
Designing mirror frames is a blend of aesthetics and functionality. You’ll want to create a frame that complements the mirror’s shape and size while seamlessly integrating into your woodworking project.
Mirror Frame Design Principles, Mirror woodworking plans
Aesthetics and functionality play key roles in designing a mirror frame.
- Scale and Proportion: The frame should be proportionate to the mirror, avoiding overwhelming or diminishing its visual impact. A rule of thumb is to keep the frame width 1/10 to 1/20 of the mirror’s width.
- Style and Design: Consider the overall design of the room and the mirror’s intended use. A traditional style might call for ornate carvings, while a contemporary setting might benefit from a minimalist frame.
- Materials and Finishes: Choose materials that complement the mirror and the room’s décor. Wood, metal, and even fabric can be used, each with its own unique aesthetic and properties.
- Functionality: Consider how the frame will be attached to the mirror and wall. A secure and visually appealing mounting system is essential.
Examples of Mirror Frame Styles
Here are a few examples of different styles and patterns for mirror frames:
- Classic: Characterized by simple lines, elegant curves, and often featuring ornate carvings or moldings. These frames often complement traditional décor.
- Modern: Modern frames embrace clean lines, geometric shapes, and minimalist designs. They often feature materials like metal or polished wood.
- Rustic: Rustic frames often utilize reclaimed wood or natural materials with a distressed finish. They create a warm and inviting ambiance.
- Shaker: Shaker frames are known for their simplicity and functionality. They feature clean lines, minimal ornamentation, and often use wood with a natural finish.
Integrating Mirrors into Existing Woodworking Projects
Mirrors can be incorporated into various woodworking projects, adding visual interest and functionality.
- Built-in Cabinets: A mirror can be incorporated into the door of a cabinet or a shelf unit, creating a sense of depth and reflecting light.
- Wall Paneling: A mirror can be framed and integrated into a wall paneling design, adding a focal point to the space.
- Floating Shelves: A mirror can be mounted above or below floating shelves, creating a balanced and visually appealing arrangement.
- Headboards: A mirror can be incorporated into a headboard design, adding a unique and decorative touch to the bedroom.
Constructing Mirror Frames

The mirror frame is the decorative element that surrounds the mirror and can be made from a variety of materials, including wood, metal, and plastic. A well-constructed frame not only enhances the appearance of the mirror but also provides a sturdy base for attaching the mirror securely.
Cutting and Joining Frame Pieces
When constructing a mirror frame, achieving precise cuts and joints is crucial for a visually appealing and structurally sound frame. Here are some tips and techniques to ensure accuracy:
- Measure twice, cut once: Accuracy is paramount. Take your time, measure carefully, and double-check your measurements before making any cuts.
- Use the right tools: A miter saw or a table saw is ideal for making precise cuts, especially for mitered joints. For hand-cutting, a sharp saw and a miter box will help ensure accurate angles.
- Practice with scrap wood: Before cutting your final pieces, practice with scrap wood to ensure you are comfortable with the cutting process and that you are achieving the desired angles and lengths.
- Types of joints: Miter joints are common for mirror frames, as they create a clean, finished look. Other joints, such as rabbet joints or dado joints, can also be used depending on the design and material of the frame.
- Use a miter gauge: A miter gauge ensures accurate angles when cutting with a table saw or chop saw. Always check the gauge for alignment before making cuts.
Securing the Mirror to the Frame
Once the frame is constructed, the next step is to attach the mirror securely. There are several methods for attaching mirrors to frames:
- Mirror clips: Mirror clips are small metal brackets that are attached to the frame and hold the mirror in place. They are a common and effective method for attaching mirrors, especially for lighter mirrors.
- Mirror mastic: Mirror mastic is a type of adhesive that is applied to the back of the mirror and then pressed into the frame. It provides a strong bond and is often used for heavier mirrors.
- Mirror plates: Mirror plates are flat pieces of material, typically metal, that are attached to the back of the mirror and then secured to the frame with screws. They are often used for large or heavy mirrors and provide a very secure attachment.
Mirror Attachment Methods
Here is a table summarizing the different mirror attachment methods:
| Method | Description | Advantages | Disadvantages |
|---|---|---|---|
| Mirror clips | Small metal brackets attached to the frame | Easy to install, relatively inexpensive | May not be suitable for heavy mirrors |
| Mirror mastic | Adhesive applied to the back of the mirror | Strong bond, can be used for heavy mirrors | Can be messy, requires careful application |
| Mirror plates | Flat pieces of material attached to the back of the mirror | Very secure, suitable for large and heavy mirrors | More complex installation, can be expensive |
Finishing and Refinishing Mirror Frames
The final step in creating a stunning mirror frame is finishing it. This involves applying a protective coating and enhancing the frame’s aesthetic appeal. Finishing can range from simple staining to intricate painting techniques, each contributing to the overall look and feel of your mirror.
Sanding and Sealing Mirror Frames
Proper sanding and sealing are crucial for a professional finish. Sanding creates a smooth surface for the finish to adhere to, while sealing protects the wood from moisture and stains.
- Start by sanding the frame with progressively finer grits of sandpaper, removing any imperfections and creating a smooth surface.
- After sanding, apply a wood sealer to protect the wood from moisture and prevent the finish from soaking in unevenly.
Finishing Techniques for Mirror Frames
Several finishing techniques can be employed for mirror frames, each offering unique aesthetic qualities.
- Staining: Staining is a popular option for enhancing the natural beauty of the wood. Choose a stain color that complements the mirror and your décor.
- Painting: Painting allows for greater creative freedom, enabling you to customize the frame’s color and design. Use high-quality paint for a durable and attractive finish.
- Varnishing: Varnishing adds a protective layer that enhances the wood’s natural grain and provides a glossy or matte finish.
- Waxing: Waxing provides a protective layer and adds a soft sheen to the frame.
- Distressing: Distressing techniques create a vintage or antique look by adding wear and tear to the frame.
Tips for Achieving a Professional Finish
- Use high-quality materials: Invest in quality sandpaper, wood sealer, stain, paint, varnish, or wax for a professional finish.
- Prepare the surface properly: Thoroughly clean and sand the frame before applying any finish.
- Apply thin coats: Apply thin, even coats of finish to prevent drips and runs.
- Allow adequate drying time: Follow the manufacturer’s instructions for drying times between coats.
- Practice on scrap wood: Test the finish on a scrap piece of wood before applying it to the frame.
Mirror Woodworking Safety
Mirror woodworking, while rewarding, involves tools and materials that can be hazardous if not handled properly. Always prioritize safety to prevent accidents and ensure a positive woodworking experience.
Safety Precautions for Tools and Materials
Safety precautions are essential when working with tools and materials in any woodworking project. Proper handling and usage of tools, along with awareness of potential hazards, will help prevent injuries.
- Power Tools: Always wear safety glasses and ear protection when operating power tools. Ensure tools are sharp and in good working order. Use appropriate guards and hold the tools firmly with both hands. Never operate power tools when fatigued or under the influence of alcohol or drugs.
- Hand Tools: While hand tools may seem less dangerous, they still require care. Use sharp chisels and knives, and avoid using dull or damaged tools. Always cut away from your body and keep your fingers clear of the cutting edge.
- Wood: Wood can splinter, so wear gloves when handling it. Use a dust mask to avoid inhaling wood dust, which can be harmful to your lungs. Always use a push stick to keep your hands away from the blade when using a table saw or other power tools.
- Glass: Always wear safety glasses when working with glass. Use a glass cutter designed for the thickness of the glass. Handle glass carefully to avoid breakage, and dispose of broken glass properly.
- Adhesives and Finishes: Use adhesives and finishes in well-ventilated areas and wear a respirator if necessary. Follow the manufacturer’s instructions for safe handling and disposal of these materials. Always wash your hands thoroughly after using adhesives and finishes.
Handling and Disposal of Hazardous Materials
Hazardous materials used in woodworking projects require careful handling and disposal to protect your health and the environment.
- Adhesives: Many adhesives contain volatile organic compounds (VOCs), which can be harmful if inhaled. Use adhesives in well-ventilated areas and wear a respirator if necessary. Dispose of leftover adhesives according to the manufacturer’s instructions.
- Finishes: Finishes, like paints, varnishes, and stains, can also contain VOCs. Use these materials in well-ventilated areas and wear a respirator if necessary. Dispose of leftover finishes properly. Some communities have hazardous waste disposal programs that accept leftover paints and finishes.
- Wood Dust: Wood dust is a respiratory irritant and can be a fire hazard. Use a dust collection system to minimize exposure to wood dust. Clean up spills and dust promptly. Dispose of wood dust in a sealed container.
Inspiration and Ideas for Mirror Woodworking

Mirror woodworking offers a fantastic opportunity to create unique and personalized pieces that enhance any space. From simple, elegant frames to intricate, statement-making designs, the possibilities are endless.
Examples of Unique and Innovative Mirror Woodworking Projects
These examples showcase the diverse and captivating world of mirror woodworking:
- A circular mirror with a geometric frame crafted from reclaimed wood, featuring contrasting wood tones and intricate joinery.
- A large rectangular mirror with a rustic, hand-hewn frame made from salvaged barn wood, showcasing the natural beauty of the wood and its history.
- A small, oval mirror with a sleek, modern frame made from polished walnut, highlighting the rich grain and deep color of the wood.
- A square mirror with a whimsical, geometric frame made from brightly colored plywood, adding a playful touch to any room.
- A rectangular mirror with a contemporary, minimalist frame made from thin strips of black walnut, creating a sleek and sophisticated look.
Resources for Finding Inspiration and Ideas for Mirror Designs
Several resources can spark your creativity and provide inspiration for your mirror woodworking projects:
- Online platforms: Websites like Pinterest, Instagram, and Houzz showcase a vast collection of mirror designs, from classic to contemporary, allowing you to explore different styles and find inspiration.
- Design magazines and books: Publications focused on interior design, woodworking, and home décor often feature stunning mirror designs, offering valuable insights into current trends and innovative techniques.
- Art galleries and museums: Visiting art galleries and museums can expose you to diverse artistic styles and inspire unique design ideas for your mirror frames.
- Nature: Observing natural forms, such as the intricate patterns of leaves, the flowing lines of a river, or the geometric structure of a honeycomb, can spark innovative ideas for your mirror designs.
Creating Custom Mirror Woodworking Projects
Creating custom mirror woodworking projects allows you to personalize your space and express your unique style. Here are some tips to get started:
- Consider the style of your space: Determine the overall aesthetic of the room where the mirror will be placed, whether it’s modern, traditional, rustic, or eclectic. This will help you choose a style for your mirror frame that complements the existing décor.
- Think about the size and shape of the mirror: Choose a size and shape that fits the space and purpose of the mirror. Consider the dimensions of the wall, the furniture surrounding it, and the overall balance of the room.
- Select the right wood: Explore different wood species, considering their grain patterns, color, hardness, and availability. Choose a wood that complements the style of the mirror and the overall décor of the room.
- Experiment with different techniques: Don’t be afraid to try new techniques, such as carving, inlaying, or painting, to add unique details and personalize your mirror frame.
- Don’t be afraid to be creative: Allow your imagination to run wild and create a mirror that reflects your individual style and personality.
Final Thoughts: Mirror Woodworking Plans
With a little creativity and the right tools, you can transform ordinary mirrors into captivating works of art. Mirror woodworking projects are not only visually appealing but also functional, adding a touch of luxury to any space. Whether you’re creating a statement piece for your living room or a charming vanity mirror for your bedroom, these plans provide a foundation for endless possibilities. So, grab your tools, unleash your inner craftsman, and let the reflection of your skills shine through your creations.
Commonly Asked Questions
What are the best wood types for mirror frames?
Hardwoods like oak, maple, cherry, and walnut are popular choices due to their durability and aesthetic appeal. Softwoods like pine and cedar can also be used for simpler frames.
How do I attach the mirror to the frame securely?
Use mirror clips or adhesive designed for mirrors. Mirror clips provide a secure and adjustable hold, while adhesive offers a clean and seamless finish.
What safety precautions should I take when working with mirrors?
Always wear safety glasses and gloves when handling mirrors. Be careful when cutting glass, and use a mirror cutter designed for the job. Store mirrors safely to prevent breakage.
Mirror woodworking plans can be a fun project, and you can even use them to build a whole room’s worth of furniture! If you’re looking for inspiration for your next woodworking project, check out this great resource on woodworking furniture.
Once you’ve got some ideas, you can start planning out your mirror project and maybe even add some custom touches to make it truly unique!
