Woodworking plans planter – Woodworking plans for planters offer a fantastic opportunity to create beautiful and functional additions to your home or garden. Whether you’re a seasoned woodworker or a beginner, these plans provide detailed instructions and guidance to help you build stunning planters that will enhance your outdoor spaces.
From simple designs to more intricate creations, woodworking plans for planters allow you to personalize your project and express your creativity. You can choose from a variety of wood types, styles, and sizes to match your preferences and the plants you want to showcase. Building your own planter is not only rewarding but also allows you to control the quality and craftsmanship of the final product.
Introduction to Woodworking Planter Projects: Woodworking Plans Planter

Woodworking planters offer a unique blend of creativity, functionality, and a touch of rustic charm. These handcrafted planters bring a personal touch to your garden, patio, or indoor spaces, transforming ordinary plants into eye-catching focal points.
Building your own planter allows you to express your personal style and create a piece that perfectly complements your surroundings. You have the freedom to choose the wood, size, shape, and finish, resulting in a one-of-a-kind planter that reflects your individual taste.
Popular Planter Designs
Popular planter designs offer a diverse range of styles and functionalities.
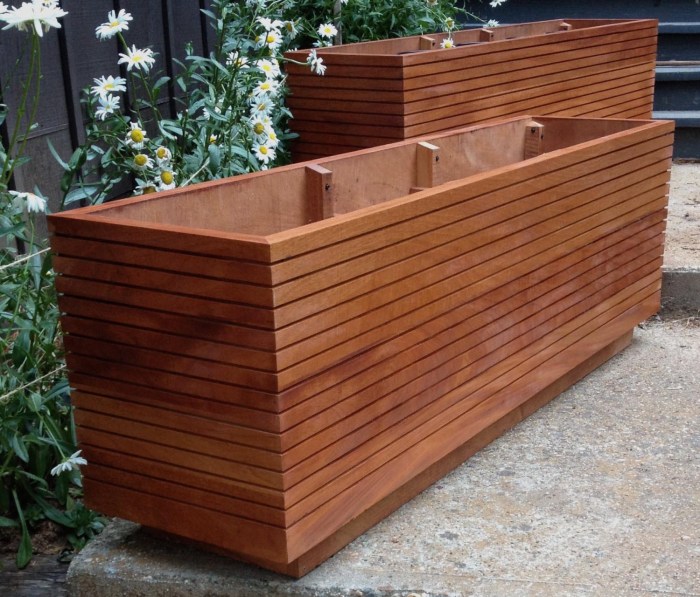
- Classic Rectangular Planters: These timeless designs are versatile and practical, suitable for a wide variety of plants and spaces. They can be made in various sizes, from small window boxes to large, statement pieces.
- Round Planters: Round planters offer a softer, more organic feel, complementing circular or curved spaces. They can be created in different diameters, from small pots for succulents to larger planters for shrubs or trees.
- Hanging Planters: Hanging planters add a touch of whimsy and vertical interest to your garden or patio. They can be made in various shapes and sizes, often using chains or ropes for suspension.
- Tiered Planters: Tiered planters offer a compact and space-saving solution for displaying multiple plants. They can be designed with two or more levels, creating a cascading effect.
- Geometric Planters: Geometric planters add a modern and contemporary touch to your garden. They can be designed in various shapes, such as squares, triangles, or hexagons.
Benefits of Building Your Own Planter
Building your own planter provides numerous benefits, including:
- Customization: You have complete control over the design, size, shape, and finish of your planter, allowing you to create a piece that perfectly matches your style and needs.
- Cost Savings: Building your own planter can be significantly cheaper than purchasing a pre-made one, especially if you use salvaged or reclaimed wood.
- Sense of Accomplishment: Completing a woodworking project provides a sense of accomplishment and satisfaction, knowing you created something beautiful and functional with your own hands.
- Unique and Personal: A handcrafted planter adds a unique and personal touch to your garden or home, making it a conversation starter and a testament to your creativity.
- Sustainability: By using reclaimed or sustainably sourced wood, you can reduce your environmental impact and contribute to a more sustainable lifestyle.
Materials for Woodworking Planters

Choosing the right wood for your planter is an important decision. The type of wood you select will affect the durability, aesthetics, and cost of your project.
There are many different types of wood that can be used for planters, each with its own unique characteristics. You’ll want to consider factors such as the type of plant you’ll be growing, the size and weight of the planter, and the overall look you’re going for.
Building a planter is a great way to add a touch of personal style to your garden. You can find plenty of woodworking plans online, and if you’re looking for inspiration, check out woodworking plans garden for some awesome ideas.
Once you’ve chosen your plan, you can get started building your own planter, and you’ll be able to enjoy fresh flowers and herbs in no time!
Common Wood Types
Here are some of the most common wood types used for planters:
- Cedar: Naturally resistant to rot and insects, cedar is a popular choice for outdoor planters. It has a warm, reddish-brown color and a pleasant aroma.
- Redwood: Similar to cedar, redwood is also naturally resistant to rot and insects. It has a rich, reddish-brown color and a distinctive grain pattern.
- Pine: Pine is a softwood that is relatively inexpensive and easy to work with. It is not as durable as cedar or redwood, but it can be treated with preservatives to extend its lifespan.
- Oak: Oak is a hardwood that is known for its strength and durability. It has a beautiful grain pattern and a rich, golden color. Oak is more expensive than pine, but it will last for many years.
- Teak: Teak is a tropical hardwood that is highly resistant to rot, insects, and water damage. It has a rich, golden-brown color and a distinctive grain pattern. Teak is the most expensive wood on this list, but it is also the most durable.
Wood Properties
Here is a table comparing the properties of different wood types:
| Wood Type | Durability | Cost | Aesthetic Appeal |
|---|---|---|---|
| Cedar | High | Moderate | Warm, reddish-brown color; pleasant aroma |
| Redwood | High | Moderate | Rich, reddish-brown color; distinctive grain pattern |
| Pine | Moderate | Low | Light, yellowish-brown color; soft texture |
| Oak | High | High | Beautiful grain pattern; rich, golden color |
| Teak | Very High | Very High | Rich, golden-brown color; distinctive grain pattern |
Tools and Equipment for Woodworking Planters
Constructing a woodworking planter requires a range of tools and equipment. The specific tools you need will depend on the complexity of your planter design and your level of woodworking experience. However, there are some essential tools that every woodworking planter builder should have.
Essential Tools
- Measuring Tape: Accurate measurements are crucial for building a well-proportioned planter. A measuring tape is used to measure the length, width, and depth of the planter box.
- Pencil: A pencil is used to mark cutting lines on the wood.
- Saw: A saw is used to cut the wood to the desired size. You can choose from a variety of saws, such as a handsaw, circular saw, or jigsaw.
- Drill: A drill is used to create holes in the wood for screws, bolts, or drainage.
- Screwdriver: A screwdriver is used to drive screws into the wood.
- Clamps: Clamps are used to hold the wood pieces together while they are being glued or screwed.
- Sandpaper: Sandpaper is used to smooth out the edges of the wood and to create a smooth finish.
- Wood Glue: Wood glue is used to bond the pieces of wood together.
- Safety Glasses: Safety glasses protect your eyes from flying debris.
- Dust Mask: A dust mask is important for protecting your lungs from wood dust.
Recommended Brands
| Tool | Recommended Brand |
|---|---|
| Measuring Tape | Stanley, Lufkin |
| Pencil | Ticonderoga, Dixon |
| Saw | DeWalt, Bosch |
| Drill | DeWalt, Ryobi |
| Screwdriver | DeWalt, Craftsman |
| Clamps | Bessey, Irwin |
| Sandpaper | 3M, Norton |
| Wood Glue | Titebond, Elmer’s |
Popular Woodworking Planter Designs
Woodworking planters offer a wide range of design possibilities, from classic styles to modern and innovative creations. Understanding the different designs can help you choose the perfect planter for your needs and aesthetic preferences.
Classic Planter Designs
Classic planter designs are timeless and often feature simple, elegant forms. They can be easily incorporated into various garden styles and add a touch of traditional charm.
- Box Planters: These are rectangular planters with a simple, straightforward design. They are versatile and can be used for a variety of plants, from herbs to flowers.
- Urn Planters: Urns are typically round or oval-shaped planters with a wide mouth and a narrow base. They are often made from materials like stone or terracotta but can also be crafted from wood. Urns can add a touch of elegance and grandeur to any garden.
- Trough Planters: Trough planters are long, rectangular planters that are perfect for growing herbs, vegetables, or flowers. They can be placed on a patio, deck, or windowsill.
Modern and Innovative Planter Styles
Modern planter designs often feature unique shapes, materials, and finishes. They can add a contemporary touch to any garden or indoor space.
- Geometric Planters: Geometric planters come in a variety of shapes, such as cubes, spheres, and pyramids. They can add a modern and minimalist aesthetic to any space.
- Hanging Planters: Hanging planters are a great way to add greenery to vertical spaces. They can be made from a variety of materials, including wood, metal, and rope.
- Vertical Planters: Vertical planters are designed to maximize space by growing plants vertically. They are a great option for small gardens or patios.
Planter Shapes and Sizes
The shape and size of a planter can significantly impact the growth and health of your plants.
- Round Planters: Round planters provide ample space for root growth and are ideal for plants that prefer a more even distribution of water.
- Square Planters: Square planters offer a more compact design and are great for maximizing space. They can be challenging for plants with large root systems.
- Rectangular Planters: Rectangular planters are versatile and can be used for a variety of plants. They offer a good balance of space for root growth and ease of maintenance.
- Small Planters: Small planters are suitable for herbs, succulents, and other small plants. They are easy to move around and can be placed in various locations.
- Large Planters: Large planters are ideal for larger plants, such as trees or shrubs. They provide ample space for root growth and can help to stabilize larger plants.
Step-by-Step s for Building a Woodworking Planter
Building a planter is a rewarding project for any woodworking enthusiast, offering a blend of creativity and practicality. Whether you’re aiming for a simple, functional design or a more intricate piece, following the right steps will ensure a successful outcome.
Simple Planter Construction
This section Artikels the steps involved in building a basic rectangular planter.
- Gather Materials: You’ll need wood boards (pine, cedar, or redwood are good choices), screws, wood glue, stain or paint (optional), and a measuring tape.
- Cut the Wood: Measure and cut the boards to the desired dimensions for the planter’s sides, bottom, and any decorative elements. For a basic rectangular planter, you’ll need two side pieces, two end pieces, and a bottom piece.
- Assemble the Sides: Align the side and end pieces, ensuring the corners are square. Secure them with wood glue and screws.
- Attach the Bottom: Once the sides are assembled, attach the bottom piece to the inside of the planter. Ensure it’s flush with the sides and use wood glue and screws to secure it.
- Sand and Finish: After the glue has dried, sand the planter to smooth any rough edges. Apply a stain or paint to protect the wood and enhance the appearance (optional).
Complex Planter Construction
This section details the process of building a more intricate planter design, for instance, a hexagonal planter with decorative elements.
- Design and Planning: Begin by sketching the planter design, including its dimensions, shape, and any decorative features. Consider the type of wood and the overall aesthetic you want to achieve.
- Cutting the Wood: Based on your design, cut the wood pieces for the planter’s sides, bottom, and decorative elements. For a hexagonal planter, you’ll need six side pieces, a bottom piece, and any additional pieces for decorative features.
- Assembling the Sides: Align the side pieces, ensuring they form a hexagon. Secure them with wood glue and screws.
- Adding Decorative Elements: Incorporate decorative features, such as a raised lip around the top or a lattice pattern on the sides. Cut the necessary wood pieces and attach them using glue and screws.
- Attaching the Bottom: Once the sides and decorative elements are assembled, attach the bottom piece to the inside of the planter. Ensure it’s flush with the sides and use wood glue and screws to secure it.
- Finishing Touches: Sand the planter to smooth any rough edges. Apply a stain or paint to protect the wood and enhance the appearance (optional).
Finishing Touches for Woodworking Planters
The finishing touches are what make your planter truly stand out and protect it from the elements. This is your chance to add a personal touch and ensure longevity for your creation.
There are several options available to protect and enhance the look of your wooden planter. Each method offers a different level of protection and aesthetic appeal.
Choosing the Right Finish
Choosing the right finish depends on your desired look and the intended use of the planter. Some finishes provide more protection against water and UV damage than others.
- Stains: Stains are a great option for highlighting the natural beauty of the wood while providing a degree of protection. They penetrate the wood, adding color and depth without obscuring the grain. Popular choices include oil-based stains, water-based stains, and gel stains.
- Paints: Paints offer a more opaque finish, allowing you to create a wide range of colors and patterns. They provide excellent protection against water and UV damage, but they hide the wood grain.
- Varnishes: Varnishes are clear coatings that protect the wood from moisture, UV rays, and scratches. They enhance the natural beauty of the wood while providing a durable finish. Common types include polyurethane, acrylic, and oil-based varnishes.
The Importance of Sealing Wood Planters, Woodworking plans planter
Sealing your wooden planter is crucial for its longevity. It creates a protective barrier that prevents moisture from penetrating the wood, which can lead to warping, cracking, and rotting.
- Moisture Protection: Sealing prevents water from soaking into the wood, keeping it from warping or cracking.
- UV Protection: UV rays can fade the wood’s color and cause it to become brittle over time. A sealant helps to protect the wood from these damaging effects.
- Durability: A sealant makes the wood surface more resistant to scratches and abrasions, extending its lifespan.
Maintenance and Care of Woodworking Planters
Just like any other wooden furniture, your handcrafted planter requires regular care and maintenance to keep it looking its best and extending its lifespan. Proper care involves protecting the wood from the elements, cleaning it regularly, and applying protective finishes.
Protecting Wood Planters from the Elements
Protecting your wood planter from the elements is crucial for its longevity. Direct sunlight, rain, and humidity can cause the wood to warp, crack, or rot.
- Choose the Right Wood: Select a wood species known for its durability and resistance to moisture, such as cedar, redwood, or teak. These woods naturally contain oils that make them more resistant to decay and insect damage.
- Apply a Protective Finish: A good quality sealant or finish will create a barrier against water and UV rays. You can use oil-based finishes like teak oil or tung oil, or water-based finishes like polyurethane or acrylic paint.
- Provide Shelter: If your planter is exposed to harsh weather conditions, consider placing it under a covered area like a porch or awning. You can also use a waterproof cover to protect it from rain and snow.
Cleaning and Restoring Wood Planters
Regular cleaning is essential to maintain the appearance and health of your wood planter. Dirt, grime, and plant debris can accumulate over time, potentially damaging the wood.
- Dust and Debris Removal: Start by brushing away any loose dirt and debris with a soft-bristled brush.
- Mild Soap and Water: For a general cleaning, use a mild soap solution and a soft cloth to wipe down the planter. Avoid harsh chemicals or abrasive cleaners that can damage the wood finish.
- Re-applying Finish: After cleaning, inspect the finish. If it appears worn or damaged, reapply a fresh coat of sealant or finish to protect the wood.
Inspiring Woodworking Planter Projects

Let’s dive into some creative and inspiring woodworking planter projects. We’ll explore unique designs, learn how to incorporate different materials and techniques, and discover the potential for upcycling and repurposing materials.
Unique and Creative Planter Designs
Unique planter designs can transform your outdoor spaces. Here are some ideas to get you started:
- Geometric Planters: These planters feature clean lines and sharp angles. You can build them using different types of wood and finishes to create a modern or rustic look. A popular design is the cube planter.
- Hanging Planters: These planters offer a unique way to display your plants. They can be made from various materials, such as wood, metal, or rope. Consider using a sturdy rope or chain for hanging to ensure the planter is securely attached.
- Tiered Planters: These planters provide vertical space for your plants and add a touch of elegance to your garden. You can create tiered planters with different sizes and shapes of wooden boxes or shelves.
- Trellis Planters: These planters combine the function of a trellis with a planter, allowing plants to climb and grow vertically. You can build them with a variety of wood types, creating a beautiful and functional piece for your garden.
Incorporating Different Materials and Techniques
Woodworking planters offer a fantastic canvas for incorporating various materials and techniques.
- Metal Accents: Add a touch of industrial style with metal accents like brackets, handles, or even metal mesh for drainage.
- Mosaic Tiles: Create a unique and colorful planter by incorporating mosaic tiles into the design. You can use ceramic, glass, or even stone tiles. Be sure to use a strong adhesive to secure the tiles.
- Painted Finishes: Use paints, stains, and varnishes to create a wide range of looks. Consider using natural finishes to enhance the wood’s grain or applying bold colors for a modern touch.
Upcycling and Repurposing Materials
Upcycling and repurposing materials for planters is an excellent way to reduce waste and create unique pieces.
- Pallets: Wooden pallets can be transformed into beautiful and functional planters. Consider cutting them into smaller sections or using them as they are, adding a touch of rustic charm.
- Old Doors: Give old doors a new life as planters. You can use them as they are or cut them into sections to create smaller planters.
- Wine Barrels: Repurposed wine barrels offer a unique and rustic look for planters. You can use them as they are or cut them in half to create smaller planters.
End of Discussion
Creating your own woodworking planter is a fulfilling experience that combines craftsmanship, creativity, and the joy of gardening. With the right plans, tools, and a little patience, you can build a unique planter that will enhance your outdoor space and become a source of pride for years to come. So grab your tools, select your wood, and let your imagination run wild as you embark on your woodworking planter journey.
Expert Answers
What are the best wood types for planters?
Cedar, redwood, and teak are popular choices due to their durability and natural resistance to rot and decay.
How do I choose the right size and shape for my planter?
Consider the size of the plants you want to grow and the overall design of your garden or patio.
What are some finishing techniques for wood planters?
Staining, painting, and varnishing are common options to enhance the appearance and protect the wood.
