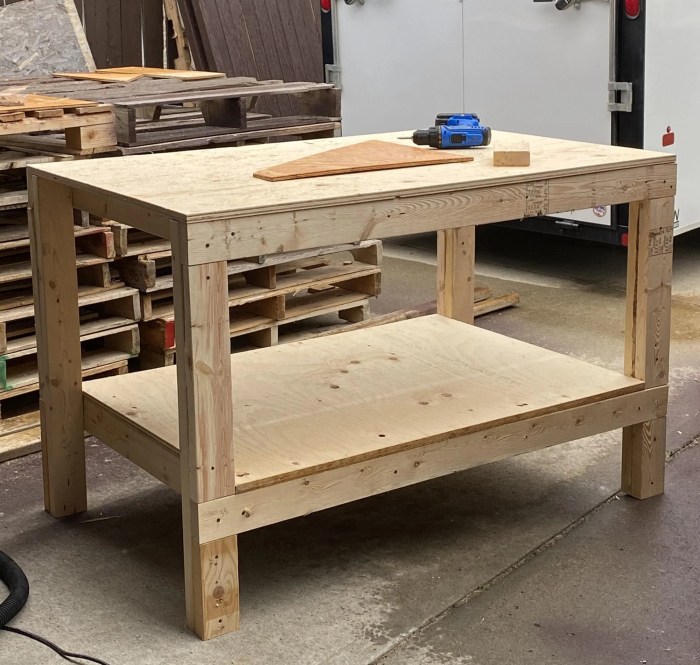
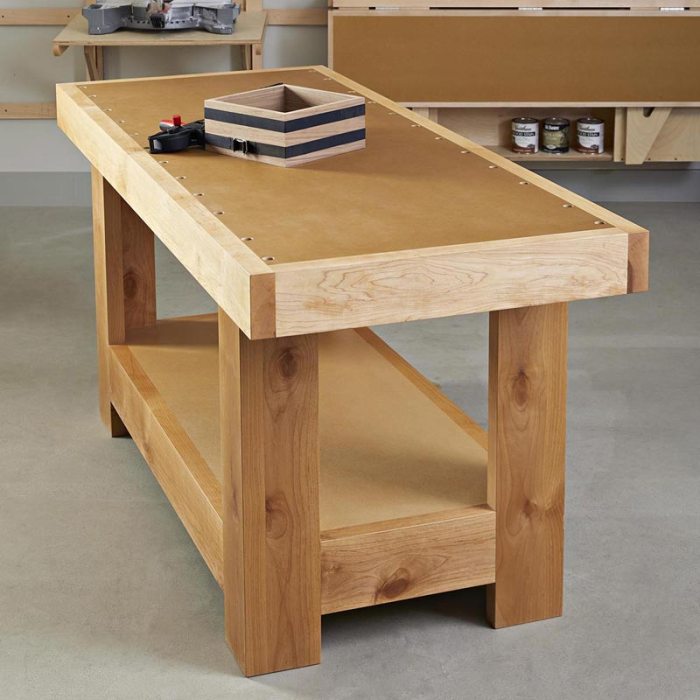
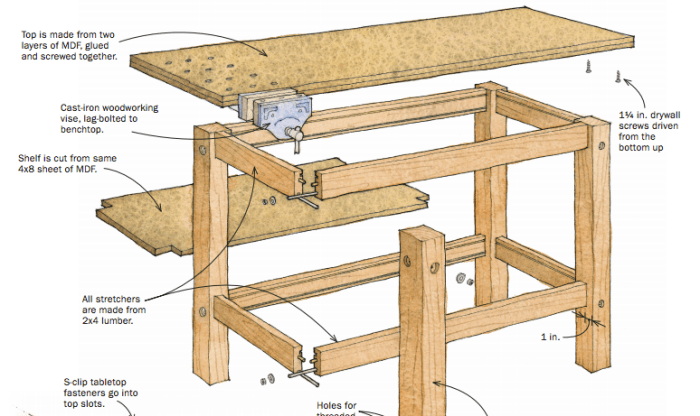
Woodworking work bench plans – Woodworking workbench plans are the blueprint to crafting the heart of your workshop – a sturdy, functional, and personalized space where your woodworking dreams come to life. Whether you’re a seasoned woodworker or just starting out, a well-designed workbench is essential for precision, stability, and comfort. It’s more than just a table; it’s a platform for creativity, a place where you can transform raw materials into beautiful, lasting pieces.
This guide will walk you through the process of choosing the perfect workbench plan, understanding its components, and constructing it with confidence. From selecting the right materials and tools to incorporating clever accessories and ensuring proper maintenance, we’ll equip you with the knowledge and inspiration to build a workbench that meets your unique needs and enhances your woodworking journey.
Introduction to Workbenches

A woodworking workbench is an indispensable tool for any woodworker, providing a stable and versatile platform for a wide range of tasks. It serves as a central hub for cutting, shaping, assembling, and finishing projects, enhancing accuracy, efficiency, and overall woodworking experience.
Workbench Features and Components
A well-designed workbench incorporates several key features and components that contribute to its functionality and durability. These include:
- Work Surface: The work surface is the primary area for working on projects. It should be flat, sturdy, and resistant to wear and tear. Common materials include solid wood, plywood, or a combination of both.
- Base: The base provides stability and support for the work surface. It can be constructed from wood, metal, or a combination of materials. A robust base ensures that the workbench remains steady even when working on large or heavy projects.
- Vise: A vise is a crucial component for securely holding workpieces while cutting, shaping, or assembling. It allows for hands-free operation, improving accuracy and safety.
- Storage: Adequate storage is essential for organizing tools, materials, and projects. Workbenches often incorporate drawers, shelves, or pegboards for convenient storage and easy access.
- Workholding Devices: Workholding devices, such as clamps, stops, and jigs, help secure workpieces in specific positions, ensuring accuracy and repeatability in woodworking tasks.
Workbench Styles
Workbenches come in various styles, each tailored to specific woodworking needs and preferences. Some common styles include:
- Traditional Workbench: Traditional workbenches are characterized by their robust construction, often featuring a heavy wooden base, a thick work surface, and a sturdy vise. These workbenches are ideal for general woodworking tasks, including hand tool work, power tool operations, and assembly.
- Modern Workbench: Modern workbenches often incorporate sleek designs and innovative features. They may utilize lightweight materials, such as aluminum or steel, and feature adjustable work surfaces, integrated storage, and power outlets. These workbenches are well-suited for smaller workshops or for those seeking a contemporary aesthetic.
- Mobile Workbench: Mobile workbenches offer flexibility and portability. They are typically equipped with wheels or casters, allowing for easy movement around the workshop. Mobile workbenches are particularly useful for smaller spaces or for tasks that require working in different locations.
Workbench Plans

Building a workbench is a rewarding project that can significantly enhance your woodworking experience. With a well-designed workbench, you’ll have a dedicated space for cutting, assembling, and finishing your projects, making the process more efficient and enjoyable. Choosing the right workbench plan is crucial to ensure it meets your specific needs and preferences.
Factors to Consider When Selecting a Workbench Plan
When choosing a workbench plan, several factors should be considered to ensure the final product aligns with your requirements and space limitations.
- Size: The size of your workbench should accommodate the largest projects you plan to work on. Consider the dimensions of your workshop and the space you have available. A standard workbench is typically 6-8 feet long and 2-3 feet deep.
- Materials: Workbench plans can be made from various materials, each with its own advantages and disadvantages. Popular choices include wood, metal, and a combination of both. Wood is generally more affordable and easy to work with, while metal offers greater durability and strength.
- Budget: The cost of materials and tools can vary significantly depending on the chosen design and materials. Setting a budget beforehand will help you narrow down your options and choose a plan that fits your financial constraints.
- Intended Use: The intended use of your workbench will influence the design and features you select. If you plan to use it for heavy-duty woodworking, a sturdy and robust design is essential. If you primarily focus on smaller projects, a more compact and lightweight workbench might be more suitable.
Comparing and Contrasting Workbench Plan Designs, Woodworking work bench plans
Various workbench plans are available, each with unique features and benefits.
- Traditional Workbench: This classic design typically features a sturdy top supported by legs and often includes a vice for holding workpieces. Traditional workbenches are versatile and can handle a wide range of woodworking tasks.
- Mobile Workbench: These workbenches are designed with wheels for easy movement, making them ideal for workshops with limited space or for projects requiring portability. They often have a smaller footprint than traditional workbenches.
- Folding Workbench: Folding workbenches are space-saving options that can be easily stored away when not in use. They are typically made from lightweight materials and are well-suited for smaller projects or hobbyists with limited space.
Customizing a Workbench Plan
Once you’ve chosen a plan, consider customizing it to meet your specific needs and preferences.
- Adding Storage: Incorporate shelves, drawers, or cabinets to provide storage for tools, materials, and other woodworking essentials.
- Modifying the Work Surface: You can adjust the size, material, or thickness of the work surface to suit your specific projects. For example, you might choose a thicker surface for heavy-duty woodworking or a laminated surface for easy cleaning.
- Adding Accessories: Consider adding accessories like a vise, tool holders, or power outlet strips to enhance the functionality of your workbench.
Building a Workbench from Plans
Now that you have a plan, let’s get started on building your workbench. This section will guide you through the process of gathering the necessary materials and tools, and provide step-by-step instructions for constructing a sturdy and functional workbench.
Essential Tools and Materials
Having the right tools and materials is crucial for a successful workbench build.
- Power Tools:
- Circular Saw: For making accurate cuts in plywood and lumber.
- Drill/Driver: For drilling pilot holes and driving screws.
- Jigsaw: For cutting curves and intricate shapes.
- Router: For creating edges and profiles (optional).
- Sanding Tools: Belt sander, orbital sander, or random orbit sander for smoothing surfaces.
- Hand Tools:
- Measuring Tape: For precise measurements.
- Level: To ensure the workbench is level.
- Clamps: To hold pieces together securely during assembly.
- Hammer: For driving nails and securing fasteners.
- Chisels: For shaping wood and removing excess material.
- Screwdrivers: For driving screws.
- Pencil: For marking wood.
- Safety Glasses: For eye protection.
- Work Gloves: For hand protection.
- Materials:
- Lumber: Choose high-quality, kiln-dried lumber for the frame and top. Consider hardwoods like maple, oak, or cherry for durability. Pine or fir are less expensive alternatives.
- Plywood: For the workbench top, choose a plywood that is thick and strong enough to withstand the weight of your tools and projects. Baltic birch plywood is a popular choice for its durability and smooth surface.
- Fasteners: Choose screws or bolts that are long enough to secure the pieces of the workbench together. Use galvanized screws for added resistance to rust.
- Wood Glue: Use a high-quality wood glue to bond the pieces of the workbench together.
- Finishing Products: Choose a finish that will protect the wood from scratches and spills. Oil-based finishes are popular for their durability, while water-based finishes are easier to apply and clean up.
Workbench Construction Steps
- Step 1: Prepare the Work Area
- Ensure a clean and well-lit workspace.
- Clear any obstacles that could cause tripping hazards.
- Wear appropriate safety gear, including safety glasses and work gloves.
- Step 2: Cut the Lumber
- Carefully measure and mark the lumber according to the workbench plans.
- Use a circular saw or other appropriate saw to make precise cuts.
- Double-check the measurements to ensure accuracy.
- Step 3: Assemble the Frame
- Use wood glue and screws or bolts to join the frame pieces together.
- Use clamps to hold the pieces in place while the glue dries.
- Ensure the frame is square and level before securing the joints.
- Step 4: Attach the Top
- Cut the plywood to the desired size and shape for the workbench top.
- Secure the plywood to the frame using screws or bolts.
- Make sure the top is flush with the frame.
- Step 5: Sand and Finish
- Sand the entire workbench, paying particular attention to any rough edges or imperfections.
- Apply a finish to the workbench, such as oil, varnish, or paint, to protect the wood and enhance its appearance.
Safety Tips and Best Practices
- Use appropriate safety gear, including safety glasses, work gloves, and a dust mask, to protect yourself from injuries and dust inhalation.
- Always double-check your measurements to ensure accuracy. A small error can lead to a significant problem later on.
- Use clamps to hold pieces together while the glue dries to prevent them from moving or warping.
- Use a level to ensure that the workbench is level, both from side to side and front to back. This will make the workbench more stable and prevent it from wobbling.
- Take your time and work carefully. Building a workbench is a process that requires patience and attention to detail.
- If you are not comfortable using a power tool, seek help from a more experienced woodworker. Safety should always be your top priority.
Workbench Accessories and Enhancements

A well-equipped workbench is a joy to work with. It can make your projects easier, faster, and more enjoyable. You can add many accessories to your workbench to improve its functionality.
Workbench accessories can be divided into two categories: essential and optional. Essential accessories are those that are necessary for basic woodworking tasks, such as clamping and holding workpieces. Optional accessories are those that can make your workbench more versatile and efficient, such as tool holders and work surfaces.
Essential Workbench Accessories
These accessories are crucial for safe and effective woodworking.
- Vise: A vise is a must-have for any workbench. It securely holds workpieces in place, allowing you to work on them with both hands. There are many different types of vises available, each with its own advantages and disadvantages. For example, a quick-release vise is great for quick clamping, while a heavy-duty vise is better for holding large or heavy workpieces.
- Clamps: Clamps are essential for holding workpieces together, whether you’re gluing them or just holding them in place while you work. There are many different types of clamps available, each with its own purpose. For example, bar clamps are great for holding large workpieces, while spring clamps are good for smaller projects.
- Tool Holders: Tool holders keep your tools organized and within easy reach. You can use pegboards, magnetic strips, or even simple hooks to hang your tools. Tool holders can be attached to the side of your workbench or placed on a dedicated tool rack.
- Work Surface: The work surface of your workbench should be durable and flat. A good work surface will protect your tools and provide a stable base for your projects. Some popular materials for work surfaces include plywood, MDF, and solid wood.
Custom Workbench Accessories
You can design and build your own custom accessories to enhance your workbench’s functionality.
- Outfeed Table: An outfeed table is a separate table placed behind your workbench. It provides a stable surface for supporting long workpieces as you push them through a saw or other power tools. You can build an outfeed table from scrap wood or purchase a pre-made one.
- Tool Trays: Tool trays can be built to store small tools and hardware. These trays can be mounted on the sides of your workbench or placed underneath it. You can use wood, metal, or even plastic to create tool trays.
- Storage Cabinets: Storage cabinets are great for storing tools and materials that you don’t use every day. You can build a storage cabinet to fit your workbench’s dimensions or purchase a pre-made one.
Popular Workbench Accessories
This table lists some popular workbench accessories and their descriptions and uses.
| Accessory | Description | Uses |
|---|---|---|
| Vise | A vise is a clamping device used to hold workpieces securely in place. | Holding workpieces for cutting, shaping, or drilling. |
| Clamps | Clamps are used to hold workpieces together, whether you’re gluing them or just holding them in place while you work. | Holding workpieces together for gluing, clamping workpieces for sanding or planing, and holding workpieces for drilling. |
| Tool Holders | Tool holders are used to organize and store tools. | Keeping tools organized and within easy reach. |
| Work Surface | The work surface of a workbench should be durable and flat. | Providing a stable base for workpieces and protecting tools. |
| Outfeed Table | An outfeed table is a separate table placed behind the workbench to support long workpieces. | Providing a stable surface for supporting long workpieces as you push them through a saw or other power tools. |
| Tool Trays | Tool trays are used to store small tools and hardware. | Keeping small tools and hardware organized and within easy reach. |
| Storage Cabinets | Storage cabinets are used to store tools and materials that you don’t use every day. | Storing tools and materials that are not used regularly. |
Workbench Maintenance and Care
Just like any other tool in your workshop, your workbench requires regular maintenance and care to ensure it remains sturdy and functional for years to come. Neglecting upkeep can lead to wear and tear, weakening the structure and impacting its performance.
Cleaning and Inspection
A clean workbench is a happy workbench. Regularly cleaning your workbench not only keeps it looking good but also helps prevent the build-up of dust, grime, and debris that can damage the surface and tools.
- Wipe down the work surface with a damp cloth to remove sawdust and other debris. Use a mild cleaner if necessary, but avoid harsh chemicals that can damage the wood.
- Inspect the workbench for any signs of wear and tear, such as loose joints, cracks in the wood, or damage to the work surface. Address these issues promptly to prevent further deterioration.
- Check the vise and other hardware for proper function and tighten any loose screws or bolts.
Repairing Common Workbench Issues
Over time, your workbench may experience some wear and tear, requiring repairs to maintain its functionality.
- Damaged Work Surfaces: If the work surface is scratched or gouged, you can repair it by sanding the affected area and applying a new finish. For deeper damage, you may need to replace the entire work surface.
- Loose Joints: Loose joints can be tightened by applying wood glue and clamping the joint until the glue dries. If the joint is severely damaged, you may need to reinforce it with additional wood or metal brackets.
Extending the Lifespan
With proper care, your workbench can last for generations.
- Use a Workbench Mat: A workbench mat provides a protective layer between your work surface and your tools, reducing the risk of scratches and dents. You can choose from a variety of materials, such as rubber, plastic, or even leather.
- Avoid Direct Sunlight and Moisture: Excessive sunlight can cause the wood to fade and crack, while moisture can lead to warping and rot. Keep your workbench in a well-ventilated area away from direct sunlight and moisture sources.
- Regularly Oil or Wax the Work Surface: Applying a protective finish, such as oil or wax, helps to seal the wood and protect it from moisture, stains, and scratches. Reapply the finish as needed to maintain its effectiveness.
Final Wrap-Up
With the right workbench plan, you’ll have a solid foundation for years of woodworking enjoyment. Whether you’re building intricate furniture, delicate crafts, or simply enjoying the process of working with wood, a well-built workbench will become your trusted companion, supporting your projects and fueling your creativity. So, dive into the world of workbench plans, explore the options, and embark on a rewarding journey of crafting a space that reflects your passion and skills.
Commonly Asked Questions: Woodworking Work Bench Plans
What are the most common materials used for workbenches?
Common materials include hardwoods like maple, oak, and cherry for durability and stability. Plywood, MDF, and even metal are also used for specific applications.
How do I choose the right size for my workbench?
Consider the size of your projects, the space available in your workshop, and your working height. A good rule of thumb is to have at least 2-3 feet of workspace on either side of your primary working area.
What are some essential workbench accessories?
Vices, clamps, tool holders, work surfaces (like butcher block or steel), and storage solutions are essential for efficient and organized woodworking.
How often should I maintain my workbench?
Regularly clean and inspect your workbench, tighten loose joints, and re-apply finishes as needed to keep it in top shape.
Woodworking work bench plans are a great way to get started with building your own furniture. You can find plans for all sorts of benches, from simple workbenches to elaborate dining tables. If you’re looking for some inspiration, check out these woodworking plans benches that will help you get started.
Once you’ve got your bench plans, you can start building your own masterpiece!
