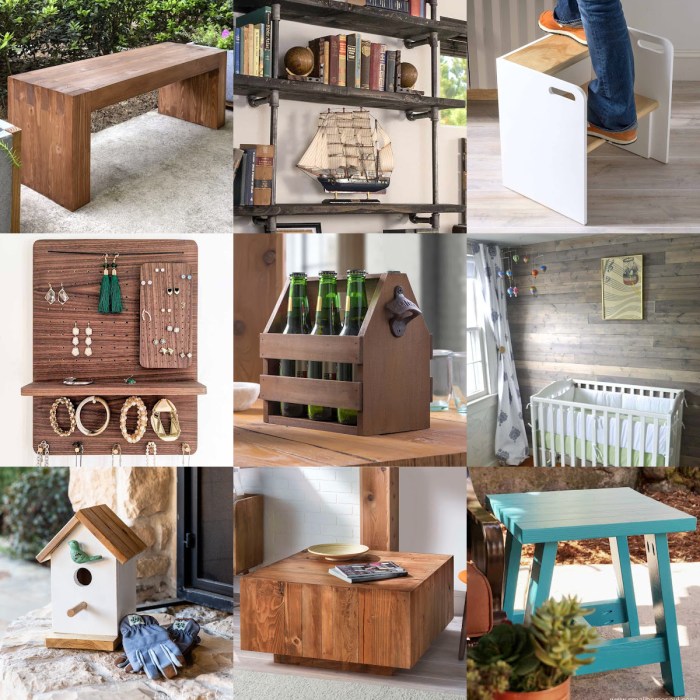
DIY woodworking projects offer a rewarding way to unleash your creativity, transform your living space, and build something truly unique. Whether you’re a seasoned craftsman or a curious beginner, the world of woodworking provides a fulfilling outlet for self-expression and practical skills.
From simple shelves to intricate furniture, woodworking projects can range in complexity, allowing you to challenge yourself and learn new techniques as you progress. The process itself is inherently satisfying, offering a sense of accomplishment with each completed project.
The Allure of DIY Woodworking
The world of woodworking is a captivating realm where creativity meets craftsmanship, offering a rewarding and fulfilling experience for individuals of all ages and skill levels. The allure of DIY woodworking lies in its ability to transform raw materials into functional and beautiful pieces, fostering a sense of accomplishment and satisfaction.
Benefits of Woodworking as a Hobby
Woodworking offers numerous benefits that contribute to a fulfilling lifestyle.
- Stress Relief: Engaging in woodworking provides a therapeutic escape from the stresses of daily life. The repetitive motions of cutting, sanding, and shaping wood can have a calming effect, allowing the mind to focus on the task at hand.
- Creativity: Woodworking provides a canvas for unleashing creativity, allowing individuals to design and build unique pieces that reflect their personal style and preferences.
- Sense of Accomplishment: The satisfaction of completing a woodworking project from start to finish is a rewarding experience. Seeing a vision come to life through one’s own hands instills a sense of pride and accomplishment.
Examples of How Woodworking Contributes to a Fulfilling Lifestyle
Woodworking can be incorporated into various aspects of life, enhancing the overall quality of living.
- Home Improvement: Building furniture, cabinets, or decorative elements can add a personal touch to a home and create a more comfortable and inviting environment.
- Gifting: Handcrafted wooden gifts, such as cutting boards, picture frames, or toys, are thoughtful and unique presents that demonstrate care and effort.
- Community Involvement: Woodworking skills can be shared with others through workshops, classes, or volunteer projects, fostering a sense of community and connection.
Essential Tools and Materials
Starting a woodworking journey requires the right tools and materials. Choosing the right ones can make a significant difference in your projects’ quality and efficiency. This section will guide you through the essentials, helping you build a well-equipped workshop.
Essential Woodworking Tools
A well-stocked woodworking toolbox is a valuable asset for any DIY enthusiast. It should contain a collection of tools that can handle a wide range of tasks. Here is a list of essential tools, their uses, and recommended brands:
| Tool | Uses | Recommended Brands |
|---|---|---|
| Measuring Tape | Measuring lengths and distances accurately. | Stanley, DeWalt, Bosch |
| Combination Square | Creating accurate 90-degree angles and measuring distances. | Starrett, Swanson, Empire |
| Hand Saw | Cutting wood along straight lines. | Stanley, DeWalt, Craftsman |
| Circular Saw | Cutting wood with precision and speed. | DeWalt, Bosch, Makita |
| Jig Saw | Cutting intricate shapes and curves in wood. | Bosch, DeWalt, Ryobi |
| Drill | Drilling holes and driving screws. | DeWalt, Bosch, Makita |
| Sandpaper | Smoothing and refining wood surfaces. | 3M, Norton, Klingspor |
| Clamps | Holding pieces of wood together securely during assembly. | Bessey, Irwin, Jorgensen |
| Chisels | Shaping and carving wood. | Stanley, Narex, Pfeil |
Common Woodworking Materials
The choice of wood for your projects depends on factors like durability, appearance, and budget. Here’s a list of common woodworking materials, their properties, and typical applications:
- Pine: Softwood, lightweight, affordable, easy to work with. Often used for furniture, trim, and construction.
- Oak: Hardwood, strong, durable, with a beautiful grain. Popular for furniture, flooring, and cabinetry.
- Maple: Hardwood, strong, with a smooth, fine grain. Used for furniture, flooring, and musical instruments.
- Cherry: Hardwood, with a rich reddish-brown color. Popular for furniture, cabinets, and trim.
- Walnut: Hardwood, with a beautiful dark brown color and distinctive grain. Used for furniture, cabinets, and veneers.
- Plywood: Made from thin layers of wood veneer glued together. Strong, stable, and affordable. Used for construction, furniture, and crafts.
- MDF (Medium-Density Fiberboard): Made from wood fibers compressed and bonded with resin. Smooth, dense, and affordable. Used for furniture, cabinets, and trim.
Selecting High-Quality Tools and Materials
Investing in high-quality tools and materials is crucial for woodworking projects. While cost is a factor, consider these tips for selecting tools and materials that fit your budget and project needs:
- Research: Read reviews and compare different brands and models to find the best value for your money.
- Consider your needs: If you’re a beginner, you might not need the most expensive tools. Start with a few essentials and gradually expand your collection as your skills improve.
- Shop around: Compare prices from different retailers and look for sales and discounts.
- Invest in quality: High-quality tools and materials will last longer and perform better, saving you money in the long run.
Beginner-Friendly Projects

Starting your woodworking journey can be exciting, but it’s also important to begin with projects that are manageable and build your skills gradually. Here are five beginner-friendly woodworking projects that will introduce you to basic techniques and provide a sense of accomplishment.
Simple Wooden Coasters
These coasters are a great way to practice cutting, sanding, and finishing techniques. You can use scrap wood or purchase inexpensive boards from your local hardware store.
Materials
*
- Wood boards (1/4″ thick)
- Saw (hand saw or jigsaw)
- Sandpaper (various grits)
- Wood glue
- Wood finish (stain or polyurethane)
- Measuring tape
- Pencil
- Safety glasses
- Dust mask
Steps
- Cut the wood: Measure and cut the wood into squares or circles using a saw. Wear safety glasses and a dust mask during this step.
- Sand the edges: Smooth out the edges of the coasters using sandpaper. Start with a coarse grit and work your way up to a fine grit.
- Apply wood glue: If you want to create a layered coaster, apply wood glue to the edges of two pieces of wood and clamp them together until the glue dries.
- Apply wood finish: Once the glue is dry, apply a wood finish to the coasters. This will protect the wood and enhance its appearance.
- Let the finish dry: Allow the finish to dry completely before using the coasters.
Safety Tip: When working with power tools, always wear safety glasses and ear protection.
Finished Project
Imagine a set of four coasters, each crafted from different types of wood like cherry, maple, and walnut. The coasters have a smooth, polished finish and display a beautiful grain pattern.
Wooden Picture Frame
This project will teach you how to cut mitered joints, which are essential for creating professional-looking frames. You can personalize the frame by adding decorative elements or using different wood types.
Materials
*
- Wood boards (1/2″ thick)
- Miter saw or hand saw
- Sandpaper (various grits)
- Wood glue
- Finishing nails or brads
- Measuring tape
- Pencil
- Safety glasses
- Dust mask
Steps
- Measure and cut the wood: Measure the picture you want to frame and cut the wood pieces to the appropriate length. Cut the pieces at a 45-degree angle using a miter saw or hand saw to create mitered joints.
- Sand the edges: Sand the edges of the frame pieces to smooth out any rough spots.
- Assemble the frame: Apply wood glue to the mitered joints and carefully join the frame pieces together. Use finishing nails or brads to secure the joints.
- Finish the frame: Once the glue is dry, sand the frame again and apply a wood finish.
Safety Tip: When using a miter saw, always keep your fingers away from the blade.
Finished Project
Picture a beautifully crafted wooden frame with mitered corners, highlighting a cherished photograph or artwork. The frame could be stained in a rich walnut color, adding a touch of elegance to the piece.
Simple Wooden Shelf
This project is perfect for adding storage space to your home or office. You can adjust the size and design to fit your needs.
Materials
*
- Wood boards (1″ thick)
- Saw (hand saw or circular saw)
- Sandpaper (various grits)
- Wood screws
- Drill
- Measuring tape
- Pencil
- Level
- Safety glasses
- Dust mask
Steps
- Cut the wood: Measure and cut the wood for the shelf and supports using a saw.
- Sand the edges: Sand the edges of the shelf and supports to smooth out any rough spots.
- Assemble the shelf: Attach the supports to the wall using screws. Then, place the shelf on top of the supports and secure it with screws.
- Finish the shelf: Apply a wood finish to the shelf and supports if desired.
Safety Tip: When drilling into walls, make sure there are no electrical wires or plumbing pipes in the way.
Finished Project
Imagine a sturdy wooden shelf mounted on a wall, providing extra space for books, plants, or decorative items. The shelf could be stained in a light oak color, blending seamlessly with the surrounding décor.
Wooden Cutting Board
This project is practical and fun to make. You can personalize it by adding a handle or carving a design into the surface.
Materials
*
- Wood board (1″ thick)
- Saw (hand saw or jigsaw)
- Sandpaper (various grits)
- Mineral oil or beeswax
- Measuring tape
- Pencil
- Safety glasses
- Dust mask
Steps
- Cut the wood: Measure and cut the wood to the desired size for your cutting board.
- Sand the edges: Sand the edges of the cutting board to smooth out any rough spots.
- Apply mineral oil or beeswax: Apply mineral oil or beeswax to the cutting board to seal the wood and protect it from moisture.
- Let the oil or wax dry: Allow the oil or wax to dry completely before using the cutting board.
Safety Tip: Always use a separate cutting board for raw meat and poultry to prevent cross-contamination.
Finished Project
Picture a beautiful cutting board crafted from maple wood. The board has a smooth, polished surface, and a handle carved into one end for easy grip. It’s ready to serve as a practical and stylish addition to your kitchen.
Wooden Birdhouse
This project allows you to create a welcoming habitat for birds in your backyard. You can customize the design and add decorative elements to make it unique.
Materials
*
- Wood boards (1/2″ thick)
- Saw (hand saw or jigsaw)
- Sandpaper (various grits)
- Wood glue
- Finishing nails or brads
- Measuring tape
- Pencil
- Safety glasses
- Dust mask
Steps
- Cut the wood: Measure and cut the wood pieces for the birdhouse using a saw.
- Sand the edges: Sand the edges of the birdhouse pieces to smooth out any rough spots.
- Assemble the birdhouse: Apply wood glue to the edges of the birdhouse pieces and carefully join them together. Use finishing nails or brads to secure the joints.
- Add a roof: Attach a roof to the birdhouse using wood glue and nails.
- Add an entrance hole: Cut an entrance hole in the front of the birdhouse. The size of the hole should be appropriate for the type of bird you want to attract.
- Hang the birdhouse: Attach a hook or wire to the top of the birdhouse and hang it in a safe location in your yard.
Safety Tip: When using a saw, always keep your fingers away from the blade.
Finished Project
Imagine a charming birdhouse crafted from cedar wood. The house has a small, peaked roof and a decorative entrance hole. It’s painted in bright colors and features a whimsical design, making it a delightful addition to your backyard.
Intermediate and Advanced Projects: Diy Woodworking Projects
Once you’ve mastered the basics of woodworking, you’re ready to tackle more challenging projects that require more complex techniques and precision. These projects will allow you to experiment with different joinery methods, explore a wider range of finishing techniques, and create pieces that showcase your growing woodworking skills.
Intermediate Woodworking Projects
Intermediate woodworking projects are perfect for those who want to expand their skills beyond basic projects. They typically involve more intricate joinery, advanced finishing techniques, and require a higher level of precision. These projects will challenge your skills and help you develop a deeper understanding of woodworking principles.
Here are three examples of intermediate woodworking projects:
Building a Coffee Table
Building a coffee table is a great way to practice joinery and learn how to create a piece of furniture with a complex design. You can choose from a variety of joinery techniques, such as mortise and tenon joints, dovetail joints, or pocket hole joinery, depending on your skill level and the style of the table. You can also experiment with different finishes, such as stain, paint, or varnish, to achieve the desired look.
The tools and materials needed for building a coffee table include:
- Woodworking tools: saw, drill, sander, router, etc.
- Materials: lumber (hardwood or softwood), wood glue, screws, finish (stain, paint, varnish), etc.
- Hardware: legs, casters, etc.
Constructing a Bookshelf
Building a bookshelf is another great way to practice joinery and learn how to create a piece of furniture with a functional design. You can choose from a variety of styles, such as a simple freestanding bookshelf or a more elaborate built-in bookshelf. You can also experiment with different materials, such as plywood, MDF, or hardwood, depending on your budget and desired aesthetic.
The tools and materials needed for building a bookshelf include:
- Woodworking tools: saw, drill, sander, router, etc.
- Materials: lumber (plywood, MDF, or hardwood), wood glue, screws, finish (stain, paint, varnish), etc.
- Hardware: shelves, brackets, etc.
Crafting a Wooden Picture Frame
Crafting a wooden picture frame is a great way to practice woodworking techniques and create a personalized piece of art. You can choose from a variety of styles, such as a simple rectangular frame or a more elaborate ornate frame. You can also experiment with different materials, such as hardwood, softwood, or even reclaimed wood.
The tools and materials needed for crafting a wooden picture frame include:
- Woodworking tools: saw, drill, sander, router, etc.
- Materials: lumber (hardwood, softwood, or reclaimed wood), wood glue, screws, finish (stain, paint, varnish), etc.
- Hardware: glass, backing board, etc.
Advanced Woodworking Projects
Advanced woodworking projects are for those who have mastered the basics and are ready to take their skills to the next level. These projects often involve complex joinery, intricate designs, and advanced finishing techniques. They require a high level of precision, attention to detail, and a thorough understanding of woodworking principles.
Here are three examples of advanced woodworking projects:
Building a Custom Cabinet
Building a custom cabinet is a challenging project that requires a high level of precision and attention to detail. You will need to be proficient in a variety of woodworking techniques, such as joinery, finishing, and hardware installation. You will also need to be able to create accurate drawings and plans to ensure that the cabinet fits perfectly in its intended space.
The tools and materials needed for building a custom cabinet include:
- Woodworking tools: saw, drill, sander, router, etc.
- Materials: lumber (hardwood or softwood), wood glue, screws, finish (stain, paint, varnish), etc.
- Hardware: hinges, drawer slides, knobs, etc.
Crafting a Wooden Boat
Crafting a wooden boat is a truly ambitious woodworking project that requires a high level of skill and dedication. You will need to be proficient in a variety of woodworking techniques, including joinery, bending wood, and finishing. You will also need to be able to read and interpret boat plans, as well as understand the principles of boat design.
The tools and materials needed for crafting a wooden boat include:
- Woodworking tools: saw, drill, sander, router, etc.
- Materials: lumber (hardwood or softwood), wood glue, screws, finish (paint, varnish), etc.
- Hardware: rigging, oars, etc.
Constructing a Wooden Staircase
Constructing a wooden staircase is a challenging project that requires a high level of precision and attention to detail. You will need to be proficient in a variety of woodworking techniques, including joinery, finishing, and hardware installation. You will also need to be able to create accurate drawings and plans to ensure that the staircase is safe and structurally sound.
The tools and materials needed for constructing a wooden staircase include:
- Woodworking tools: saw, drill, sander, router, etc.
- Materials: lumber (hardwood or softwood), wood glue, screws, finish (stain, paint, varnish), etc.
- Hardware: handrails, balusters, etc.
Woodworking Styles and Techniques

Woodworking styles and techniques are diverse, reflecting the creativity and ingenuity of woodworkers throughout history. Understanding these styles and techniques will allow you to create projects that align with your aesthetic preferences and technical abilities.
Woodworking Styles
Woodworking styles encompass the overall aesthetic and design principles that guide a project’s creation. Each style has unique characteristics that influence the choice of materials, finishes, and construction methods.
- Rustic: This style embraces the natural beauty of wood, showcasing its knots, grain patterns, and imperfections. Rustic furniture often features heavy timbers, distressed finishes, and simple, functional designs. Examples include farmhouse tables, reclaimed wood benches, and rustic cabinets.
- Modern: Modern woodworking emphasizes clean lines, minimalist designs, and sleek silhouettes. It often incorporates contemporary materials like metal and glass, creating a sophisticated and functional aesthetic. Examples include mid-century modern chairs, minimalist bookshelves, and sleek coffee tables.
- Traditional: Traditional woodworking draws inspiration from historical styles, featuring intricate details, ornate carvings, and classic designs. It often utilizes traditional joinery techniques and finishes, creating a timeless and elegant look. Examples include Victorian-era furniture, antique clocks, and handcrafted wooden toys.
Woodworking Techniques
Woodworking techniques are the methods and processes used to shape, join, and finish wood. Each technique requires specific tools and skills, allowing for a wide range of creative possibilities.
Hand-Tool Techniques
Hand-tool techniques rely on manual dexterity and precision, allowing for intricate work and a personal touch. These techniques often involve using chisels, planes, saws, and other hand tools to shape and join wood.
- Chiseling: Chiseling involves using a chisel to remove wood from a workpiece, creating precise cuts, grooves, and shapes. It’s a versatile technique used for carving, shaping, and creating decorative details.
- Planing: Planing involves using a plane to smooth and flatten wood surfaces, creating a consistent and even finish. It’s a crucial technique for preparing wood for joinery and creating smooth, polished surfaces.
- Sawing: Sawing involves using a saw to cut wood into desired shapes and sizes. Different types of saws are used for various tasks, such as crosscutting, ripping, and intricate cuts.
- Hand-Cut Joinery: Hand-cut joinery involves creating precise cuts and joints using hand tools, such as chisels, saws, and planes. These techniques are essential for creating strong and durable connections between pieces of wood, ensuring a stable and long-lasting construction.
Power Tool Techniques
Power tools significantly enhance woodworking efficiency and precision, allowing for complex cuts, shaping, and finishing tasks. These techniques utilize tools like routers, sanders, and drills to achieve specific results.
- Routing: Routing involves using a router to create precise cuts, grooves, and profiles in wood. It’s a versatile technique used for creating decorative edges, moldings, and intricate details.
- Sanding: Sanding involves using a sander to smooth and refine wood surfaces, creating a consistent and polished finish. It’s an essential technique for removing imperfections, achieving desired textures, and preparing wood for finishing.
- Drilling: Drilling involves using a drill to create holes in wood, allowing for fastening, creating decorative details, or preparing for other processes.
Carving
Carving is a specialized woodworking technique that involves using hand tools to sculpt and shape wood into three-dimensional forms. It requires patience, skill, and a keen eye for detail, allowing for the creation of intricate and artistic pieces.
- Relief Carving: Relief carving involves carving a design into the surface of wood, creating a raised image or pattern. It’s a popular technique for creating decorative elements, such as picture frames, furniture inlays, and wall hangings.
- Round Carving: Round carving involves carving a three-dimensional form from a block of wood, creating sculptures, figurines, and other free-standing pieces. It requires a high level of skill and precision to create realistic shapes and details.
Woodworking Safety

Woodworking is a rewarding hobby and profession, but it also involves inherent risks. Safety should be a top priority in every woodworking project, from simple crafts to complex furniture building. Neglecting safety can lead to serious injuries, so it’s crucial to understand and implement proper safety practices.
Common Woodworking Hazards and Safety Precautions
Woodworking involves numerous hazards, but with proper precautions, most injuries can be prevented. Here are some common hazards and corresponding safety measures:
- Sharp Tools: Knives, chisels, saws, and other sharp tools are essential for woodworking. Always handle them with care, using appropriate cutting techniques and keeping them sharp. Dull tools require more force, increasing the risk of slippage and injuries.
- Power Tools: Power tools like table saws, routers, and sanders can be extremely dangerous if used improperly. Always use safety guards, follow operating instructions, and maintain tools in good working condition.
- Dust and Fumes: Woodworking generates dust and fumes that can be harmful to your respiratory system. Use dust collection systems, wear a respirator mask, and work in a well-ventilated area.
- Heavy Objects: Lifting and moving heavy pieces of wood can strain your back and cause injuries. Use proper lifting techniques, wear back support, and consider using lifting aids for heavy items.
- Loose Clothing and Jewelry: Loose clothing and jewelry can get caught in machinery, leading to serious injuries. Always wear close-fitting clothing and remove jewelry before operating power tools.
Proper Use of Safety Equipment
Safety equipment plays a vital role in protecting you from woodworking hazards. Here’s a breakdown of essential safety equipment and their proper usage:
- Eye Protection: Eye protection is crucial to prevent dust, wood chips, and flying debris from entering your eyes. Wear safety glasses or goggles that are specifically designed for woodworking.
- Hearing Protection: Power tools and other woodworking equipment can generate loud noises that can damage your hearing over time. Wear earplugs or earmuffs that provide adequate noise reduction.
- Dust Masks: Wood dust can irritate your respiratory system and cause long-term health problems. Wear a dust mask that provides adequate protection against wood dust particles.
Additional Safety Tips
- Clear Work Area: A clean and organized workspace reduces the risk of tripping and accidents. Clear away any clutter and ensure adequate lighting.
- Use the Right Tools: Choose the right tool for the job. Using the wrong tool can lead to accidents and inefficient work.
- Be Alert and Focused: Avoid distractions while working with power tools and sharp objects. Stay focused and alert to prevent accidents.
- Don’t Rush: Rushing can lead to mistakes and injuries. Take your time and work carefully, especially when using power tools.
- Take Breaks: Take regular breaks to avoid fatigue, which can increase the risk of accidents.
Resources for Woodworkers
The world of woodworking offers a wealth of resources to help you hone your skills, discover new techniques, and stay inspired. From online platforms to physical books and workshops, there’s a plethora of options to suit every woodworker’s needs.
Online Resources
Online resources provide a vast and readily accessible platform for woodworkers to learn, connect, and share their passion. Here are some valuable online resources:
- Woodworking Websites: Numerous websites offer woodworking tutorials, project plans, and articles covering various aspects of the craft. Popular websites include Woodworking for Mere Mortals, Popular Woodworking, and Fine Woodworking. These sites often feature step-by-step instructions, detailed plans, and expert tips.
- Online Forums and Communities: Online forums and communities provide a space for woodworkers to connect, ask questions, share their projects, and seek advice from fellow enthusiasts. Examples include Lumberjocks, Woodworking Talk, and the Reddit community r/woodworking. These platforms offer a valuable platform for learning, troubleshooting, and inspiration.
- YouTube Channels: YouTube is a treasure trove of woodworking content. Channels like “The Wood Whisperer,” “Paul Sellers,” and “Steve Ramsey” provide comprehensive tutorials, project walkthroughs, and tips for various woodworking techniques. These channels often feature detailed demonstrations and helpful advice.
Books and Magazines
Woodworking books and magazines offer a more in-depth and comprehensive approach to learning and exploring the craft. They often feature detailed instructions, project plans, and expert insights.
- Woodworking Books: There are numerous books available covering a wide range of woodworking topics, from beginner-friendly guides to advanced techniques. Some popular books include “The Complete Illustrated Guide to Woodworking” by George Walker, “The Woodworker’s Bible” by Taunton Press, and “The Anarchist’s Design Book” by Christopher Schwarz.
- Woodworking Magazines: Magazines such as “Fine Woodworking,” “Popular Woodworking,” and “Woodworking Magazine” provide regular updates on new techniques, project ideas, and product reviews. These magazines often feature articles by renowned woodworkers and provide insights into the latest trends in the craft.
Local Woodworking Clubs and Organizations
Local woodworking clubs and organizations offer a valuable opportunity to connect with other woodworkers in your community, share your passion, and learn from experienced individuals.
- Woodworking Clubs: Many cities and towns have woodworking clubs that meet regularly for workshops, demonstrations, and social gatherings. These clubs often provide a welcoming environment for beginners and experienced woodworkers alike.
- Woodworking Associations: National and regional woodworking associations offer resources, events, and networking opportunities for woodworkers. These associations often host conferences, workshops, and competitions.
Woodworking Courses and Workshops
Formal woodworking courses and workshops provide structured learning environments with expert guidance and hands-on experience.
- Community Colleges and Vocational Schools: Many community colleges and vocational schools offer woodworking courses and certificate programs. These programs provide comprehensive training in various woodworking techniques and skills.
- Private Workshops and Classes: Numerous woodworking instructors and studios offer private workshops and classes. These workshops often focus on specific techniques, projects, or styles.
The Impact of Woodworking

Woodworking, a craft deeply rooted in human history, has a profound impact on our world, shaping not only our built environment but also our social and economic landscapes. From the humble tools used by early artisans to the advanced machinery employed in modern workshops, woodworking has evolved alongside humanity, leaving an indelible mark on our lives.
Environmental Impact of Woodworking
The environmental impact of woodworking is multifaceted and can be both positive and negative, depending on the practices employed. Sustainable forestry practices are crucial to ensure the long-term availability of wood resources while minimizing harm to ecosystems.
- Sustainable Forestry: Responsible forestry practices prioritize reforestation, biodiversity conservation, and the health of forest ecosystems. This involves managing harvest rates, promoting natural regeneration, and protecting sensitive areas. Sustainable forestry ensures that wood resources are replenished for future generations while safeguarding the environment.
- Wood as a Renewable Resource: Wood is a renewable resource that can be harvested and replanted, unlike fossil fuels, which are finite. When managed sustainably, forests can act as carbon sinks, absorbing carbon dioxide from the atmosphere and mitigating climate change.
- Wood Products and Carbon Sequestration: Wood products, such as furniture, flooring, and building materials, store carbon for their lifespan. This carbon sequestration helps to reduce greenhouse gas emissions and contribute to a more sustainable future.
- Wood Waste and Recycling: Reducing waste and promoting recycling in woodworking is essential for minimizing environmental impact. Wood scraps can be repurposed for smaller projects, used as fuel for wood-burning stoves, or composted to enrich soil.
Social and Economic Impact of Woodworking
Woodworking has a significant social and economic impact, particularly in local communities and the craft economy. It provides employment opportunities, fosters craftsmanship, and contributes to the preservation of traditional skills.
- Local Communities and Craft Economy: Woodworking often thrives in local communities, supporting small businesses, artisans, and craft centers. It contributes to the cultural identity and economic vitality of these areas, promoting tourism and heritage preservation.
- Employment and Skills Development: Woodworking provides employment opportunities for skilled workers in various sectors, from furniture making to construction. It also fosters the development of craftsmanship, technical skills, and creative problem-solving abilities.
- Social Connections and Community Building: Woodworking can foster social connections and community building through workshops, shared spaces, and online forums. It allows individuals to connect with others who share a passion for the craft, learn from each other, and build lasting relationships.
- Economic Sustainability: Woodworking can contribute to economic sustainability by promoting the use of local materials, supporting small businesses, and creating value-added products. It can also help to revitalize rural areas and create new economic opportunities.
Woodworking Projects Promoting Sustainability and Social Good, Diy woodworking projects
Woodworking can be a powerful tool for promoting sustainability and social good. Numerous projects demonstrate the positive impact of the craft on communities and the environment.
- Community Furniture Projects: Many woodworking groups and organizations collaborate to create furniture for community centers, schools, or libraries, providing essential resources and fostering a sense of community.
- Sustainable Building and Construction: Woodworking plays a vital role in sustainable building and construction, utilizing renewable materials and reducing reliance on energy-intensive products. This includes building homes, schools, and community centers with wood frames and other sustainable materials.
- Upcycling and Repurposing: Woodworking is an excellent way to upcycle and repurpose old furniture, wood scraps, and other materials, giving them new life and reducing waste. This practice promotes resource conservation and reduces the demand for new materials.
- Educational Programs and Workshops: Woodworking programs and workshops can empower individuals with the skills and knowledge to create sustainable projects, repair furniture, and contribute to the circular economy. They also promote environmental awareness and responsible resource management.
Last Point

As you embark on your woodworking journey, remember that patience, practice, and a passion for the craft are your most valuable tools. With each project, you’ll gain confidence, refine your skills, and create lasting memories. So, grab your tools, choose your wood, and let your creativity flow – the world of DIY woodworking awaits!
FAQ Explained
What are the best beginner woodworking projects?
Simple projects like cutting boards, birdhouses, or small shelves are great for beginners. They allow you to practice basic techniques and build confidence.
What safety precautions should I take when woodworking?
Always wear safety glasses, hearing protection, and a dust mask. Use sharp tools properly and keep your workspace clean and organized.
Where can I find woodworking plans?
There are countless resources online, in books, and at woodworking stores. Search for “free woodworking plans” or visit websites like Ana White or Popular Woodworking.
DIY woodworking projects are a great way to add a personal touch to your home. Whether you’re looking to build a coffee table, a bookshelf, or even a whole new set of cabinets, you’ll need some solid plans. That’s where woodworking plans shelves come in.
With detailed instructions and diagrams, you can build beautiful and functional shelves that will fit perfectly in your space. So grab your tools and get ready to build something amazing!
