Bookshelf woodworking plans offer a fantastic way to create a personalized storage solution and enhance your home decor. Whether you’re a seasoned woodworker or just starting out, building a bookshelf provides a rewarding experience and a sense of accomplishment. From selecting the right design to mastering essential woodworking techniques, this guide will equip you with the knowledge and skills to build a beautiful and functional bookshelf.
The process begins with choosing a design that suits your space and style. There are endless possibilities, ranging from classic and timeless designs to modern and minimalist styles. Consider the size of your book collection, the available space in your home, and your personal aesthetic preferences. Once you’ve settled on a design, you’ll delve into the world of woodworking techniques, learning to cut, sand, and assemble wood with precision. You’ll discover how to create sturdy joints, utilize various tools, and achieve a professional finish.
Introduction to Bookshelf Woodworking

Building a bookshelf is a rewarding woodworking project that combines creativity, practicality, and a touch of craftsmanship. It’s a project that allows you to personalize your space, showcase your favorite books, and create a functional and aesthetically pleasing piece of furniture.
Woodworking as a hobby offers numerous benefits. It provides a creative outlet, encourages problem-solving skills, and promotes a sense of accomplishment. The process of designing, cutting, and assembling wood allows you to develop hand-eye coordination, spatial reasoning, and a deeper appreciation for the beauty of natural materials.
Essential Tools and Materials for Bookshelf Construction
Having the right tools and materials is crucial for successful bookshelf construction. Here’s a list of essential items you’ll need:
- Saw: A circular saw or a table saw is necessary for making precise cuts in the wood. A jigsaw can be used for intricate cuts or curved shapes.
- Drill: A cordless drill with various drill bits is essential for creating pilot holes and driving screws.
- Sandpaper: Sandpaper in various grits is used to smooth the wood surface and prepare it for finishing.
- Clamps: Clamps are used to hold wood pieces together while gluing or assembling.
- Measuring Tape: A measuring tape is essential for accurate measurements and marking cuts.
- Level: A level ensures that shelves are installed horizontally and the bookshelf is plumb.
- Wood Glue: Wood glue is used to bond wood pieces together.
- Wood Screws: Wood screws are used to fasten the bookshelf together.
- Wood: The type of wood you choose will depend on your preference and the style of bookshelf you’re building. Common options include pine, oak, maple, and plywood.
- Finish: A finish is applied to protect the wood and enhance its appearance. Options include paint, stain, or varnish.
Choosing the Right Bookshelf Design

The design of your bookshelf is more than just aesthetics; it plays a crucial role in functionality, storage capacity, and how it blends with your space. Choosing the right design involves considering your needs, the available space, and the overall style you’re aiming for.
Classic Bookshelf Designs, Bookshelf woodworking plans
Classic bookshelf designs are timeless and versatile, often featuring simple, elegant lines and a focus on functionality.
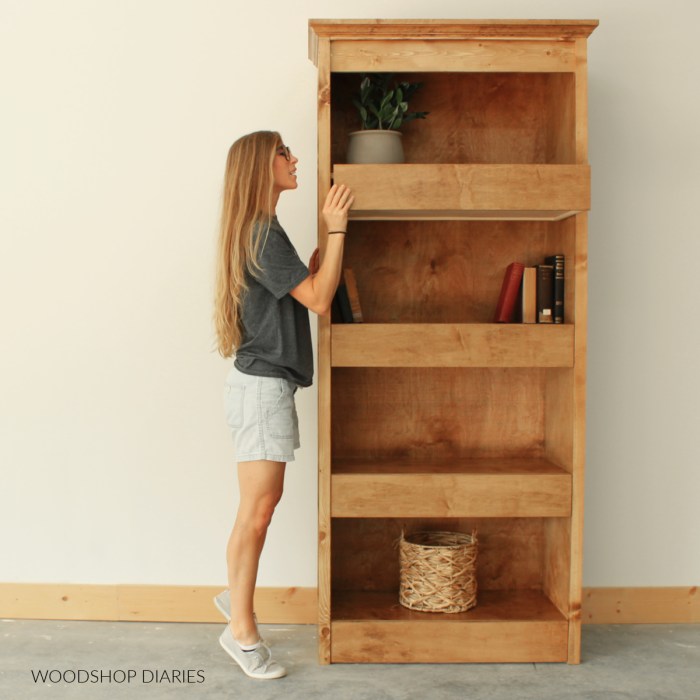
- Traditional Bookcases: These are often characterized by tall, upright structures with multiple shelves, providing ample storage space. They can be made from various materials like wood, metal, or a combination of both.
- Ladder Bookshelves: These unique designs resemble ladders with shelves attached to the rungs, creating an open and airy look. They are perfect for showcasing books and decorative items.
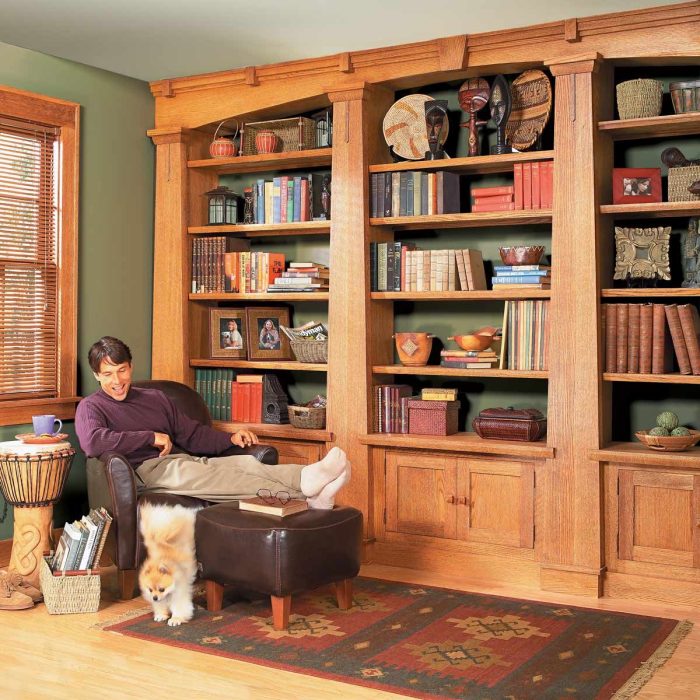
- Library-Style Bookshelves: Inspired by traditional libraries, these designs feature large, freestanding units with numerous shelves and often include decorative details like moldings or carvings.
Modern Bookshelf Designs
Modern bookshelf designs prioritize clean lines, minimalist aesthetics, and innovative materials.
- Floating Bookshelves: These shelves appear to float on the wall, creating a sleek and contemporary look. They are ideal for small spaces as they don’t take up floor space.
- Geometric Bookshelves: These designs incorporate geometric shapes like cubes, triangles, or circles, adding a unique and modern touch to any room. They can be customized to fit various spaces and styles.
- Industrial Bookshelves: These designs often feature metal accents, exposed pipes, and reclaimed wood, giving a raw and industrial feel. They are perfect for adding a touch of urban chic to a space.
Rustic Bookshelf Designs
Rustic bookshelf designs embrace natural materials and handcrafted elements, creating a warm and inviting atmosphere.
- Reclaimed Wood Bookshelves: These shelves are made from salvaged wood, often with visible knots, grains, and imperfections, giving them a unique and rustic charm.
- Barnwood Bookshelves: Inspired by old barns, these designs feature weathered wood planks and often incorporate metal accents for a rustic and industrial feel.
- Log Bookshelves: These shelves are made from whole logs or log slices, creating a natural and rustic look. They are perfect for adding a touch of the outdoors to any space.
Bookshelf Features: Open Shelves vs. Closed Cabinets
Choosing between open shelves and closed cabinets depends on your storage needs and aesthetic preferences.
- Open Shelves: Offer easy access to your books and allow you to showcase them. They can also be used to display decorative items.
- Closed Cabinets: Provide enclosed storage for books and other items, keeping them dust-free and hidden from view. They can also add a touch of formality to a space.
Bookshelf Features: Integrated Lighting
Integrated lighting can enhance the functionality and aesthetics of your bookshelf.
- Under-Shelf Lighting: Provides soft, focused light that illuminates books and other items on the shelves.
- Backlit Shelves: Creates a dramatic effect by illuminating the back of the shelves, highlighting the books and adding a warm glow to the space.
- Spotlight Lighting: Directs light onto specific books or decorative items, creating a museum-like display.
Choosing a Bookshelf Design Based on Space Constraints
Space constraints play a significant role in choosing the right bookshelf design.
- Small Spaces: Consider floating shelves, wall-mounted units, or compact designs that maximize vertical space.
- Large Spaces: You have more flexibility to choose larger, freestanding units or multiple smaller shelves to create a unique and personalized library space.
Choosing a Bookshelf Design Based on Personal Preferences
Your personal preferences should ultimately guide your decision.
- Style: Choose a design that complements your existing decor and personal taste.
- Functionality: Consider your storage needs, desired features, and how you plan to use the bookshelf.
- Budget: Set a budget and explore options that fit your financial constraints.
Essential Woodworking Techniques
Building a bookshelf involves several essential woodworking techniques that ensure a sturdy and aesthetically pleasing final product. Mastering these techniques will help you create a bookshelf that you’ll be proud to display in your home.
Cutting Wood
Cutting wood accurately and precisely is fundamental to woodworking. This involves using various tools and techniques depending on the cut’s complexity and the desired finish.
For straight cuts, a handsaw or a circular saw is commonly used. A handsaw requires more effort but offers greater control over the cut. A circular saw is faster and more efficient, especially for long, straight cuts.
For intricate cuts, a jigsaw is preferred. Its ability to navigate curves and irregular shapes makes it ideal for cutting out complex designs or creating unique shapes for your bookshelf.
Always wear safety goggles and hearing protection when using power tools.
Sanding Wood
Sanding is crucial for creating a smooth surface and removing imperfections from the wood. It also prepares the wood for finishing by creating a consistent texture.
The sanding process involves using sandpaper with varying grits, starting with a coarser grit to remove larger imperfections and ending with a finer grit to achieve a smooth finish. Sanding can be done manually using sandpaper or using a power sander for faster and more efficient results.
Sanding in the direction of the wood grain helps prevent scratches and ensures a smooth finish.
Assembling Wood
Assembling the bookshelf requires joining the various pieces of wood securely. This involves using different types of woodworking joints that provide strength and stability to the structure.
Here are some common woodworking joints used in bookshelf construction:
Common Woodworking Joints
| Joint Type | Description | Advantages | Disadvantages |
|---|---|---|---|
| Dovetail Joint | A strong and decorative joint that uses interlocking, tapered pins and slots. | Strong, durable, and aesthetically pleasing. | Requires specialized tools and more time to cut. |
| Mortise and Tenon Joint | A strong and traditional joint that uses a rectangular hole (mortise) and a protruding pin (tenon). | Strong, durable, and easy to assemble. | Requires specialized tools and more time to cut. |
| Dado Joint | A groove cut into a piece of wood to receive another piece. | Strong, durable, and relatively easy to cut. | Less decorative than other joints. |
Using Tools
Effective use of woodworking tools is essential for achieving accurate cuts, smooth surfaces, and strong joints.
Saws
– Handsaws: Used for straight cuts and require more effort but offer greater control.
– Circular saws: Faster and more efficient for long, straight cuts.
– Jigsaws: Ideal for intricate cuts and navigating curves and irregular shapes.
Routers
– Routers: Used for shaping edges, creating grooves, and cutting intricate designs. They require precise handling and safety precautions.
Clamps
– Clamps: Used to hold pieces of wood together during assembly, ensuring a secure and accurate fit. They come in various sizes and types, depending on the application.
Always use safety glasses and hearing protection when operating woodworking tools.
Building a Bookshelf Step-by-Step

Now that you have a design in mind and understand the basic woodworking techniques, it’s time to get your hands dirty and build your bookshelf. This step-by-step guide will walk you through the process, from cutting the wood to finishing the project.
Cutting the Wood
This is the first step in building your bookshelf. It is crucial to accurately cut the wood to ensure the bookshelf is properly sized and assembled.
Here’s a breakdown of the process:
- Measure and Mark: Using a tape measure, mark the wood according to your design plans. Be sure to consider the thickness of the wood when making your measurements. Use a pencil or marker to mark the wood clearly.
- Cutting: Use a saw to cut the wood along your marked lines. A circular saw is ideal for straight cuts, while a jigsaw can be used for curved or intricate cuts. Make sure your saw is sharp and the blade is aligned properly for a clean cut.
- Sanding: After cutting, sand the edges of the wood to remove any rough spots and prepare them for assembly.
| Step | Material | Quantity |
|---|---|---|
| Cutting the Wood | Wood (e.g., plywood, MDF, pine) | As per your design |
| Saw (circular saw, jigsaw) | 1 | |
| Tape measure | 1 | |
| Pencil or marker | 1 | |
| Sandpaper | As needed |
Assembling the Bookshelf
Once you’ve cut all the pieces, it’s time to assemble your bookshelf.
- Dry Fit: Before attaching any pieces permanently, it’s a good idea to dry fit the bookshelf to make sure everything fits together correctly. This is a crucial step to identify and correct any errors in your measurements or cutting.
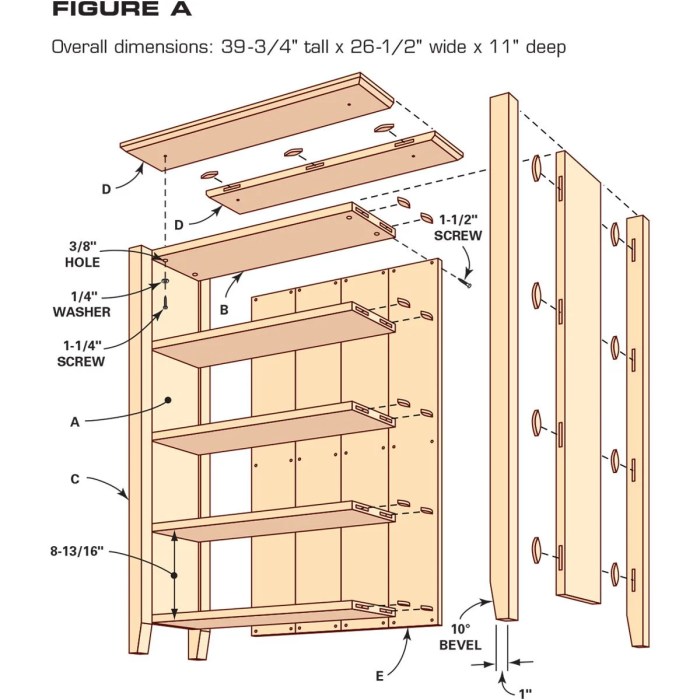
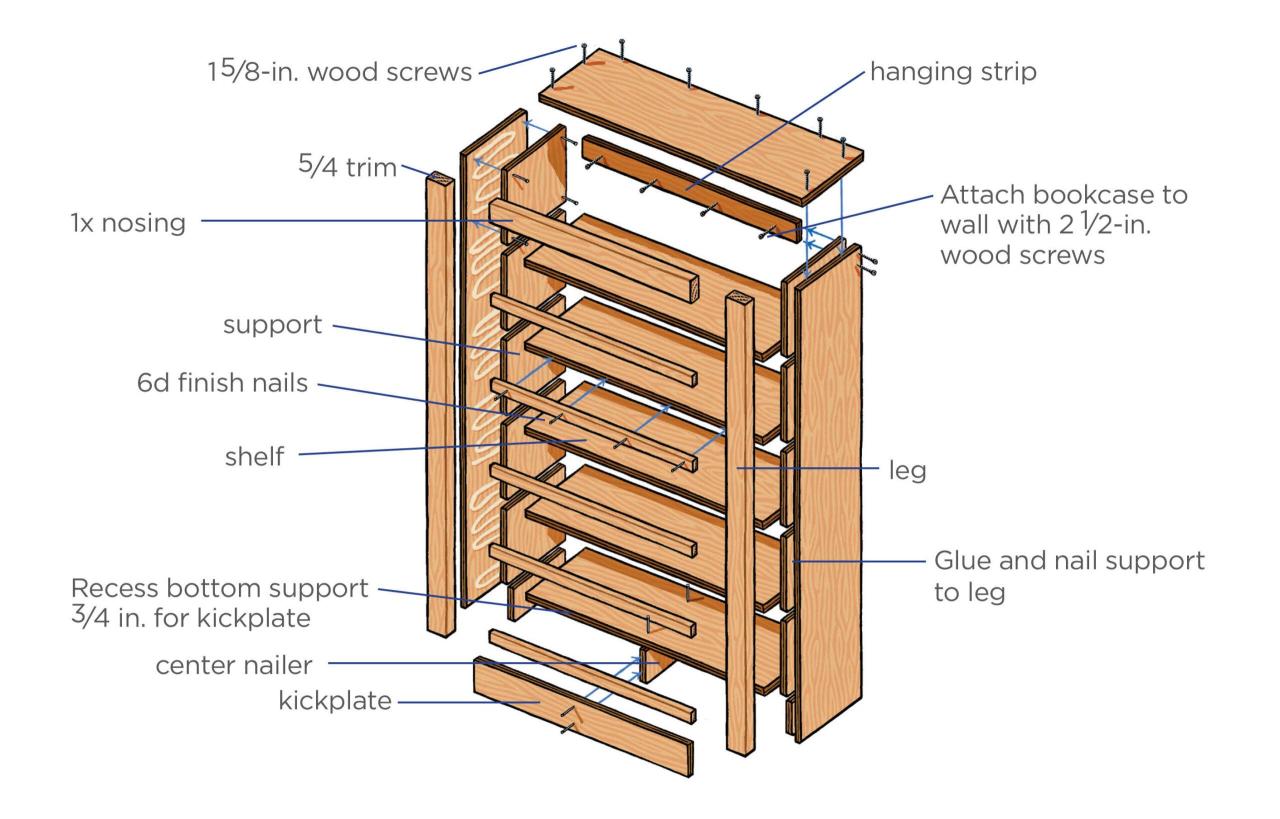
- Attaching the Shelves: Depending on your design, you can use wood glue, screws, or a combination of both to attach the shelves to the sides and back of the bookshelf. For added strength, use wood glue in conjunction with screws.
- Adding the Back: The back of the bookshelf can be made of plywood or a thin sheet of wood. Attach it to the sides and shelves using wood glue and brads.
- Adding the Base: Attach the base of the bookshelf to the sides using wood glue and screws.
| Step | Material | Quantity |
|---|---|---|
| Assembling the Bookshelf | Wood glue | As needed |
| Screws (appropriate size) | As needed | |
| Brads | As needed | |
| Drill | 1 | |
| Screwdriver | 1 |
Finishing the Bookshelf
The final step is to finish your bookshelf to protect it from scratches and give it a polished look.
- Sanding: Sand the entire bookshelf with progressively finer grades of sandpaper to smooth out any imperfections and create a uniform surface.
- Applying Stain or Paint: Choose a stain or paint that complements your design and the style of your room. Apply the stain or paint evenly using a brush or roller.
- Sealing: Apply a sealant to protect the finish from spills and scratches. You can use polyurethane, wax, or other suitable sealant.
| Step | Material | Quantity |
|---|---|---|
| Finishing the Bookshelf | Sandpaper (various grits) | As needed |
| Stain or paint | As needed | |
| Brush or roller | 1 | |
| Sealant | As needed |
Tips for Achieving a Professional Finish
- Use Quality Materials: Invest in high-quality wood and finishing products to ensure your bookshelf is durable and looks its best.
- Take Your Time: Don’t rush the process. Pay attention to detail and take your time with each step to ensure a professional-looking finish.
- Practice Safe Woodworking: Always wear safety glasses and a dust mask when working with wood. Be careful when using power tools and follow all safety instructions.
- Clean Up as You Go: Clean up sawdust and debris as you work to keep your workspace tidy and prevent dust from settling on your finished bookshelf.
Tips for Ensuring Structural Integrity
- Use Strong Wood: Choose wood that is strong enough to support the weight of your books. Plywood, MDF, and hardwood are good choices.
- Use Enough Support: Make sure your shelves are adequately supported to prevent sagging. Use enough screws or brackets to distribute the weight evenly.
- Reinforce Corners: Reinforce the corners of your bookshelf with wood glue or corner brackets to prevent them from splitting or cracking.
- Avoid Overloading: Don’t overload your bookshelf with too many heavy books. This can put stress on the shelves and cause them to sag.
Finishing Touches and Customization

Your bookshelf is built, and it’s time to add the finishing touches that will truly make it your own. This stage is all about enhancing its appearance, protecting the wood, and adding unique features that reflect your style.
Finishing Techniques
Adding a finish to your bookshelf not only protects the wood but also enhances its natural beauty. Here are some popular techniques:
- Staining: This process adds color and depth to the wood, highlighting its grain patterns. Stain comes in a wide range of colors and finishes, from natural wood tones to rich, dark hues. For a more even application, use a brush or cloth to apply the stain in thin, even coats, allowing each coat to dry completely before applying the next.
- Painting: Painting your bookshelf provides a blank canvas for expressing your creativity. You can choose a solid color or experiment with different patterns and techniques. Ensure you use a high-quality primer to create a smooth surface for the paint. Apply the paint in thin, even coats, allowing each coat to dry completely before applying the next.
- Varnishing: Varnish protects the wood from scratches, moisture, and UV damage. It also enhances the natural beauty of the wood by adding a glossy or satin finish. Apply the varnish in thin, even coats, allowing each coat to dry completely before applying the next.
Customizing Your Bookshelf
Adding unique features to your bookshelf can make it truly stand out.
- Decorative Hardware: Consider adding decorative hinges, handles, or pulls to your bookshelf. These details can add a touch of elegance or a rustic charm, depending on your style.
- Built-in Lighting: Installing LED strips or small spotlights can highlight your books and create a cozy reading nook. Consider adding a dimmer switch for adjustable lighting.
- Hidden Compartments: A hidden compartment can be a great way to store valuables or create a secret space. You can build a false bottom or a hidden drawer within the bookshelf structure.
Caring for Your Bookshelf
Proper care ensures your bookshelf remains beautiful and functional for years to come.
- Dust Regularly: Use a soft cloth or a feather duster to remove dust regularly. Avoid using abrasive cleaners that can damage the finish.
- Avoid Direct Sunlight: Prolonged exposure to direct sunlight can cause the wood to fade and warp. Place your bookshelf in a location that receives indirect light.
- Protect from Moisture: Avoid placing your bookshelf in humid environments or areas prone to spills. Wipe up any spills immediately.
Epilogue: Bookshelf Woodworking Plans
Building a bookshelf from scratch is a rewarding journey that combines creativity, craftsmanship, and a touch of DIY magic. With the right plans, tools, and a bit of patience, you can transform simple wood into a beautiful and functional piece of furniture. As you progress through the steps, you’ll gain a deeper appreciation for the artistry of woodworking and the satisfaction of creating something unique and lasting. So, gather your materials, choose your design, and embark on your bookshelf woodworking adventure. You’ll be amazed at what you can create with your own two hands.
Question Bank
What are the best woods for building a bookshelf?
Hardwoods like oak, maple, and cherry are popular choices for bookshelves due to their durability and attractive grain patterns. Softwoods like pine and cedar can also be used, but they may be more susceptible to scratches and dents.
How do I prevent wood warping during the building process?
Use properly dried lumber, avoid exposing wood to extreme temperature fluctuations, and allow ample time for glue to cure before applying finishes.
What type of finish is best for a bookshelf?
A clear polyurethane finish is a good choice for bookshelves as it protects the wood from moisture, scratches, and stains. You can also use a stain to enhance the wood’s natural color or paint it to match your decor.
Building a bookshelf is a great way to get started with woodworking. You can find tons of plans online, but if you’re looking for inspiration beyond bookshelves, check out this awesome website for woodwork projects. Once you’ve got the basics down, you can move on to more complex projects like building your own coffee table or a custom desk.
And who knows, maybe you’ll even be inspired to create a new bookshelf with a unique design!
