Easel woodworking plans bring the joy of creating art to life, allowing you to build a sturdy and personalized easel that perfectly complements your artistic style. Whether you’re a seasoned artist or a curious beginner, constructing your own easel offers a rewarding experience, blending woodworking skills with artistic expression. From simple tabletop easels to elaborate studio models, these plans provide detailed instructions and visual guides to help you craft the perfect support for your canvas.
This guide will take you through the process of selecting the right plans, gathering essential tools and materials, and mastering fundamental woodworking techniques. We’ll explore design considerations, safety precautions, and finishing touches to ensure you create a beautiful and functional easel that will enhance your artistic journey.
Introduction to Easel Woodworking
Easels are essential tools for artists and crafters, providing a stable platform to support their work. Whether you’re painting, drawing, or creating mixed media pieces, a well-made easel can make a significant difference in your creative process.
Easels offer a variety of benefits, including adjustable height, angle, and stability, which can enhance your comfort and improve your overall artistic experience. They also serve as a display stand for your finished artwork, allowing you to showcase your creations with pride.
Types of Easels
Easels come in various types, each with its unique features and applications. Understanding the different types can help you choose the one that best suits your needs and artistic style.
- Studio Easels: These are large and sturdy easels designed for professional artists working in their studios. They often feature adjustable height and angle, a large canvas support area, and a robust construction for stability. Studio easels are typically made of wood, metal, or a combination of both materials.
- Tabletop Easels: Compact and portable, tabletop easels are ideal for smaller canvases and for use on tables or desks. They are often made of wood or plastic and can be easily stored when not in use.
- Field Easels: Designed for outdoor use, field easels are lightweight and portable. They often feature adjustable legs and a compact design that makes them easy to transport. Field easels are typically made of lightweight materials like aluminum or wood.
- French Easels: Known for their elegant design, French easels are traditionally made of wood and feature a single central leg with a hinged top. They are often used for displaying paintings or for smaller works.
- H-Frame Easels: These easels are characterized by their sturdy H-shaped frame, which provides excellent stability. They are typically made of wood or metal and can support large canvases.
Benefits of Building Your Own Easel
While you can find a wide range of easels in stores, building your own offers numerous advantages.
- Customization: Building your own easel allows you to tailor it to your specific needs and preferences. You can choose the size, height, angle, and materials that best suit your artistic style and workflow.
- Cost Savings: Depending on the materials and complexity of the design, building your own easel can be more cost-effective than purchasing one from a store.
- Sense of Accomplishment: Completing a woodworking project like building an easel can be a rewarding experience, giving you a sense of pride and accomplishment.
- Unique Design: You can create a truly unique easel that reflects your personal style and adds a touch of individuality to your studio.
Easel Woodworking Plans
Easel woodworking plans provide detailed instructions and diagrams for building various types of easels, from simple tabletop easels to elaborate studio easels. These plans are designed to guide you through the process of creating a functional and aesthetically pleasing easel that meets your specific needs.
Tabletop Easels
Tabletop easels are compact and portable, making them ideal for small spaces or for artists who prefer to work on a table. These easels typically have a simple design, often featuring a single upright support and a tilting canvas holder.
Simple Tabletop Easel
A simple tabletop easel can be built with just a few pieces of wood and some basic tools. This type of easel is perfect for beginners or those who want a quick and easy project.
- Materials:
- Two pieces of 1×4 lumber, 12 inches long
- One piece of 1×2 lumber, 12 inches long
- One piece of 1/4-inch plywood, 12 inches by 12 inches
- Wood glue
- Wood screws
- Sandpaper
- Paint or stain (optional)
- Construction:
- Cut the 1×4 lumber pieces to 12 inches long.
- Glue and screw the two 1×4 pieces together to form the easel’s legs.
- Cut the 1×2 lumber piece to 12 inches long and attach it to the top of the legs to create the canvas holder.
- Cut the plywood to 12 inches by 12 inches and attach it to the bottom of the legs to form the easel’s base.
- Sand the easel smooth and apply paint or stain (optional).
Adjustable Tabletop Easel
An adjustable tabletop easel allows you to change the angle of the canvas holder, providing greater flexibility for different painting styles.
- Materials:
- Two pieces of 1×4 lumber, 12 inches long
- One piece of 1×2 lumber, 12 inches long
- One piece of 1/4-inch plywood, 12 inches by 12 inches
- One piece of 1/4-inch dowel rod, 6 inches long
- Wood glue
- Wood screws
- Sandpaper
- Paint or stain (optional)
- Construction:
- Cut the 1×4 lumber pieces to 12 inches long.
- Glue and screw the two 1×4 pieces together to form the easel’s legs.
- Cut the 1×2 lumber piece to 12 inches long and attach it to the top of the legs to create the canvas holder.
- Drill a hole in the center of the canvas holder and insert the dowel rod.
- Cut the plywood to 12 inches by 12 inches and attach it to the bottom of the legs to form the easel’s base.
- Sand the easel smooth and apply paint or stain (optional).
Floor Easels
Floor easels are taller and more stable than tabletop easels, making them suitable for larger canvases and for artists who prefer to stand while painting. Floor easels typically have a tripod base and a telescopic canvas holder.
Simple Floor Easel
A simple floor easel can be built with just a few pieces of wood and some basic tools. This type of easel is a good starting point for those who want a more substantial easel.
- Materials:
- Three pieces of 2×4 lumber, 48 inches long
- One piece of 1×2 lumber, 12 inches long
- One piece of 1/4-inch plywood, 12 inches by 12 inches
- Wood glue
- Wood screws
- Sandpaper
- Paint or stain (optional)
- Construction:
- Cut the 2×4 lumber pieces to 48 inches long.
- Glue and screw the three 2×4 pieces together to form the easel’s legs.
- Cut the 1×2 lumber piece to 12 inches long and attach it to the top of the legs to create the canvas holder.
- Cut the plywood to 12 inches by 12 inches and attach it to the bottom of the legs to form the easel’s base.
- Sand the easel smooth and apply paint or stain (optional).
Adjustable Floor Easel
An adjustable floor easel allows you to change the height of the canvas holder, providing greater flexibility for different painting positions.
- Materials:
- Three pieces of 2×4 lumber, 48 inches long
- One piece of 1×2 lumber, 12 inches long
- One piece of 1/4-inch plywood, 12 inches by 12 inches
- One piece of 1/4-inch dowel rod, 12 inches long
- Wood glue
- Wood screws
- Sandpaper
- Paint or stain (optional)
- Construction:
- Cut the 2×4 lumber pieces to 48 inches long.
- Glue and screw the three 2×4 pieces together to form the easel’s legs.
- Cut the 1×2 lumber piece to 12 inches long and attach it to the top of the legs to create the canvas holder.
- Drill a hole in the center of the canvas holder and insert the dowel rod.
- Cut the plywood to 12 inches by 12 inches and attach it to the bottom of the legs to form the easel’s base.
- Sand the easel smooth and apply paint or stain (optional).
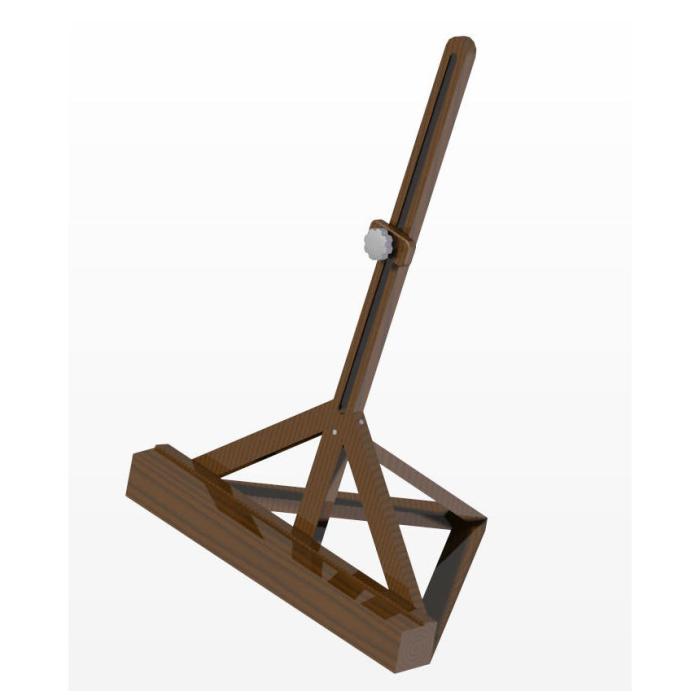
Studio Easels
Studio easels are designed for professional artists and offer a range of features for greater stability, adjustability, and versatility. These easels typically have a robust construction, multiple adjustment points, and often include features such as a sliding canvas holder, a shelf for supplies, and a drawer for storage.
Basic Studio Easel
A basic studio easel can be built with a combination of wood and metal components. This type of easel provides a solid foundation for larger canvases and offers some adjustability.
- Materials:
- Two pieces of 2×4 lumber, 48 inches long
- One piece of 1×2 lumber, 12 inches long
- One piece of 1/4-inch plywood, 12 inches by 12 inches
- Two metal L-brackets
- Wood glue
- Wood screws
- Sandpaper
- Paint or stain (optional)
- Construction:
- Cut the 2×4 lumber pieces to 48 inches long.
- Glue and screw the two 2×4 pieces together to form the easel’s legs.
- Cut the 1×2 lumber piece to 12 inches long and attach it to the top of the legs to create the canvas holder.
- Attach the metal L-brackets to the sides of the legs to provide additional support.
- Cut the plywood to 12 inches by 12 inches and attach it to the bottom of the legs to form the easel’s base.
- Sand the easel smooth and apply paint or stain (optional).
Advanced Studio Easel
An advanced studio easel incorporates features such as a sliding canvas holder, a shelf for supplies, and a drawer for storage. This type of easel provides a professional-level setup for artists who need greater functionality.
- Materials:
- Two pieces of 2×4 lumber, 48 inches long
- One piece of 1×2 lumber, 12 inches long
- One piece of 1/4-inch plywood, 12 inches by 12 inches
- One piece of 1/4-inch dowel rod, 12 inches long
- Two metal L-brackets
- One metal drawer slide
- Wood glue
- Wood screws
- Sandpaper
- Paint or stain (optional)
- Construction:
- Cut the 2×4 lumber pieces to 48 inches long.
- Glue and screw the two 2×4 pieces together to form the easel’s legs.
- Cut the 1×2 lumber piece to 12 inches long and attach it to the top of the legs to create the canvas holder.
- Drill a hole in the center of the canvas holder and insert the dowel rod.
- Attach the metal L-brackets to the sides of the legs to provide additional support.
- Cut the plywood to 12 inches by 12 inches and attach it to the bottom of the legs to form the easel’s base.
- Attach the metal drawer slide to the bottom of the easel’s base.
- Sand the easel smooth and apply paint or stain (optional).
Adjustable Easels
Adjustable easels offer flexibility in height, angle, and canvas size. These easels are designed to accommodate a variety of painting styles and preferences.
Simple Adjustable Easel
A simple adjustable easel can be built with a combination of wood and metal components. This type of easel allows for basic height and angle adjustments.
- Materials:
- Two pieces of 2×4 lumber, 48 inches long
- One piece of 1×2 lumber, 12 inches long
- One piece of 1/4-inch plywood, 12 inches by 12 inches
- Two metal L-brackets
- One metal hinge
- Wood glue
- Wood screws
- Sandpaper
- Paint or stain (optional)
- Construction:
- Cut the 2×4 lumber pieces to 48 inches long.
- Glue and screw the two 2×4 pieces together to form the easel’s legs.
- Cut the 1×2 lumber piece to 12 inches long and attach it to the top of the legs to create the canvas holder.
- Attach the metal L-brackets to the sides of the legs to provide additional support.
- Attach the metal hinge to the canvas holder.
- Cut the plywood to 12 inches by 12 inches and attach it to the bottom of the legs to form the easel’s base.
- Sand the easel smooth and apply paint or stain (optional).
Advanced Adjustable Easel
An advanced adjustable easel incorporates features such as a telescoping canvas holder, a height adjustment mechanism, and a tilt adjustment mechanism. This type of easel provides a wide range of adjustment options for ultimate flexibility.
- Materials:
- Two pieces of 2×4 lumber, 48 inches long
- One piece of 1×2 lumber, 12 inches long
- One piece of 1/4-inch plywood, 12 inches by 12 inches
- Two metal L-brackets
- One metal hinge
- One metal telescoping tube
- Wood glue
- Wood screws
- Sandpaper
- Paint or stain (optional)
- Construction:
- Cut the 2×4 lumber pieces to 48 inches long.
- Glue and screw the two 2×4 pieces together to form the easel’s legs.
- Cut the 1×2 lumber piece to 12 inches long and attach it to the top of the legs to create the canvas holder.
- Attach the metal L-brackets to the sides of the legs to provide additional support.
- Attach the metal hinge to the canvas holder.
- Attach the metal telescoping tube to the canvas holder.
- Cut the plywood to 12 inches by 12 inches and attach it to the bottom of the legs to form the easel’s base.
- Sand the easel smooth and apply paint or stain (optional).
Essential Tools and Materials

Before you embark on your easel-building journey, it’s crucial to gather the necessary tools and materials. The specific items you’ll need will depend on the chosen plan, but this section provides a general overview of common requirements.
Woodworking Tools
Woodworking tools are essential for cutting, shaping, and assembling the wood components of your easel.
- Saw: A handsaw or a power saw, such as a circular saw or a jigsaw, is needed to cut the wood to size.
- Drill: A drill with various drill bits is essential for creating holes for screws, dowels, and other hardware.
- Screwdriver: A set of screwdrivers with different sizes and types is necessary for driving screws.
- Sandpaper: Sandpaper in various grits is used to smooth out rough surfaces and prepare the wood for finishing.
- Clamps: Clamps are essential for holding wood pieces together while gluing or assembling them.
- Measuring Tape: A measuring tape is necessary for accurate measurements of the wood components.
- Level: A level is crucial for ensuring that the easel is straight and stable.
- Pencil: A pencil is used for marking the wood for cuts and drilling.
Wood Types
The type of wood you choose for your easel will affect its durability, appearance, and cost.
- Pine: Pine is a softwood that is affordable and easy to work with. It is often used for beginner projects due to its forgiving nature. Pine is a good choice for a basic easel that will be used for lighter canvases.
- Oak: Oak is a hardwood that is strong and durable. It is a good choice for a heavier easel that will be used for larger canvases. Oak will add a more substantial and traditional look to your easel.
- Maple: Maple is a hardwood that is known for its beautiful grain pattern. It is a good choice for an easel that will be a focal point in your studio or home.
Hardware
Hardware is necessary for attaching the easel’s components and for adding stability and functionality.
- Hinges: Hinges are used to connect the easel’s legs to the top frame.
- Screws: Screws are used to secure the easel’s components together.
- Brackets: Brackets can be used to add extra support to the easel’s legs or to create a shelf for art supplies.
- Fasteners: A variety of fasteners, such as nails, staples, and glue, may be needed depending on your chosen plan.
Finishing Supplies
Finishing supplies protect the wood from damage and enhance its appearance.
- Paint: Paint can be used to cover the wood and give it a new color.
- Stain: Stain can be used to enhance the natural wood grain and add a color to the wood.
- Varnish: Varnish is a protective coating that helps to seal the wood and prevent scratches and water damage.
- Polyurethane: Polyurethane is a durable, clear coating that protects the wood from scratches and water damage. It is often used on outdoor furniture.
Construction Techniques: Easel Woodworking Plans
Constructing a sturdy and functional easel requires a combination of precise cuts, strong joints, and a smooth finish. This section explores the essential woodworking techniques involved in easel building.
Cutting and Shaping Wood
Cutting and shaping wood accurately is crucial for creating the components of your easel. It ensures that the pieces fit together properly and that the finished product is aesthetically pleasing.
* Measuring and Marking:
* Begin by carefully measuring and marking the wood according to your plans. Use a measuring tape and a pencil or marker to ensure precision.
* When marking, use a straightedge to guide your pencil for straight lines and a compass for circles or arcs.
* Sawing:
* There are various saws for different cutting tasks, such as:
* Hand saws: Suitable for straight cuts and crosscuts.
* Jigsaw: Used for curved cuts and intricate shapes.
* Table saw: Provides accurate and precise cuts for straight and angled pieces.
* Circular saw: Offers portability for cutting larger pieces of wood.
* Planing and Sanding:
* Once the wood is cut to size, you may need to plane it to achieve a smooth surface. A hand plane or a power planer can be used for this purpose.
* Sanding is essential to smooth out any imperfections and create a consistent surface. Use sandpaper in various grits, starting with a coarse grit and gradually progressing to finer grits.
* You can use a sanding block or a power sander for this process.
* Shaping:
* For intricate shapes, you can use chisels, gouges, and rasps to carve the wood.
* A router can also be used to create precise shapes and profiles.
Joining Wood Pieces
Connecting wood pieces securely is vital for the structural integrity of your easel. Various joinery techniques offer different levels of strength and aesthetics.
* Butt Joints:
* This is the simplest joint, where two pieces of wood are joined end to end.
* However, it’s not the strongest joint, and requires glue and screws or nails for reinforcement.
* Dado Joints:
* A dado joint involves cutting a groove (dado) in one piece of wood to accommodate the edge of another piece.
* This joint provides more strength and stability than a butt joint.
* Rabbet Joints:
* A rabbet joint is created by cutting a rectangular groove (rabbet) along the edge of one piece of wood to receive the edge of another piece.
* This joint is often used for framing and assembling boxes.
* Mortise and Tenon Joints:
* A mortise and tenon joint is a strong and traditional joint that involves cutting a rectangular hole (mortise) in one piece of wood and a corresponding projection (tenon) on another piece.
* This joint can be glued and secured with pins or screws.
* Dovetail Joints:
* Dovetail joints are renowned for their strength and decorative appeal.
* They involve cutting interlocking wedge-shaped pieces on the ends of two pieces of wood.
* Dovetail joints are often used for drawer fronts and other visible joinery.
Sanding and Finishing
After assembling the easel, sanding and finishing are crucial for achieving a smooth, protective, and visually appealing surface.
* Sanding:
* Sanding removes any rough edges, imperfections, and glue residue.
* Start with a coarse grit sandpaper and gradually progress to finer grits for a smoother finish.
* Sand in the direction of the wood grain to avoid scratches.
* Finishing:
* The final finish protects the wood from scratches, moisture, and other environmental factors.
* Common finishes include:
* Paint: Provides a durable and colorful finish.
* Stain: Enhances the natural grain of the wood while adding color.
* Varnish: Offers a clear protective coating that enhances the wood’s natural beauty.
* Polyurethane: Provides a durable and water-resistant finish.
* Applying the Finish:
* Apply the finish in thin coats, allowing each coat to dry thoroughly before applying the next.
* Use a brush, roller, or spray gun for application, depending on the type of finish and the size of the project.
Easel Design Considerations
When crafting your easel plans, you have a unique opportunity to infuse your design with personal touches and practical features. This section explores various design elements that can elevate your easel from a simple canvas holder to a functional and visually appealing piece of furniture.
Height Adjustability
The ability to adjust the easel’s height is a crucial feature, especially for artists who work with canvases of varying sizes. Height adjustability ensures a comfortable and ergonomic working posture, reducing strain on the back and neck.
There are various methods for incorporating height adjustability:
- Telescoping legs: These legs extend and retract, allowing for a wide range of height adjustments. They are often found on more expensive easels and offer a smooth and reliable mechanism.
- Adjustable leg brackets: These brackets allow you to change the angle of the legs, effectively altering the easel’s height. This method is simpler to implement but may not offer the same range of adjustment as telescoping legs.
- Multiple leg positions: Some easels feature pre-set leg positions, offering a few discrete height options. This method is the simplest to implement but offers the least flexibility.
Storage Compartments
Adding storage compartments to your easel design can be a practical and convenient feature for artists who need to keep their tools and supplies organized. These compartments can be integrated into the easel’s frame, providing a dedicated space for brushes, paints, palettes, and other essentials.
Consider these storage options:
- Shelves: Simple shelves can be incorporated into the easel’s frame, offering a straightforward storage solution. They can be positioned at different heights to accommodate various items.
- Drawers: Drawers provide a secure and dust-proof storage space for smaller items like brushes, pencils, and erasers. They can be incorporated into the easel’s base or side panels.
- Side pockets: Fabric pockets attached to the easel’s sides offer convenient storage for tools and supplies. They are lightweight and can be easily customized to fit your needs.
Canvas Size Compatibility
When designing your easel, it’s important to consider the range of canvas sizes you intend to use. The easel’s frame should be sturdy enough to support the weight of the largest canvas you plan to work with.
Here are some considerations for canvas size compatibility:
- Canvas holding mechanism: The easel’s canvas holding mechanism should be adjustable to accommodate different canvas sizes. This could include a sliding bar, adjustable clamps, or a combination of both.
- Easel width: The easel’s width should be sufficient to accommodate the largest canvas you intend to use. A wider easel will provide greater stability and prevent the canvas from tilting or falling.
- Easel height: The easel’s height should be adjustable to accommodate canvases of different sizes. A taller easel will allow you to work comfortably with larger canvases.
Aesthetic Appeal
The aesthetic appeal of your easel is just as important as its functionality. A well-designed easel can be a statement piece in your studio or home, complementing your artistic style and personality.
Consider these design elements for aesthetic appeal:
- Material choice: The choice of wood species, finish, and color can significantly impact the easel’s aesthetic. Hardwoods like oak, maple, and cherry offer durability and a classic look, while softwoods like pine and cedar can provide a more rustic feel.
- Design details: Incorporating design details like decorative moldings, carvings, or inlays can add visual interest and elevate the easel’s aesthetic appeal.
- Overall shape: The easel’s overall shape can also influence its aesthetic appeal. A traditional A-frame design is classic and timeless, while a more modern design can offer a sleek and minimalist look.
Unique Easel Designs
- Portable easel: This type of easel is designed for artists who travel or work outdoors. It is lightweight and compact, making it easy to transport. Some portable easels feature a telescoping leg design and a built-in carrying handle.
- Studio easel: This type of easel is designed for artists who work in a studio setting. It is typically larger and more stable than a portable easel, offering a wider range of canvas sizes and a more robust canvas holding mechanism.
- Multi-purpose easel: This type of easel can be used for a variety of purposes, such as painting, drawing, and displaying artwork. It may feature adjustable legs, a built-in storage compartment, and a canvas holding mechanism that can accommodate different types of art supplies.
Safety Precautions
Woodworking can be a rewarding hobby, but it’s crucial to prioritize safety throughout the entire process. Neglecting safety precautions can lead to serious injuries, so it’s essential to follow established guidelines and use appropriate safety equipment.
Using Proper Safety Equipment
It’s crucial to use appropriate safety equipment to protect yourself from potential hazards during woodworking.
- Eye Protection: Always wear safety glasses or goggles to protect your eyes from flying debris, sawdust, and other projectiles. Consider using a face shield for added protection, especially when working with power tools.
- Hearing Protection: Exposure to loud noises from power tools can damage your hearing. Use earplugs or earmuffs to reduce noise levels and protect your hearing.
- Gloves: Wearing gloves protects your hands from cuts, splinters, and other injuries. Choose gloves made of durable material, such as leather or heavy-duty fabric, for optimal protection.
- Dust Mask: Wood dust can be harmful to your respiratory system. Wear a dust mask or respirator to filter out dust particles and protect your lungs.
- Respirator: For more serious dust exposure, consider using a respirator that provides a tighter seal and better filtration.
Handling Power Tools Safely
Power tools are essential for many woodworking projects, but they can also be dangerous if not used correctly.
- Read the Manual: Before using any power tool, carefully read the manufacturer’s instructions and safety guidelines. Familiarize yourself with the tool’s functions, safety features, and potential hazards.
- Use the Right Tool: Select the appropriate power tool for the task at hand. Using the wrong tool can increase the risk of injury.
- Keep Tools Sharp: Dull tools are more likely to slip and cause injury. Regularly sharpen blades, bits, and other cutting tools.
- Secure Workpiece: Always secure the workpiece before operating any power tool. Use clamps, vices, or other appropriate holding devices to prevent the workpiece from moving.
- Avoid Distractions: When using power tools, avoid distractions and focus on the task at hand.
- Use Safety Guards: Always use the safety guards provided with power tools. These guards are designed to protect you from flying debris and other hazards.
- Unplug Tools: Unplug power tools when not in use, and before making adjustments or cleaning them.
Avoiding Potential Hazards, Easel woodworking plans
Woodworking involves various potential hazards, so it’s crucial to be aware of these risks and take steps to avoid them.
- Sharp Objects: Be cautious of sharp objects, such as blades, chisels, and sandpaper. Handle them with care and use appropriate safety equipment.
- Heavy Objects: When lifting or moving heavy objects, use proper lifting techniques to avoid strains or injuries.
- Fire Hazards: Woodworking can involve fire hazards, such as sparks from power tools or dust buildup. Keep a fire extinguisher nearby and be aware of potential ignition sources.
- Electrical Hazards: Be careful when working with electricity. Ensure that tools are properly grounded and avoid using them in wet conditions.
- Dust Accumulation: Wood dust can be a fire hazard and a respiratory irritant. Regularly clean up dust and dispose of it properly.
- Work Area: Keep your work area clean, organized, and well-lit. Avoid clutter and tripping hazards.
Finishing Touches

The finishing touches are the final steps in creating a beautiful and durable easel. They involve sanding, smoothing, and applying a protective finish to the wood. This section will guide you through the process of selecting the right finishing materials and applying them effectively.
Sanding and Smoothing
Sanding is essential for creating a smooth surface and removing any imperfections from the wood. It also prepares the wood for the final finish. Here’s a step-by-step guide:
- Start with coarse-grit sandpaper (80-120 grit) to remove any major imperfections or saw marks.
- Gradually move to finer grits (150-220 grit) to smooth out the surface.
- Finish with very fine sandpaper (220-400 grit) for a silky smooth finish.
- Sand with the grain of the wood to avoid scratches.
- Use a sanding block to ensure even pressure and a consistent finish.
- Dust the wood thoroughly after each sanding stage to remove any sawdust.
Applying Paint, Stain, or Varnish
Once the wood is sanded and smooth, you can apply a finish. The type of finish you choose will depend on the desired look and the type of wood.
- Paint is a good option for covering the wood’s natural grain and adding a pop of color. It comes in a wide range of colors and finishes, from matte to gloss.
- Stain is used to enhance the wood’s natural grain and color. It penetrates the wood, creating a deeper, richer hue. Stains are available in a variety of colors, from light to dark.
- Varnish is a clear, protective coating that seals the wood and enhances its natural beauty. It comes in different finishes, including gloss, semi-gloss, and matte.
Here are some tips for applying paint, stain, or varnish:
- Apply the finish in thin, even coats, allowing each coat to dry completely before applying the next.
- Use a brush, roller, or spray gun, depending on the type of finish and the size of the project.
- Follow the manufacturer’s instructions for drying time and application.
- Wipe off any excess finish with a clean cloth.
Choosing the Right Finishing Materials
The type of wood you use will influence the best finishing material to apply.
Easel woodworking plans can be a fun project for any skill level. You’ll need to gather some basic woodworking supplies like wood, screws, and paint. Once you have your materials, you can start building your own easel to display your favorite artwork.
| Wood Type | Best Finishing Material |
|---|---|
| Oak | Polyurethane varnish, oil-based stain |
| Maple | Polyurethane varnish, oil-based stain |
| Cherry | Polyurethane varnish, oil-based stain |
| Pine | Polyurethane varnish, oil-based stain |
| Walnut | Polyurethane varnish, oil-based stain |
| Mahogany | Polyurethane varnish, oil-based stain |
The desired aesthetic will also influence your choice of finishing material. For example, if you want a glossy finish, you would use a polyurethane varnish. If you want a natural, rustic look, you would use a clear oil finish.
Adding Decorative Elements
Once the finish is dry, you can add decorative elements to personalize your easel. Some ideas include:
- Adding a decorative trim to the edges of the easel.
- Incorporating a small drawer or shelf for storing art supplies.
- Painting a design or pattern on the easel.
- Attaching a small plaque with the easel’s name or date of creation.
Remember, the goal is to create an easel that is both functional and aesthetically pleasing. Don’t be afraid to experiment and let your creativity shine through!
Summary
Building your own easel is a journey of creativity and craftsmanship. By following these woodworking plans, you’ll not only gain a valuable skill but also create a unique piece of art that reflects your personal style. So, gather your tools, choose your wood, and embark on this fulfilling project, transforming your artistic workspace and enhancing your creative process.
Question & Answer Hub
What kind of wood is best for an easel?
Hardwoods like oak, maple, and cherry are durable and offer a beautiful grain. Softer woods like pine are easier to work with but may require additional support.
What tools do I need to build an easel?
Essential tools include a saw, drill, sander, measuring tape, and clamps. The specific tools will depend on the complexity of the chosen plan.
How do I choose the right easel plan?
Consider your skill level, desired size, and intended use. Start with a simpler plan if you’re a beginner and gradually progress to more complex designs.
