Mailbox woodworking plans offer a chance to create a personalized and stylish addition to your home. From classic designs to modern interpretations, crafting a mailbox from wood allows you to express your creativity and enhance your curb appeal. Whether you’re a seasoned woodworker or a beginner, there’s a plan out there for you.
This guide explores the different aspects of mailbox woodworking, starting with planning and design, moving through material selection and construction, and finishing with tips on installation and maintenance. We’ll cover everything you need to know to build a mailbox that’s both functional and visually appealing.
Introduction to Mailbox Woodworking
Building a wooden mailbox is a rewarding project that allows you to personalize your home’s curb appeal and create a unique piece of functional art. Not only is it a satisfying way to express your creativity, but it also offers the advantage of crafting a durable and weather-resistant mailbox that can last for years to come.
Types of Mailbox Designs and Styles
The wide variety of mailbox designs and styles available caters to diverse preferences and architectural styles.
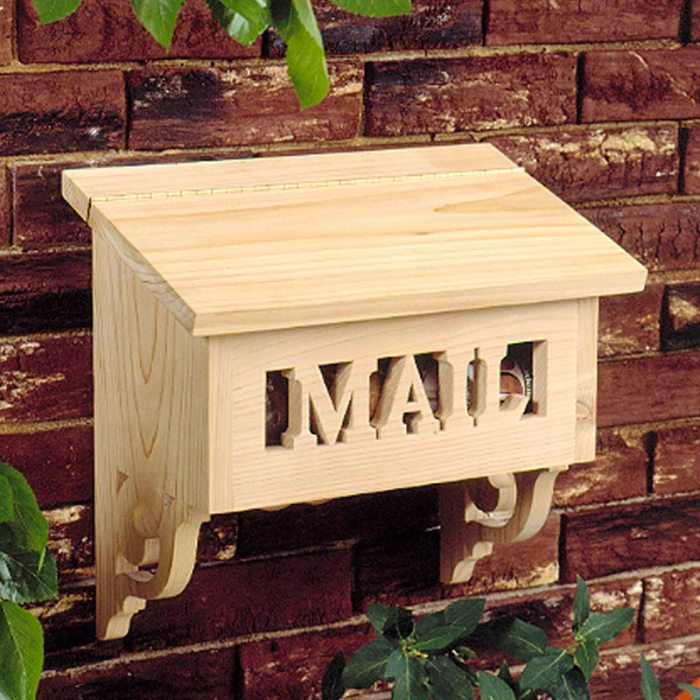
- Traditional Mailboxes: These classic designs often feature a simple rectangular shape with a slanted top and a flag for indicating the presence of mail. They are available in various wood types and finishes, offering a timeless aesthetic that complements most homes.
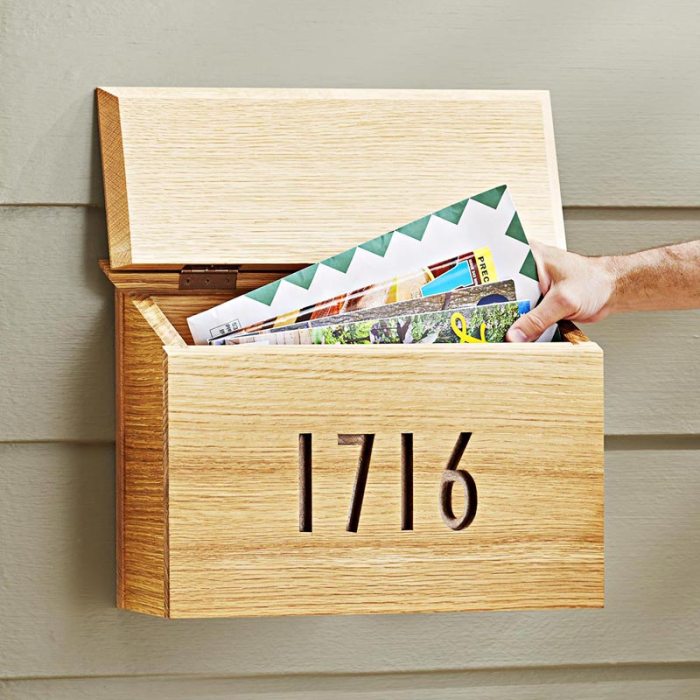
- Modern Mailboxes: Modern mailbox designs embrace sleek lines and minimalist aesthetics. They may feature geometric shapes, clean edges, and contemporary materials like metal or glass accents. These mailboxes often serve as a statement piece, reflecting the modern architecture of the home.
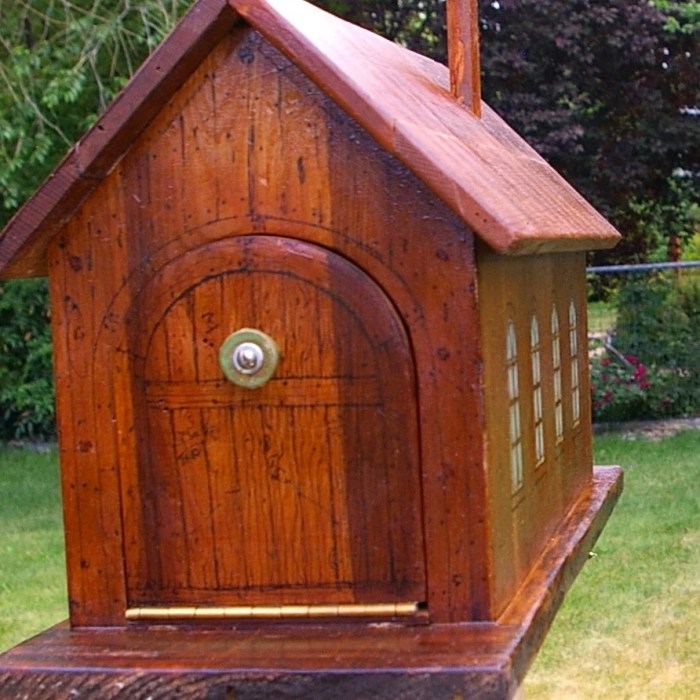
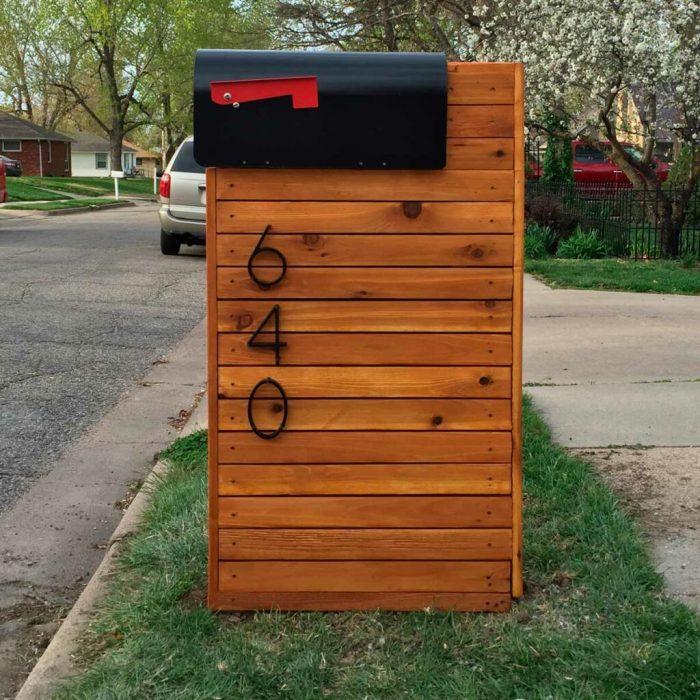
- Rustic Mailboxes: Rustic mailbox designs evoke a sense of warmth and natural beauty. They often incorporate rough-hewn wood, weathered finishes, and decorative elements like wrought iron accents. These mailboxes blend seamlessly with rustic homes and landscapes.
- Custom Mailboxes: Custom-designed mailboxes allow for complete creative freedom. You can personalize the mailbox with intricate carvings, unique shapes, and personalized details that reflect your individual style and interests.
Choosing the Right Wood for Mailbox Construction
Selecting the right wood is crucial for ensuring the durability and longevity of your wooden mailbox.
- Cedar: Cedar is a naturally rot-resistant and insect-repellent wood, making it an excellent choice for outdoor applications. It also possesses a beautiful reddish-brown hue that adds warmth and character to the mailbox.
- Redwood: Redwood is another highly durable and weather-resistant wood that is known for its rich reddish-brown color. It is also naturally resistant to decay and insects, making it an ideal material for outdoor structures.
- Teak: Teak is a dense and durable hardwood that is highly resistant to moisture, decay, and insect infestations. It also has a beautiful golden-brown color that deepens with age. Teak is an excellent choice for mailboxes that are exposed to harsh weather conditions.
- Pressure-Treated Pine: Pressure-treated pine is a cost-effective option that offers good durability and weather resistance. It is treated with preservatives to prevent rot and insect infestations, making it suitable for outdoor use.
Planning and Design

Planning and designing a mailbox is a crucial first step in the woodworking process. It involves determining the size, shape, and features of your mailbox to ensure it meets your needs and complements your home’s aesthetic.
Mailbox Dimensions and Size
The dimensions and size of your mailbox are important considerations. You need to ensure it can accommodate the mail you receive and meet USPS regulations.
- USPS Regulations: The USPS has specific regulations for mailbox dimensions, including a minimum height of 6 inches and a maximum height of 19 inches. The maximum width is 12 inches, and the maximum depth is 18 inches.
- Mail Volume: Consider the volume of mail you typically receive. A larger mailbox is necessary if you get a lot of packages or oversized envelopes.
- Design Considerations: The size and dimensions will also influence the overall design of your mailbox. A smaller mailbox might be more appropriate for a compact or modern aesthetic, while a larger mailbox might be better suited for a more traditional style.
Mailbox Functionality
Functionality is essential for a mailbox. Consider the following aspects:
- Access: The mailbox should be easily accessible for both you and the mail carrier. This includes considering the location, height, and opening mechanism.
- Security: You want to ensure your mail is secure from theft or damage. This might involve using a lock, a sturdy construction, or a secure mounting system.
- Weather Protection: The mailbox should be weatherproof to protect the mail from rain, snow, and other elements.
Mailbox Design Examples, Mailbox woodworking plans
There are many mailbox designs to choose from. Some popular options include:
- Traditional Mailboxes: These mailboxes often have a classic design with a rectangular shape, a flag, and a hinged door.
- Modern Mailboxes: Modern mailboxes are typically minimalist and sleek, with clean lines and simple shapes.
- Rustic Mailboxes: Rustic mailboxes often feature natural materials like wood or stone and have a more handcrafted look.
Materials and Tools
Choosing the right materials and tools is crucial for building a sturdy and aesthetically pleasing mailbox. The materials you select will determine the mailbox’s durability, appearance, and overall cost. The tools you use will influence the ease and precision of construction.
Essential Materials
The materials you’ll need for building a mailbox vary depending on your design. However, here are some common materials you might use:
- Wood: The most common material for mailboxes. Choose durable and weather-resistant wood like cedar, redwood, or pressure-treated pine.
- Metal: For a more durable and weather-resistant mailbox, consider using galvanized steel or aluminum.
- Hardware: This includes hinges, screws, nails, and fasteners. Choose high-quality hardware that is suitable for outdoor use.
- Paint or Stain: Protect your mailbox from the elements and enhance its appearance with a suitable paint or stain.
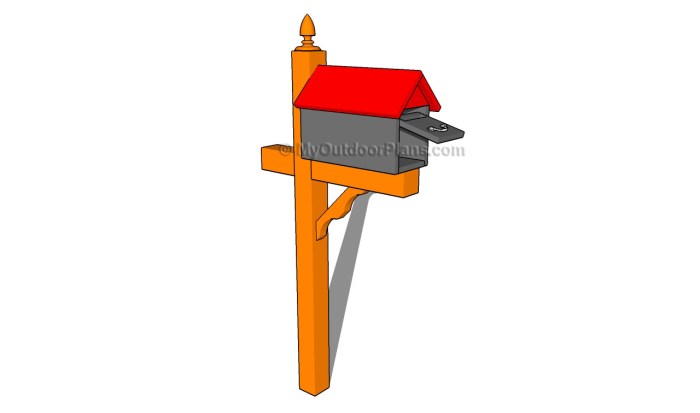
- Post: A sturdy post is essential for supporting your mailbox. You can use a wooden post, a metal post, or even a concrete post.
- Mailbox Components: This includes a mailbox door, a mail slot, and a flag.
Woodworking Tools
Woodworking tools are essential for building a mailbox. You’ll need a combination of hand tools and power tools, depending on your skill level and the complexity of your design.
Hand Tools
- Measuring Tape: For accurately measuring and cutting materials.
- Pencil: For marking cuts and other details.
- Level: Ensures that your mailbox is level and plumb.
- Square: Used to create accurate right angles.
- Hand Saw: For cutting wood.
- Chisel: For shaping wood and removing excess material.
- Hammer: For driving nails and securing hardware.
- Screwdriver: For securing screws.
- Clamps: For holding pieces of wood together during assembly.
Power Tools
- Circular Saw: For making precise cuts in wood.
- Jigsaw: For cutting curves and intricate shapes.
- Drill: For drilling holes for screws and other hardware.
- Sandpaper: For smoothing rough edges and preparing surfaces for painting or staining.
- Router: For creating decorative edges and designs.
Choosing the Right Tools and Materials
- Consider your design: The complexity of your design will determine the tools and materials you need.
- Skill level: If you’re a beginner, start with a simple design and use basic hand tools. As you gain experience, you can tackle more complex designs and use power tools.
- Budget: Set a budget for your mailbox project. This will help you choose the right materials and tools.
- Durability: Consider the durability of the materials you choose. If you live in a harsh climate, choose materials that can withstand the elements.
- Aesthetics: Choose materials and colors that complement your home’s style.
Construction Process
Now that you have your materials and tools ready, it’s time to dive into the actual construction process. Building a mailbox might seem daunting, but it’s a rewarding project that can be completed with a bit of patience and attention to detail. Let’s break down the process step-by-step.
Cutting and Shaping
This stage involves bringing your wood pieces to the required dimensions and shaping them for the mailbox.
- Cutting: Begin by accurately cutting your wood pieces to the dimensions Artikeld in your chosen plan. You can use a table saw, miter saw, or circular saw for this task. Remember to double-check your measurements and make any necessary adjustments before making the final cuts.
- Shaping: For intricate shapes or curved sections, you may need to employ tools like a jigsaw, band saw, or router. Remember to work slowly and carefully, especially when using power tools.
Assembling the Mailbox
This section Artikels the steps involved in putting together the individual pieces of your mailbox.
- Joining the Pieces: The most common method of joining wood pieces is using wood glue and screws. Apply glue generously to the surfaces to be joined, ensuring a strong bond. Then, secure the pieces with screws, using a drill to pre-drill pilot holes to prevent splitting the wood.
- Securing the Base: The base of your mailbox should be strong and sturdy to support the entire structure. Depending on your plan, you may use dado joints, rabbet joints, or even a simple butt joint to join the base pieces. Ensure the base is square and level before proceeding.
- Building the Sides and Back: The sides and back of the mailbox will be attached to the base. You can use a variety of techniques, such as dado joints, rabbet joints, or simple butt joints. Again, ensure that all joints are tight and secure before moving on.
- Adding the Front Panel: The front panel of your mailbox will hold the door and opening for mail. You’ll need to carefully cut the opening for the mail slot and ensure that the door hinges and latch are properly installed.
- Installing the Door: Once the front panel is in place, you can install the door. Use hinges to attach the door to the front panel, making sure the door opens and closes smoothly. A latch or magnetic closure will keep the door secure.
Finishing Touches
After the mailbox is assembled, you can add the final touches that make it unique and functional.
- Sanding: Before applying any finish, sand the mailbox thoroughly to smooth out any rough edges or imperfections. Use progressively finer grits of sandpaper to achieve a smooth surface.
- Painting or Staining: Choose a paint or stain that complements your home’s exterior and provides a protective finish. Apply multiple coats of paint or stain, allowing each coat to dry completely before applying the next.
- Adding Hardware: Install any necessary hardware, such as a house number plaque, a flag indicator, or a decorative trim.
Finishing Touches
Now that you’ve built your mailbox, it’s time to give it that final touch of personality and protection. This involves choosing the right finish to enhance its beauty and safeguard it from the elements.
Staining, Painting, and Varnishing
The finishing process involves choosing the right techniques to achieve your desired look. Staining, painting, and varnishing are popular options, each with its own unique characteristics and advantages.
- Staining: This method adds color and enhances the wood’s natural grain, giving it a warm and rustic look. Stains penetrate the wood, providing a more natural finish than paint. Consider oil-based stains for a deeper color and water-based stains for a more transparent finish.
- Painting: Painting offers the most flexibility in terms of color and design. You can create a bold statement with bright colors or opt for a more subtle look with muted tones. Acrylic paints are a good choice for mailboxes due to their durability and ease of application.
- Varnishing: Varnish provides a protective layer that shields the wood from moisture, UV rays, and scratches. It enhances the natural beauty of the wood and creates a glossy or satin finish. Consider polyurethane varnishes for their durability and water resistance.
Applying Finishes
Proper application is key to achieving a professional-looking finish.
- Preparation: Begin by sanding the mailbox to smooth out any rough spots and create a uniform surface for the finish. Wipe down the mailbox with a tack cloth to remove any dust or debris.
- Application: Apply the finish in thin, even coats, following the manufacturer’s instructions. Allow each coat to dry completely before applying the next. Use a brush, roller, or spray gun depending on the type of finish and your preference.
- Drying Time: Allow the finish to dry completely before handling the mailbox. This ensures the finish cures properly and provides the desired level of protection.
Decorative Elements and Personalization
Once you’ve applied the finish, you can add decorative elements to give your mailbox a unique touch.
- Hardware: Choose stylish hinges, latches, and mailbox numbers to complement the overall design. You can find a wide variety of hardware options to match your mailbox’s style.
- Engraving: Engraving your name, address, or a special message on the mailbox adds a personal touch. This can be done professionally or with a DIY engraving kit.
- Decorative Painting: Paint intricate designs or patterns on the mailbox to add a touch of artistry. You can use stencils or freehand painting techniques to create unique and personalized details.
Installation and Maintenance
You’ve built a beautiful mailbox, and now it’s time to put it to work. Installing your mailbox securely is essential for its longevity and functionality. Regular maintenance will also help ensure it remains in top condition for years to come.
Installation
Proper installation is crucial for ensuring your mailbox stands strong against the elements and remains accessible. Here’s a step-by-step guide:
- Choose the right location. The mailbox should be placed at a convenient spot for mail delivery and retrieval, ideally within 6 feet of the road and at least 4 feet from the edge of the road. Consider the direction of the prevailing wind and sun exposure to ensure it’s protected from harsh weather conditions.
- Prepare the ground. Mark the location for your mailbox and dig a hole that’s deep enough to accommodate the post and any concrete footing. The depth should be at least 24 inches, but you may need to go deeper depending on the soil conditions and frost line in your area.
- Install the post. Securely attach the mailbox to the post. If you’re using a concrete footing, set the post in the hole and pour concrete around it, ensuring it’s level and plumb. If you’re using a wooden post, you’ll need to treat it with a wood preservative to protect it from rot and decay. You can also use landscaping timbers for added stability.
- Secure the post. Use gravel or crushed stone for drainage and fill the hole around the post. Tamp the soil firmly to ensure the post is securely anchored. If you’re using a concrete footing, let it cure for at least 24 hours before placing the mailbox.
Maintenance
Regular maintenance is key to keeping your mailbox looking its best and functioning properly. Here’s a guide to help you:
- Clean regularly. Use a damp cloth to wipe down the mailbox, removing any dirt, dust, or debris. For tougher stains, you can use a mild soap and water solution. Avoid using harsh chemicals or abrasive cleaners that could damage the finish.
- Inspect for damage. Check for any cracks, chips, or loose screws. Repair any damage promptly to prevent further deterioration. Also, inspect the hinges and latch for wear and tear.
- Repaint or refinish as needed. If the finish is starting to fade or chip, you may need to repaint or refinish the mailbox. This will help protect it from the elements and keep it looking its best.
- Protect from the elements. A well-maintained mailbox will last longer. Consider using a weatherproof sealant to protect the wood from moisture, rain, and sun damage.
Variations and Advanced Projects
Once you’ve mastered the basics of building a standard mailbox, you can explore a world of creative possibilities. You can enhance the functionality and aesthetics of your mailbox by incorporating unique designs, advanced woodworking techniques, and intricate details. This section delves into various mailbox variations and advanced woodworking projects that will inspire you to create truly exceptional mailboxes.
Different Mailbox Designs
There are numerous variations of mailbox designs, each offering a unique blend of functionality and aesthetics.
- Decorative Mailboxes: These mailboxes emphasize aesthetics, often featuring intricate carvings, decorative hardware, and custom paint finishes. They can enhance the curb appeal of your home and reflect your personal style.
- Functional Mailboxes: These mailboxes prioritize functionality, offering features like larger compartments for packages, integrated newspaper holders, or built-in security features.
- Unique Mailboxes: These mailboxes break away from traditional designs, incorporating unconventional shapes, materials, and themes. They can be a conversation starter and a unique addition to your property.
Advanced Woodworking Techniques
Advanced woodworking techniques can elevate your mailbox designs to new heights.
- Intricate Carving: Carving intricate patterns and designs into your mailbox can add a touch of elegance and sophistication. This technique requires precision and patience, but the results can be stunning.
- Woodturning: Woodturning allows you to create unique shapes and designs for mailbox components, such as the post or the mailbox door. It requires specialized tools and skills, but it can produce truly remarkable results.
- Inlay Work: Inlay work involves embedding different materials, such as wood, metal, or stone, into the surface of your mailbox. This technique can add a touch of elegance and visual interest.
- Marquetry: Marquetry is a technique that uses different colored woods to create intricate designs and patterns. It requires patience and precision, but the results are breathtakingly beautiful.
Examples of Advanced Mailbox Projects
Here are some examples of mailbox projects that showcase advanced woodworking techniques:
- A mailbox with a built-in birdhouse: This project combines functionality and aesthetics by providing a home for birds while also serving as a mailbox. It requires advanced carpentry skills and attention to detail.
- A mailbox with a custom-made metal plaque: This project involves creating a unique metal plaque with a personalized inscription or design. It requires knowledge of metalworking and fabrication techniques.
- A mailbox with a stained glass window: This project adds a touch of elegance and color to your mailbox by incorporating a stained glass window. It requires knowledge of glass cutting, soldering, and design techniques.
Ending Remarks: Mailbox Woodworking Plans
With a little planning, the right tools, and some patience, you can build a beautiful and durable wooden mailbox that will last for years to come. Whether you’re looking for a simple, functional design or something more elaborate, there’s a mailbox woodworking plan out there that’s perfect for you. So grab your tools, choose your wood, and let’s get started!
Question & Answer Hub
What are the best woods for building a mailbox?
Cedar, redwood, and pressure-treated pine are excellent choices for mailbox construction due to their durability and resistance to weather.
How do I make sure my mailbox is the right size?
Consult your local postal regulations for mailbox size requirements. Generally, they should be at least 6 inches wide, 12 inches high, and 18 inches deep.
What kind of finish should I use on my mailbox?
A durable exterior paint or stain will protect your mailbox from the elements. Consider a water-based finish for a safer and environmentally friendly option.
Building a mailbox is a great weekend project, and you can get creative with the design. If you’re looking for something a bit more ambitious, you might want to check out some hutch woodworking plans. Hutches are versatile pieces of furniture that can be used in a variety of ways, and they can be a great way to add some extra storage space to your home.
Once you’ve mastered a hutch, a mailbox will seem like a breeze!
