Sideboard woodworking plans offer a fantastic opportunity to craft a unique and functional piece of furniture that will enhance your home’s style and storage capacity. Whether you’re a seasoned woodworker or a curious beginner, building a sideboard from scratch can be a rewarding and fulfilling experience.
From understanding the history and evolution of sideboards to selecting the right materials and mastering essential woodworking techniques, these plans guide you through each step of the process. You’ll discover how to create a durable and aesthetically pleasing sideboard that perfectly complements your existing decor.
Introduction to Sideboard Woodworking
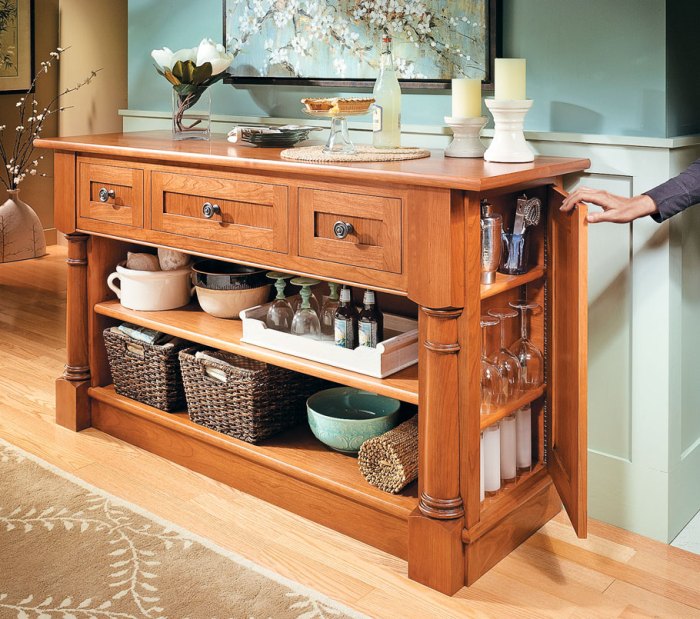
A sideboard is a freestanding piece of furniture typically placed in a dining room or living room, featuring a long, horizontal surface with drawers and cabinets for storage. Sideboards have evolved from simple serving tables to sophisticated statement pieces, reflecting the changing tastes and needs of society.
Historical Significance and Evolution of Sideboards
Sideboards have a rich history, evolving over centuries to meet changing needs and aesthetics. They emerged in the 17th century, initially serving as simple serving tables for food and drink during meals. As dining customs evolved, so did the sideboard, becoming more elaborate and incorporating features like drawers, cupboards, and shelves.
Styles and Design Elements of Sideboards
Sideboards are available in a wide variety of styles, reflecting different historical periods and design philosophies. Some common styles include:
- Traditional: Characterized by ornate carvings, decorative details, and classic materials like mahogany and cherry wood.
- Modern: Emphasizes clean lines, minimalist design, and sleek materials like metal and glass.
- Mid-century modern: Combines elements of both traditional and modern styles, featuring simple forms with a touch of retro flair.
Sideboards often incorporate a range of design elements, such as:
- Doors: Typically found in cabinets for storage, providing a concealed space for items like dishes, linens, or other household goods.
- Drawers: Offer convenient storage for cutlery, silverware, or other smaller items.
- Shelves: Provide open storage for displaying decorative items or showcasing books.
- Carvings: Ornate carvings, often found on traditional sideboards, add a touch of elegance and craftsmanship.
- Hardware: Handles, knobs, and hinges can contribute to the overall style of the sideboard, ranging from simple and functional to elaborate and decorative.
Planning Your Sideboard Project

Planning your sideboard woodworking project is essential for a successful outcome. It allows you to visualize the final product, determine the necessary materials and tools, and ensure that the project fits your skills and resources. A well-thought-out plan can save you time, money, and frustration in the long run.
Choosing Materials
Choosing the right materials for your sideboard is crucial. This involves considering the wood type, finish, and hardware.
- Wood Type: Different wood types offer varying characteristics, including durability, grain patterns, and color. Hardwoods like oak, maple, and cherry are known for their strength and durability, while softwoods like pine and cedar are more affordable and easier to work with. Consider the intended use of the sideboard and your budget when choosing a wood type.
- Finish: The finish will determine the appearance and protection of your sideboard. Options include stains, paints, varnishes, and oils. Stains enhance the natural wood grain, while paints provide a solid color. Varnishes and oils protect the wood from moisture and scratches. Choose a finish that complements the wood type and your personal style.
- Hardware: Hardware includes hinges, drawer slides, knobs, and pulls. Consider the style and functionality of the hardware when making your selection. For example, choose heavy-duty hinges for a large, heavy door, and opt for smooth-gliding drawer slides for easy access to your belongings. Ensure that the hardware is compatible with the wood type and finish.
Creating a Detailed Design Plan
A detailed design plan is essential for success. This includes sketches, dimensions, and joinery techniques.
- Sketches: Create detailed sketches of the sideboard from different angles. Include the overall dimensions, the number and size of drawers and shelves, and the placement of hardware. These sketches will serve as a visual guide throughout the construction process.
- Dimensions: Measure and record all dimensions accurately. This includes the height, width, depth, and thickness of each component. Use a tape measure, ruler, and protractor to ensure precision. Consider the scale of your design and the available space in your home.
- Joinery Techniques: Choose appropriate joinery techniques for the construction of the sideboard. Common techniques include mortise and tenon, dovetail, and biscuit joints. Consider the strength, appearance, and complexity of each technique. Practice the chosen techniques before starting the project.
Estimating Costs
Estimating costs is crucial for budgeting your project. Consider the following factors:
- Materials: Research the cost of wood, finish, and hardware. Obtain quotes from multiple suppliers to compare prices. Factor in the cost of any additional materials, such as glue, screws, and sandpaper.
- Tools: Assess the tools you already own and determine what needs to be purchased. Consider the cost of saws, drills, sanders, and other woodworking tools. Rent tools if you need them only for this project.
- Labor: If you’re hiring a professional woodworker, factor in the cost of labor. Otherwise, estimate the time you’ll spend on the project and assign a value to your time.
Setting a Realistic Timeline
Set a realistic timeline for your project, considering the complexity of the design and your available time. Allow ample time for each step, including cutting, assembly, sanding, and finishing. Be realistic about potential delays and unexpected challenges. A well-defined timeline helps you stay organized and motivated throughout the project.
Construction Techniques

Building a sideboard involves a range of woodworking techniques, each crucial for achieving a sturdy and visually appealing piece. These techniques require precision, attention to detail, and a good understanding of wood behavior.
Joinery Methods
Different joinery methods are used to connect pieces of wood in a sideboard. The choice depends on the desired strength, aesthetics, and complexity of the design.
- Mortise and Tenon Joints: This traditional joinery method is known for its strength and stability. A mortise (a rectangular hole) is cut into one piece of wood, and a tenon (a protruding tongue) is cut on the other. The tenon fits snugly into the mortise, creating a strong and durable connection.
- Dovetail Joints: Dovetail joints are visually appealing and offer excellent strength. They involve interlocking wedge-shaped pieces that create a strong, interlocking connection. Dovetails are commonly used for drawer fronts and cabinet sides.
- Dado Joints: Dado joints involve cutting a groove (dado) into one piece of wood and fitting a piece of wood into that groove. They are commonly used for shelves and drawer bottoms.
Accurate Measurements and Cutting
Precise measurements and cutting are essential for creating a sideboard with clean lines and a professional finish.
“A sideboard with poorly fitting joints can be unstable and aesthetically unappealing.”
- Marking Techniques: Use a combination square, try square, and marking gauge to ensure accurate measurements and precise cutting lines.
- Cutting Tools: Employ a handsaw, jigsaw, or table saw for accurate and controlled cutting.
- Double-Checking Measurements: Always double-check measurements before cutting, especially when dealing with expensive or rare wood.
Building the Sideboard Carcass

The sideboard carcass is the foundation of your project, providing the structural support for drawers, shelves, and doors. It’s essential to construct it with precision and care to ensure a stable and durable piece.
Assembling the Sideboard Carcass
Before assembling the carcass, ensure all pieces are cut to size and the joinery is prepared. We will discuss the common joinery techniques used for building sideboards:
* Mortise and Tenon: This classic joinery method offers strength and stability. The tenon, a protruding piece on one board, fits precisely into the mortise, a cut-out on the other.
* Dovetail: This strong and aesthetically pleasing joinery creates a strong interlocking joint. The dovetails, shaped like the tail of a dove, fit into corresponding slots on the mating piece.
* Pocket Holes: This modern joinery technique uses pre-drilled holes to attach pieces with screws. Pocket holes are concealed and offer a fast and strong method of joining.
Attaching the Drawer Runners, Sideboard woodworking plans
Drawer runners are essential for smooth and effortless drawer operation. The runners are attached to the sides of the sideboard carcass and support the drawer boxes.
* Full Extension Runners: These runners allow the drawer to extend fully, providing easy access to the entire drawer content.
* Side Mount Runners: These runners are attached to the sides of the drawer box and the sideboard carcass.
* Undermount Runners: These runners are mounted beneath the drawer box and are often used in contemporary designs.
Ensuring Stability
The stability of the sideboard carcass is paramount. Here are some techniques to ensure its structural integrity:
* Glue: Use high-quality wood glue to bond the joints and create a strong and durable connection.
* Screws: Use screws to reinforce the joints and provide additional strength.
* Braces: Internal braces can be added to reinforce the structure and prevent warping or sagging.
* Dowels: Dowels can be used to reinforce the joints and provide additional stability.
Creating the Doors and Drawers
The doors and drawers are the finishing touches that give your sideboard its character and functionality. Crafting them requires careful planning and attention to detail, but the results are well worth the effort.
Designing and Constructing Doors
The design of your doors should complement the overall style of your sideboard. Consider the size and shape of the doors, the type of wood you’ll use, and any decorative elements you want to incorporate. Here’s a step-by-step guide to creating your doors:
- Determine the size and shape: Measure the opening for your doors carefully. Decide whether you want single or double doors, and determine the desired height, width, and thickness.
- Select the wood: Choose a wood that complements the rest of your sideboard and has the strength to withstand the weight of the doors. Consider using solid wood or plywood.
- Cut the panels: Cut the panels for your doors using a table saw or circular saw. Be sure to cut the panels to the exact dimensions you need.
- Join the panels: If you’re using multiple panels, join them together using mortise and tenon joints, dado joints, or rabbet joints. These techniques create strong and durable connections.
- Add decorative elements: Consider adding decorative elements to your doors, such as raised panels, moldings, or carved details.
- Finish the doors: Sand the doors smooth and apply a finish that complements the rest of your sideboard. This could include paint, stain, or a clear coat.
- Install the doors: Once the doors are finished, install them on the sideboard using hinges. Be sure to align the doors properly and ensure they open and close smoothly.
Creating Drawers
Drawers add practicality and storage space to your sideboard. Here’s how to construct them:
- Determine the size and number: Measure the space available for drawers and decide how many drawers you need. Consider the depth and height of the drawers based on the items you’ll store in them.
- Select drawer slides: Choose drawer slides that are suitable for the weight of the drawers and the type of wood you’re using. Common types include side-mount, full-extension, and under-mount slides.
- Cut the drawer sides and bottom: Cut the sides and bottom of the drawers to the exact dimensions you need. You can use a table saw or circular saw for this step.
- Join the drawer parts: Join the sides and bottom of the drawers using dado joints, rabbet joints, or dovetail joints. These techniques create strong and durable connections.
- Attach the drawer front: Once the drawer box is assembled, attach the drawer front using screws or dowels. Ensure the drawer front is flush with the sides and bottom.
- Install the drawer slides: Attach the drawer slides to the drawer box and the sideboard using screws or dowels. Be sure to align the slides properly so that the drawers open and close smoothly.
- Finish the drawers: Sand the drawers smooth and apply a finish that complements the rest of your sideboard.
Tips for Smooth Operation and Alignment
- Precise measurements: Accurate measurements are essential for ensuring the doors and drawers open and close smoothly.
- Proper alignment: Align the doors and drawers carefully when installing them. Use a level to ensure that they are straight and plumb.
- Smooth surfaces: Sand the surfaces of the doors and drawers smooth to prevent them from sticking or catching.
- High-quality hinges and slides: Use high-quality hinges and drawer slides to ensure smooth operation.
- Test and adjust: Test the doors and drawers after installation and adjust them as needed to ensure they open and close smoothly.
Finishing and Refinishing
The final step in your sideboard project is finishing. This involves sanding, staining, and applying a protective topcoat. The finish not only enhances the beauty of the wood but also protects it from scratches, moisture, and other damage.
Sanding
Sanding is crucial for achieving a smooth and even surface. It removes imperfections and prepares the wood for staining and topcoating.
- Start with coarse-grit sandpaper (80-120 grit) to remove any major imperfections.
- Progress through progressively finer grits (150, 220, 400) to achieve a smooth finish.
- Sand with the grain of the wood to avoid creating scratches.
- Use a sanding block to ensure even pressure and prevent divots.
Staining
Staining adds color and depth to the wood. It can enhance the natural grain or create a completely different look.
- Choose a stain that complements the wood species and your desired aesthetic.
- Apply stain evenly using a brush, cloth, or sponge.
- Wipe off excess stain after the recommended drying time to prevent uneven color.
- Apply multiple coats of stain for deeper color saturation.
Applying a Protective Topcoat
A topcoat protects the wood from scratches, moisture, and other damage. It also enhances the sheen and durability of the finish.
- There are various types of topcoats, each with its own advantages and disadvantages.
- Oil finishes are easy to apply and provide a natural look.
- Varnishes offer excellent protection and a durable finish.
- Lacquer provides a hard, durable finish with a high gloss.
- Apply the topcoat in thin, even coats to avoid drips and runs.
- Allow each coat to dry completely before applying the next.
Types of Finishes
- Oil Finishes: These finishes are typically made from linseed oil, tung oil, or a combination of oils. They penetrate the wood, providing a natural look and feel. Oil finishes are easy to apply and can be refreshed with additional coats over time.
- Varnishes: Varnishes are made from resins dissolved in a solvent, such as alcohol or oil. They form a hard, protective film over the wood. Varnishes come in various finishes, from satin to gloss.
- Lacquer: Lacquer is a fast-drying finish that provides a hard, durable surface. It is often used on furniture because it is resistant to scratches and stains. Lacquer is available in a variety of finishes, including gloss, semi-gloss, and satin.
Achieving a Smooth and Durable Finish
- Preparation is Key: Proper sanding and surface preparation are essential for achieving a smooth and durable finish. Remove any dust or debris before applying stain or topcoat.
- Thin Coats: Apply thin, even coats of finish. Thick coats can lead to drips, runs, and uneven coverage.
- Drying Time: Allow each coat of finish to dry completely before applying the next. The drying time will vary depending on the type of finish and the temperature and humidity.
- Sanding Between Coats: Sand lightly between coats of finish to smooth out any imperfections and create a smoother finish.
Hardware and Accessories

Adding hardware and accessories is the final touch that completes your sideboard project. Choosing the right hardware and installing it properly can enhance both the functionality and aesthetic appeal of your piece.
Types of Hardware
Hardware for sideboards typically includes hinges, knobs, pulls, and locks. These elements serve both practical and decorative purposes.
- Hinges: Hinges are essential for attaching doors to the sideboard carcass. There are various types, including:
- Butt hinges: These are the most common type, offering a simple and reliable solution for attaching doors. They are usually concealed behind the door, giving a clean look.
- Overlay hinges: These hinges allow the door to overlap the cabinet frame, creating a more modern aesthetic.
- Inset hinges: Inset hinges are used when the door sits flush with the cabinet face, offering a sleek, minimalist appearance.
- Knobs and Pulls: Knobs and pulls provide a way to open drawers and doors. They come in a wide range of styles, materials, and finishes to complement your sideboard’s design.
- Knobs: These are small, round handles that are typically mounted on drawers. They offer a classic and elegant look.
- Pulls: Pulls are elongated handles that can be mounted on both drawers and doors. They provide a more contemporary and ergonomic option.
- Locks: Locks are optional but can add security to your sideboard. They are commonly used on drawers to prevent unwanted access to contents.
- Cabinet locks: These are simple locks that are typically installed on drawers or doors with a keyhole.
- Combination locks: These locks require a combination of numbers to open, providing a more secure option.
Installing Hardware
Installing hardware correctly ensures that your sideboard functions smoothly and looks its best.
- Measuring and Marking: Before drilling holes, carefully measure and mark the placement of your hardware. Use a level to ensure that everything is aligned.
- Drilling Pilot Holes: Drilling pilot holes before installing screws helps to prevent wood splitting. The pilot hole should be slightly smaller than the screw diameter.
- Installing Hinges: Hinges are usually attached to the door and the cabinet frame using screws. Ensure the hinges are properly aligned before tightening the screws.
- Installing Knobs and Pulls: Knobs and pulls are often mounted using screws that pass through the back of the hardware and into the drawer or door. Ensure the hardware is level and centered before tightening the screws.
- Installing Locks: Locks are typically installed using screws or bolts. Follow the manufacturer’s instructions carefully to ensure proper installation.
Decorative Elements
Decorative elements can add a touch of personality and sophistication to your sideboard. Some popular options include:
- Hardware Finishes: Hardware comes in a variety of finishes, such as brass, nickel, chrome, and black. Choosing a finish that complements the wood and overall design of your sideboard can create a cohesive and elegant look.
- Ornamental Hardware: There are numerous options for ornamental hardware, including decorative hinges, knobs, and pulls. These elements can add a touch of vintage charm or a modern twist to your sideboard.
- Embellishments: Adding embellishments like decorative molding, carvings, or inlays can elevate the aesthetic appeal of your sideboard. These details can create a sense of artistry and craftsmanship.
Inspirational Sideboard Designs

A sideboard is a versatile piece of furniture that can add both style and functionality to any room. It can be used to store dishes, linens, and other household items, or it can be used to display decorative items. Sideboards come in a variety of styles, so you can find one that perfectly complements your home decor.
Here are some inspirational sideboard designs to get your creative juices flowing:
Modern Sideboards
Modern sideboards are characterized by their clean lines, minimalist designs, and use of contemporary materials.
- Mid-Century Modern Sideboard: This style of sideboard features sleek, tapered legs and simple geometric shapes. It is often made from materials such as walnut or teak wood, and it may have a high-gloss finish.
- Scandinavian Sideboard: Scandinavian sideboards are known for their minimalist aesthetic and use of natural materials. They often feature simple, functional designs with clean lines and a focus on functionality.
- Industrial Sideboard: Industrial sideboards have a raw, edgy look that is inspired by factory spaces. They often feature exposed metal frames, reclaimed wood, and industrial hardware.
Traditional Sideboards
Traditional sideboards are characterized by their ornate designs, intricate carvings, and use of classic materials.
- Queen Anne Sideboard: Queen Anne sideboards are known for their cabriole legs, which are curved and elegant. They often feature a serpentine front and a mahogany finish.
- Chippendale Sideboard: Chippendale sideboards are characterized by their intricate carvings and use of mahogany wood. They often feature a stepped base and a carved cornice.
- Georgian Sideboard: Georgian sideboards are known for their elegant proportions and use of mahogany or walnut wood. They often feature a breakfront design, which gives them a distinctive shape.
Rustic Sideboards
Rustic sideboards are characterized by their use of natural materials, such as reclaimed wood, and their rough-hewn finishes.
- Barnwood Sideboard: Barnwood sideboards are made from reclaimed wood that has been salvaged from old barns. They often have a weathered look and a rustic charm.
- Log Sideboard: Log sideboards are made from logs that have been cut and polished. They often have a natural, organic look and a sturdy, rustic feel.
- Reclaimed Wood Sideboard: Reclaimed wood sideboards are made from wood that has been salvaged from old buildings or other structures. They often have a unique character and a story to tell.
Unique Sideboard Designs
There are many other unique sideboard designs available, each with its own special features.
- Sideboard with a Built-in Wine Rack: This design is perfect for wine lovers, as it provides a convenient place to store and display their collection.
- Sideboard with a Mirror: A sideboard with a mirror can help to make a room feel larger and brighter.
- Sideboard with a Buffet Top: This design is ideal for entertaining, as it provides a large surface area for serving food and drinks.
Safety Precautions
Woodworking is a rewarding hobby, but it’s essential to prioritize safety throughout the process. From using sharp tools to handling heavy materials, there are inherent risks involved. Understanding and implementing safety measures can help you avoid accidents and injuries, allowing you to enjoy woodworking without worry.
Personal Protective Equipment (PPE)
Personal protective equipment (PPE) is your first line of defense against potential hazards. Wearing appropriate PPE can significantly reduce the risk of injuries.
- Eye Protection: Safety glasses or goggles are crucial for protecting your eyes from flying debris, dust, and wood chips. Look for glasses with side shields for maximum protection. Consider using a face shield for additional protection when working with power tools.
- Ear Protection: Many woodworking tools, especially power tools, generate loud noises that can damage your hearing over time. Use earplugs or earmuffs to protect your hearing. Choose ear protection that provides a comfortable fit and adequate noise reduction.
- Dust Mask: Woodworking generates dust, which can irritate your respiratory system and cause health problems. A dust mask will help filter out dust particles and protect your lungs. Choose a mask that provides a tight seal and is rated for the type of dust you’re working with. For example, a respirator mask is recommended for fine dust produced by sanding.
- Gloves: Gloves protect your hands from splinters, cuts, and abrasions. Consider using gloves that offer good dexterity and grip, especially when handling sharp tools or working with rough materials.
- Footwear: Wear closed-toe shoes with good grip to protect your feet from falling objects and potential hazards in the workshop.
Safe Tool Use
Always read and understand the manufacturer’s instructions for each tool before using it. This includes safety warnings, operating procedures, and maintenance recommendations.
- Keep Tools Sharp: Sharp tools are safer than dull ones because they require less force to use. This reduces the risk of the tool slipping and causing injury.
- Use the Right Tool for the Job: Each tool is designed for a specific purpose. Using the wrong tool can lead to accidents.
- Secure Workpieces: Always secure your workpieces before using power tools. This prevents the wood from moving and causing accidents. Use clamps, vices, or other suitable holding devices.
- Avoid Distractions: Focus on the task at hand and avoid distractions. Don’t operate power tools while talking on the phone or listening to music.
- Disconnect Tools: Disconnect power tools from the power source before making adjustments or cleaning them. This prevents accidental starts.
Workshop Safety
Maintaining a clean and organized workshop is essential for safety. A cluttered workspace can lead to accidents and injuries.
Sideboard woodworking plans can be a fun challenge, and you might find that the skills you learn building a sideboard can be applied to other projects, too. If you’re looking to create a comfortable and cozy seating area, you might want to consider building a futon, and there are some great futon woodworking plans available online.
Once you’ve got your futon built, a sideboard will be the perfect place to store blankets, books, and other essentials for your relaxing space.
- Clean Up: Regularly clean up sawdust, scraps, and debris to prevent tripping hazards and fire risks.
- Proper Lighting: Ensure your workshop has adequate lighting to prevent eye strain and improve visibility.
- Ventilation: Proper ventilation is crucial for removing dust and fumes from the air. Consider using a dust collector or opening windows for fresh air circulation.
- Fire Safety: Keep a fire extinguisher readily available in case of a fire. Avoid using flammable liquids in your workshop, and be cautious when using power tools that can generate heat.
Important Reminders
Safety is an ongoing process. It’s not just about following rules; it’s about developing a safety mindset and always being aware of potential hazards.
Always think ahead and anticipate potential problems. Don’t rush, and take your time to work safely.
Final Review
By following these sideboard woodworking plans, you’ll not only gain valuable woodworking skills but also create a cherished piece of furniture that reflects your creativity and craftsmanship. With a little time, patience, and dedication, you can transform your woodworking dreams into a stunning reality.
FAQs: Sideboard Woodworking Plans
What tools do I need for sideboard woodworking?
You’ll need basic woodworking tools like a saw, drill, sander, measuring tape, and clamps. Specific tools will depend on the chosen joinery techniques and design.
How much does it cost to build a sideboard?
The cost varies based on materials, hardware, and your chosen design. You can find affordable options by using reclaimed wood or shopping for deals on lumber.
What are some tips for choosing the right wood for a sideboard?
Consider the durability, aesthetic appeal, and availability of different wood species. Hardwoods like oak, maple, and cherry are popular for their strength and beauty.
