Simple woodworking plans are a great way for beginners to get started with DIY projects. Whether you’re looking to build a birdhouse, a bookshelf, or a coffee table, there’s a plan out there for you. Pre-designed plans offer a step-by-step guide, making it easier to understand the process and avoid common mistakes. You’ll learn basic woodworking techniques, discover different types of wood, and gain confidence in your skills.
This guide will walk you through everything you need to know to start your first woodworking project, from finding the right plan to finishing your creation. We’ll cover essential tools, common woodworking techniques, and even provide inspiration for your next project.
Introduction to Simple Woodworking Plans

Woodworking is a rewarding hobby that can bring you immense satisfaction and a sense of accomplishment. However, starting a woodworking project can feel daunting, especially for beginners. Simple woodworking plans are a great way to overcome this hurdle and get started on your woodworking journey.
Simple woodworking plans offer a clear and concise guide to building a project, making them perfect for beginners. These plans typically break down the project into manageable steps, making it easier to follow along and understand the process.
Benefits of Using Pre-Designed Plans
Using pre-designed plans has numerous benefits for woodworking beginners:
- Reduces Confusion: Plans provide clear instructions, eliminating guesswork and ensuring you understand the project’s requirements.
- Saves Time: Pre-designed plans eliminate the need to spend time planning and designing your project, allowing you to jump right into building.
- Ensures Accuracy: Plans provide precise measurements and cut lists, minimizing errors and ensuring a successful outcome.
- Provides a Sense of Accomplishment: Following a plan and successfully completing a project can be a fulfilling experience, boosting your confidence and encouraging you to tackle more complex projects in the future.
Examples of Popular Simple Woodworking Projects
Simple woodworking plans are available for a wide range of projects, from basic to slightly more complex. Here are some popular examples:
- Birdhouses: These are a classic beginner project, often involving simple cuts and basic joinery techniques.
- Cutting Boards: These functional and stylish projects require precise cuts and can be customized with different wood types and finishes.
- Shelves: Simple shelf units are easy to build and can be used for storage or display in various areas of your home.
- Picture Frames: These projects offer an excellent opportunity to experiment with different wood species and finishes while creating a personalized touch for your photos.
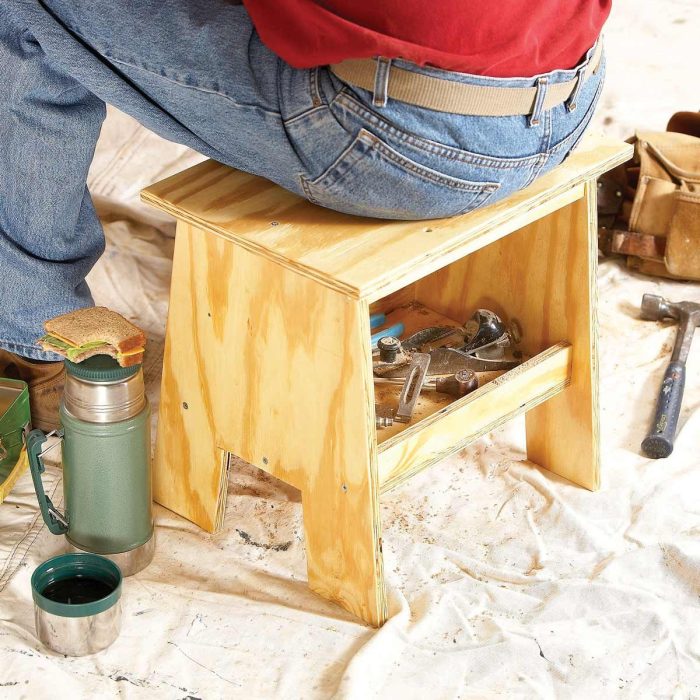
- Small Wooden Boxes: These versatile projects can be used for storage, jewelry boxes, or decorative purposes, providing a good introduction to basic joinery techniques.
Finding and Choosing Plans

Now that you’re ready to dive into woodworking, it’s time to find the perfect project to get started. The internet is a treasure trove of free and paid woodworking plans, offering a wide variety of projects to suit every skill level and interest.
Resources for Finding Woodworking Plans
The internet is a vast resource for woodworking plans. Here are some popular websites where you can find both free and paid plans:
- Free Woodworking Plans:
- Ana White: Ana White offers a huge library of free woodworking plans, covering everything from simple projects to more complex builds. Her website is well-organized and user-friendly, making it easy to find plans based on your skill level and interests.
- Woodworking for Mere Mortals: This website offers a collection of free woodworking plans, with a focus on simple and practical projects. They also have a helpful blog with tips and advice for beginner woodworkers.
- The Wood Whisperer: The Wood Whisperer is a popular woodworking blog and YouTube channel, and they offer a selection of free woodworking plans on their website. These plans are often accompanied by detailed videos and instructions.
- Paid Woodworking Plans:
- Rockler: Rockler is a popular woodworking retailer that also offers a selection of paid woodworking plans. Their plans are known for their quality and detail, and they often include step-by-step instructions and cut lists.
- Woodcraft: Woodcraft is another well-known woodworking retailer that offers paid woodworking plans. Their plans cover a wide range of projects, from furniture to toys to outdoor structures.
- Etsy: Etsy is a great place to find unique and handcrafted woodworking plans. Many sellers on Etsy offer digital downloads of their plans, which can be printed out and used for your projects.
Factors to Consider When Choosing a Plan
Choosing the right woodworking plan is essential for a successful project. Here are some factors to consider:
- Skill Level: It’s important to choose a plan that matches your current skill level. If you’re a beginner, start with a simple project that doesn’t require a lot of complex techniques. As you gain experience, you can gradually move on to more challenging projects.
- Time Commitment: Woodworking projects can take a lot of time, so it’s important to consider how much time you’re willing to dedicate to a project. Choose a plan that fits your schedule and allows you to complete the project in a reasonable timeframe.
- Materials: Before you choose a plan, make sure you have access to the necessary materials. Some plans require specific types of wood or hardware, so it’s important to check before you get started.
Understanding Plans and Diagrams
Woodworking plans are essential for creating a successful project. They provide detailed instructions and diagrams that guide you through every step of the process.
- Cut Lists: A cut list is a list of all the pieces of wood you’ll need for your project, along with their dimensions. This list is essential for ensuring that you have all the necessary materials and that they’re cut to the correct size.
- Diagrams: Woodworking plans often include diagrams that show the layout of the project, the placement of each piece of wood, and the location of joints and hardware. These diagrams are essential for visualizing the finished product and understanding how the pieces fit together.
- Instructions: Woodworking plans typically include detailed instructions that explain each step of the process. These instructions are essential for ensuring that you complete the project correctly and safely.
It’s important to read through the entire plan before you begin working. This will help you understand the project as a whole and identify any potential challenges.
Essential Woodworking Tools
Starting a woodworking journey requires the right tools. Whether you’re a beginner or have some experience, having the right tools can make your projects easier, safer, and more enjoyable. This section will cover essential woodworking tools for beginners, exploring the difference between hand tools and power tools and highlighting important safety precautions.
Essential Woodworking Tools for Beginners
Here’s a list of essential woodworking tools for beginners, along with their descriptions and uses:
| Tool | Description | Uses |
|---|---|---|
| Measuring Tape | A flexible tape measure with markings for accurate length measurements. | Measuring wood, marking cutting lines, and verifying dimensions. |
| Carpenter’s Pencil | A pencil with a hard lead, designed for marking on wood. | Marking cutting lines, transferring measurements, and creating guidelines. |
| Combination Square | A tool with a ruler and a protractor, used for measuring angles and marking straight lines. | Checking for squareness, measuring angles, and marking parallel lines. |
| Hand Saw | A saw with a toothed blade, used for cutting wood by hand. | Cutting wood to size, making straight cuts, and shaping wood. |
| Chisel | A sharp-edged tool used for carving, shaping, and removing wood. | Creating grooves, shaping edges, and carving details. |
| Hammer | A tool with a heavy head, used for driving nails and other fasteners. | Securing wood pieces, removing nails, and striking chisels. |
| Screwdriver | A tool with a handle and a tip that fits into screw heads, used for driving and removing screws. | Securing wood pieces, assembling furniture, and making repairs. |
| Clamps | Tools that hold pieces of wood together securely. | Securing wood pieces during gluing, holding joints together, and providing pressure during assembly. |
| Work Bench | A sturdy table designed for woodworking tasks. | Providing a stable work surface, supporting projects, and holding tools. |
Hand Tools vs. Power Tools
Hand tools and power tools each have their own advantages and disadvantages. Here’s a comparison of the two for simple woodworking projects:
| Feature | Hand Tools | Power Tools |
|---|---|---|
| Cost | Generally less expensive | More expensive, with a wider range of costs |
| Portability | Highly portable | Less portable, requiring power sources and storage space |
| Precision | Requires skill and practice for accuracy | Can provide more precise cuts with the right equipment |
| Speed | Slower, requiring manual effort | Faster, allowing for quicker completion of tasks |
| Noise | Quiet | Can be noisy, requiring ear protection |
| Maintenance | Minimal maintenance, usually sharpening | Requires regular maintenance and potential repairs |
Safety Precautions and Proper Tool Usage
Safety should always be a top priority when working with woodworking tools. Here are some essential safety precautions:
- Always wear safety glasses to protect your eyes from flying debris.
- Use hearing protection, especially when using power tools.
- Keep your work area clean and organized, removing any clutter or obstructions.
- Use the right tool for the job and ensure it’s in good working condition.
- Always unplug power tools before making adjustments or cleaning them.
- Keep your fingers clear of the cutting path of saws and other blades.
- Use clamps to secure wood pieces, preventing movement during cutting or assembly.
- Never use power tools when you’re tired or distracted.
- Be aware of your surroundings and avoid distractions.
It’s also important to understand the proper usage of each tool. This includes learning how to hold the tool, how to apply pressure, and how to avoid common mistakes. Refer to the manufacturer’s instructions for specific details on each tool.
Understanding Wood Types

Choosing the right wood for your woodworking project is essential for its success and longevity. Wood types have distinct characteristics that influence their suitability for specific applications. This section delves into common wood types, their properties, and how to select the best one for your needs.
Hardwoods vs. Softwoods
The terms “hardwood” and “softwood” refer to the type of tree from which the wood is derived, not its actual hardness. Hardwoods come from deciduous trees that lose their leaves seasonally, while softwoods come from coniferous trees, which bear cones and retain their needles year-round.
- Hardwoods are generally denser and stronger than softwoods, making them suitable for furniture, flooring, and other high-stress applications. Examples include oak, maple, cherry, walnut, and mahogany.
- Softwoods are typically lighter and less expensive than hardwoods, making them suitable for construction, crafts, and general woodworking projects. Examples include pine, fir, cedar, and spruce.
Common Wood Types
Here’s a list of common wood types used in woodworking, highlighting their properties and suitability for specific projects:
| Wood Type | Properties | Suitability |
|---|---|---|
| Oak | Hard, strong, durable, with distinctive grain patterns. | Furniture, flooring, cabinets, boat building. |
| Maple | Hard, strong, with a close grain and beautiful finish. | Furniture, flooring, butcher blocks, musical instruments. |
| Cherry | Hard, strong, with a warm reddish-brown color that darkens with age. | Furniture, cabinets, trim, veneers. |
| Walnut | Hard, strong, with a rich brown color and distinctive grain patterns. | Furniture, cabinets, gunstocks, veneers. |
| Mahogany | Hard, strong, with a reddish-brown color and beautiful grain patterns. | Furniture, boat building, veneers. |
| Pine | Soft, lightweight, affordable, with a distinctive knotty grain. | Construction, crafts, furniture, trim. |
| Fir | Soft, lightweight, affordable, with a straight grain and even texture. | Construction, crafts, furniture, trim. |
| Cedar | Soft, lightweight, aromatic, with a natural resistance to rot and insects. | Outdoor furniture, siding, decking, crafts. |
| Spruce | Soft, lightweight, affordable, with a straight grain and even texture. | Construction, crafts, musical instruments. |
Cutting and Joining Techniques: Simple Woodworking Plans

Cutting and joining techniques are the foundation of woodworking. Mastering these techniques allows you to shape and assemble wood to create your desired projects. This section will cover the basic cutting techniques and common joining methods used in woodworking.
Basic Cutting Techniques
Cutting wood accurately and safely is essential for any woodworking project. Here’s a step-by-step guide to basic cutting techniques:
Measuring
Measuring is the first step in any cutting operation. It ensures that your cuts are accurate and that your pieces will fit together correctly. You can use a ruler, tape measure, or measuring stick to determine the length or width of the piece you need to cut.
Marking
Once you’ve measured the piece, you need to mark it for cutting. Use a pencil, marker, or a combination square to create a clear and precise line. This line will guide your saw and ensure that your cut is straight and accurate.
Sawing
The final step is sawing. This involves using a saw to cut the wood along the marked line. Different saws are designed for different purposes, so choose the right saw for the job. For example, a handsaw is suitable for straight cuts, while a jigsaw is ideal for curved cuts.
Safety Precautions
Always prioritize safety when cutting wood. Wear safety glasses to protect your eyes from wood chips and sawdust. Use a sawhorse or workbench to support your work, and ensure the cutting area is free of distractions.
Common Joining Methods
Joining methods are used to connect different pieces of wood together. They allow you to create strong and durable structures. Common joining methods include:
Screws
Screws are versatile fasteners that can be used to join wood together in a variety of applications. They are strong and reliable, and they can be easily removed and replaced if necessary.
Nails
Nails are another common fastener used in woodworking. They are less expensive than screws, but they are not as strong or as versatile. Nails are best suited for holding pieces of wood together temporarily or for applications where strength is not a major concern.
Glue
Wood glue is an adhesive used to bond pieces of wood together. It creates a strong and permanent bond, and it is often used in conjunction with other joining methods, such as screws or nails.
Dowels
Dowels are cylindrical wooden rods used to join pieces of wood together. They are strong and durable, and they can be used to create a variety of joints, such as mortise and tenon joints.
Joinery Techniques
Joinery techniques are specialized methods of joining wood together using specific cuts and shapes. These techniques are often used to create strong and decorative joints. Here is a table illustrating different joinery techniques and their applications:
| Joinery Technique | Description | Application |
|---|---|---|
| Mortise and Tenon | A tenon (projection) is cut on one piece of wood, and a mortise (hole) is cut on the other piece to receive the tenon. | Strong and durable joint suitable for furniture, doors, and windows. |
| Dovetail | A series of interlocking wedges are cut on the ends of two pieces of wood. | Strong and decorative joint suitable for drawers, boxes, and cabinets. |
| Dado | A groove is cut across the width of a piece of wood to receive a piece of wood of the same thickness. | Used for shelves, cabinets, and other applications where a flush surface is desired. |
| Rabbet | A groove is cut along the edge of a piece of wood to receive another piece of wood. | Used for shelves, drawer fronts, and other applications where a flush surface is desired. |
Finishing Touches
The final step in any woodworking project is applying finishing touches. This is where your project truly comes to life, enhancing its appearance and protecting the wood from wear and tear. A well-chosen finish can transform your project from ordinary to extraordinary.
Sanding
Sanding is a crucial step in preparing your wood for finishing. It smooths out any imperfections and creates a uniform surface for the finish to adhere to. Sanding is typically done in stages, starting with coarser grit sandpaper to remove major imperfections and progressing to finer grits for a smooth, polished finish.
Staining
Staining adds color and depth to your wood, enhancing its natural beauty. Stains penetrate the wood’s pores, creating a rich and even color. There are various types of stains, including oil-based, water-based, and gel stains. Oil-based stains are known for their deep penetration and rich color, while water-based stains are faster drying and easier to clean up. Gel stains are thicker and provide better coverage, making them ideal for uneven surfaces.
Painting
Painting provides a solid color and protective coating for your wood. It’s a versatile finish that allows you to create a wide range of colors and effects. Paints are available in various finishes, including matte, satin, semi-gloss, and gloss. The finish you choose will affect the sheen and durability of the paint.
Varnishing
Varnishing provides a protective layer over your wood, enhancing its durability and shine. Varnishes are typically made from resins and oils, which form a hard, protective coating. Varnishes are available in different finishes, including gloss, semi-gloss, satin, and matte. Glossy varnishes provide the most shine and protection, while matte varnishes offer a more subtle finish.
Choosing the Right Finish
The best finish for your project depends on its intended use and desired aesthetic. For example, a table that will be used frequently might benefit from a durable varnish, while a decorative shelf might be better suited to a stain or paint. Consider the following factors when choosing a finish:
- Type of wood: Different wood species absorb and react to finishes differently. Some woods, like oak, are known for their ability to accept stain well, while others, like pine, might require a primer before painting.
- Project use: The intended use of your project will influence the type of finish you choose. For example, a piece of furniture that will be exposed to moisture might need a waterproof finish.
- Desired aesthetic: The look you want to achieve will also guide your finish choice. Do you want a natural wood look, a vibrant color, or a glossy shine?
Troubleshooting and Tips
Woodworking, like any craft, involves learning from mistakes and applying tips to avoid common pitfalls. While it’s normal to encounter challenges as a beginner, understanding these issues and implementing preventive measures can greatly enhance your woodworking experience.
Common Mistakes and Solutions
Many woodworking beginners make common mistakes. Knowing these errors and how to correct them can prevent frustration and ensure a successful project.
- Incorrectly Measuring and Cutting: This is a common issue, especially for beginners. Double-checking measurements before cutting and using accurate tools like measuring tapes and squares can help. If you make a mistake, try to salvage the wood by adjusting the design or using the scrap for a smaller project.
- Not Using Clamps: Clamps are essential for holding pieces together during assembly and gluing. Not using them can lead to uneven joints, gaps, and instability. Use clamps appropriate for the size and weight of the project.
- Improper Sanding: Sanding is crucial for achieving a smooth and even finish. Using the wrong sandpaper grit or sanding in the wrong direction can result in uneven surfaces and visible scratches. Always start with a coarse grit and progress to finer grits for a polished look.
- Ignoring Wood Grain: Wood grain direction affects how it reacts to cutting and bending. Cutting across the grain can lead to splintering, while bending against the grain can cause cracks. Always consider the wood grain direction when planning and cutting.
- Over-Tightening Fasteners: Over-tightening screws and nails can damage the wood, especially in softwoods. Use the appropriate torque and avoid over-tightening. Use a pilot hole for screws to prevent splitting.
Tips for Avoiding Woodworking Problems
Here are some valuable tips to help you avoid common woodworking problems:
- Plan Carefully: Before starting any project, create a detailed plan, including measurements, materials, and steps. This will help you visualize the process and avoid mistakes.
- Use Quality Tools: Investing in good quality tools, such as saws, planes, and sanders, will make your woodworking experience smoother and produce better results.
- Practice Safe Techniques: Always wear safety glasses, hearing protection, and a dust mask when working with wood. Use proper techniques for handling tools and materials.
- Take Your Time: Rushing can lead to mistakes. Take your time and focus on each step of the process. If you are unsure about a technique, research it thoroughly before proceeding.
- Don’t Be Afraid to Ask for Help: If you encounter a problem or have a question, don’t hesitate to ask for help from a more experienced woodworker or online community.
Reviewing Completed Projects
Before applying the final finish, it’s essential to review your completed project for any imperfections. This checklist can help:
- Check for Accuracy: Ensure all dimensions and angles are correct. Use a measuring tape and square to verify measurements.
- Inspect Joints: Examine all joints for gaps, misalignment, and stability. Ensure they are securely glued and clamped.
- Evaluate Sanding: Check for any rough spots, scratches, or unevenness. Sand any imperfections with progressively finer grits.
- Review Finish: Ensure the finish is evenly applied and free of drips, runs, or bubbles. If necessary, sand and reapply the finish.
- Final Inspection: Look for any other imperfections, such as loose screws, protruding nails, or unfinished areas. Address these before applying the final finish.
Inspiring Simple Woodworking Projects

Woodworking projects can be a great way to express your creativity, learn new skills, and build something useful or beautiful. Whether you are a beginner or have some experience, there are many simple woodworking projects that you can tackle with basic tools and materials.
Simple woodworking plans are a great way to get started with this rewarding hobby. You can find all sorts of projects online, from birdhouses to bookshelves. If you’re looking for a free woodworking plan to get you started, check out this website.
They have a great selection of plans for all skill levels, so you’re sure to find something that interests you. Once you’ve got a plan, you can gather your materials and tools, and start building!
Here are some ideas for inspiring simple woodworking projects that you can try:
Simple Woodworking Projects, Simple woodworking plans
Here is a list of simple woodworking projects, each with a brief description of its design, materials, and techniques:
- Cutting Board: This is a classic beginner project that is both practical and decorative. You can choose from various wood types and designs, and use simple tools like a saw, plane, and sandpaper. You can also add features like juice grooves or handles.
- Wooden Box: This is another versatile project that you can customize with different sizes, shapes, and finishes. You can use simple joinery techniques like miter joints or rabbet joints to assemble the box. You can also add hinges, latches, and decorative elements.
- Birdhouse: This is a fun and rewarding project that you can build for your backyard or as a gift. You can choose from various designs, from simple to elaborate, and use different materials like cedar, pine, or plywood. You can also paint or stain the birdhouse to match your preferences.
- Wooden Tray: This is a useful and elegant project that you can use to serve food, drinks, or decorative items. You can use different wood types and finishes to create a unique look. You can also add handles or legs to the tray.
- Picture Frame: This is a simple and quick project that you can make for your favorite photos or artwork. You can choose from different sizes, shapes, and materials, and use simple joinery techniques like miter joints or rabbet joints to assemble the frame. You can also add decorative elements like moldings or embellishments.
- Wooden Sign: This is a fun and personalized project that you can use to decorate your home, garden, or business. You can use different wood types and finishes to create a unique look. You can also add lettering, graphics, or other embellishments.
Resources for Inspiration
Here are some resources that you can use to find more inspiration for simple woodworking projects:
- Online Woodworking Communities: These websites and forums offer a wealth of information, ideas, and support from other woodworkers. Some popular examples include Woodworking.org, Lumberjocks.com, and FineWoodworking.com.
- Woodworking Magazines: These publications feature articles, projects, and tips from expert woodworkers. Some popular examples include Fine Woodworking, Popular Woodworking, and Woodworking Illustrated.
- Woodworking Books: These books offer comprehensive guides to woodworking techniques, projects, and materials. Some popular examples include “The Complete Illustrated Guide to Woodworking” by Bruce Hoadley, “Woodworking for Dummies” by Jeff Strong, and “The Woodworking Handbook” by Robert Wearing.
Outcome Summary

With a little patience and practice, you can create beautiful and functional woodworking projects that you’ll be proud of. Remember to start with simple projects and gradually work your way up to more complex ones. Don’t be afraid to experiment and have fun with the process! Woodworking is a rewarding hobby that can bring you years of enjoyment.
FAQ Insights
What are the best wood types for beginners?
Pine and plywood are good choices for beginners due to their affordability and ease of working with.
How do I choose the right woodworking plan?
Consider your skill level, the time you have available, and the materials you want to use. Read reviews and look at project examples before making your choice.
What are some essential safety tips for woodworking?
Always wear safety glasses, use sharp tools, and avoid distractions while working. Make sure your work area is well-lit and organized.
