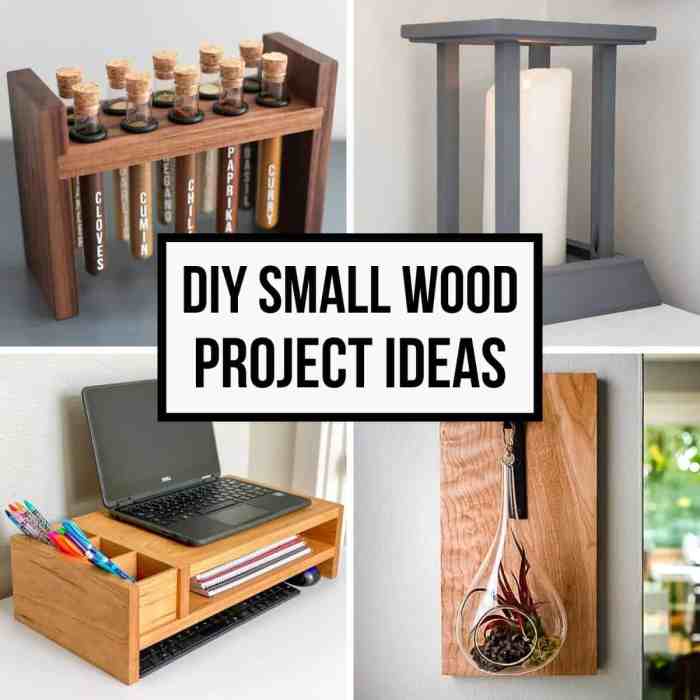
Small woodworking plans are a great starting point for beginners looking to dive into the world of woodworking. They offer a chance to learn fundamental techniques, experiment with different tools, and create beautiful, functional pieces without overwhelming yourself with complex designs. These plans often involve manageable dimensions, making them perfect for working in smaller spaces and using readily available materials.
From simple shelves and picture frames to decorative boxes and birdhouses, small woodworking projects provide a satisfying sense of accomplishment while honing your skills. You’ll find that the process of creating something tangible with your own hands is incredibly rewarding, and these projects can be personalized to reflect your unique style and interests.
Introduction to Small Woodworking Plans

Small woodworking projects are a fantastic starting point for anyone interested in learning this craft. They offer a manageable learning curve and provide a sense of accomplishment quickly. The appeal lies in their accessibility, allowing you to dive into woodworking without overwhelming yourself with complex designs or large-scale materials.
Benefits of Working with Smaller Dimensions
Working with smaller dimensions in woodworking offers several benefits:
- Reduced Material Costs: Smaller projects require less wood, leading to lower material expenses, making woodworking more affordable for beginners.
- Easier Handling: Smaller pieces of wood are easier to maneuver and work with, particularly for those new to woodworking tools and techniques.
- Faster Completion: Smaller projects tend to take less time to complete, allowing you to experience the satisfaction of finishing a project quickly, which can be encouraging for beginners.
- Reduced Risk of Mistakes: With smaller pieces, the potential impact of errors is minimized, allowing you to learn from mistakes without significant material waste.
Examples of Popular Small Woodworking Projects
There’s a wide array of popular small woodworking projects for beginners, ranging from simple to more challenging:
- Cutting Boards: A classic project, cutting boards offer practical utility and allow you to experiment with different wood types and finishes.
- Coasters: Small and functional, coasters are a great way to practice precise cuts and explore creative designs using various wood species and inlays.
- Picture Frames: Picture frames provide an excellent opportunity to learn basic joinery techniques while creating personalized gifts or home décor.
- Birdhouses: Birdhouses are popular projects that combine basic woodworking skills with a touch of creativity and can be customized with different designs and sizes.
- Small Boxes: Small boxes, such as jewelry boxes or trinket boxes, allow you to explore intricate joinery and decorative techniques, offering a rewarding project with practical value.
Choosing the Right Plan
Selecting the perfect woodworking plan is essential for a successful project. Consider your skill level, available tools, and the desired outcome before making a choice.
Factors to Consider When Choosing a Plan
There are several key factors to consider when selecting a woodworking plan.
- Complexity: Start with simple plans if you’re new to woodworking and gradually move towards more challenging projects as you gain experience.
- Time Commitment: Estimate the time required to complete the project. Choose a plan that fits your schedule and allows for realistic progress.
- Desired Outcome: Determine the specific outcome you want to achieve. Are you looking for a functional piece of furniture, a decorative object, or something else entirely?
- Tools and Materials: Ensure you have the necessary tools and materials to complete the project. Some plans may require specialized tools or materials that you may need to acquire.
- Budget: Consider the cost of materials and tools before starting a project. Choose a plan that fits your budget and allows for realistic spending.
Resources for Finding Woodworking Plans
There are numerous resources available for finding both free and paid woodworking plans.
- Online Databases: Websites like Ana White, Woodworking for Mere Mortals, and Popular Woodworking offer a wide range of free and paid plans.
- Woodworking Magazines: Magazines like Fine Woodworking and Woodturning provide detailed plans and articles for various woodworking projects.
- Local Woodworking Stores: Many woodworking stores offer free or paid plans for sale. These plans are often tailored to specific tools and materials available in the store.
- Woodworking Books: Books on woodworking often include detailed plans and instructions for a variety of projects.
Essential Tools and Materials
Having the right tools and materials is crucial for successful woodworking projects. The tools you need will depend on the specific project, but there are some essentials that every woodworker should have. The materials you choose will also affect the outcome of your project, so it’s important to understand the properties of different woods.
Essential Tools
Here is a list of essential tools for small woodworking projects:
- Hand Saw: A hand saw is used to cut wood to size. There are many different types of hand saws, each with its own specific purpose. A general-purpose hand saw is a good choice for most small projects.
- Measuring Tape: A measuring tape is essential for accurately measuring wood before cutting. Make sure you have a tape measure that is at least 25 feet long.
- Pencil: A pencil is used to mark wood before cutting. Use a sharp pencil so that your lines are clear and precise.
- Hammer: A hammer is used to drive nails into wood. Choose a hammer with a comfortable grip and a head that is the right size for the nails you will be using.
- Screwdriver: A screwdriver is used to drive screws into wood. Choose a screwdriver with a comfortable grip and a blade that fits the screws you will be using.
- Clamps: Clamps are used to hold wood pieces together while you are working on them. You will need a variety of clamps, including bar clamps, spring clamps, and C-clamps.
- Sandpaper: Sandpaper is used to smooth wood surfaces. Choose sandpaper with different grits, depending on the level of smoothness you want to achieve.
- Safety Glasses: Safety glasses are essential for protecting your eyes from flying debris.
- Dust Mask: A dust mask is essential for protecting your lungs from wood dust.
Wood Types
The type of wood you choose for your project will affect its appearance, durability, and workability. Here are some popular woods for small woodworking projects:
- Pine: Pine is a softwood that is relatively inexpensive and easy to work with. It is often used for furniture, toys, and crafts.
- Oak: Oak is a hardwood that is known for its strength and durability. It is often used for furniture, flooring, and cabinets.
- Maple: Maple is a hardwood that is known for its beautiful grain pattern. It is often used for furniture, flooring, and cutting boards.
- Cherry: Cherry is a hardwood that is known for its rich color and smooth texture. It is often used for furniture, cabinets, and trim.
- Walnut: Walnut is a hardwood that is known for its dark color and beautiful grain pattern. It is often used for furniture, cabinets, and gunstocks.
Safety Precautions
Safety should always be your top priority when working with wood. Here are some important safety precautions to follow:
- Always wear safety glasses to protect your eyes from flying debris.
- Use a dust mask to protect your lungs from wood dust.
- Keep your work area clean and organized to avoid tripping hazards.
- Use sharp tools to avoid injuries.
- Always use a clamp when cutting wood to prevent it from moving.
- Never use power tools without proper training.
Step-by-Step Project Guide

This section will walk you through a simple woodworking project, demonstrating common techniques and providing tips for a professional finish. We’ll build a small, sturdy shelf using basic tools and materials.
Project Overview
This project involves cutting, sanding, assembling, and finishing a simple shelf. We’ll use a combination of hand tools and power tools to create a functional and aesthetically pleasing piece.
Materials
- Wood boards (e.g., pine, maple, or oak) – Choose wood that is straight and free of knots for a sturdy shelf.
- Wood glue
- Wood screws
- Wood filler (optional)
- Sandpaper (various grits)
- Wood stain or paint (optional)
- Finishing oil or varnish (optional)
Tools
- Measuring tape
- Pencil
- Hand saw or circular saw
- Drill
- Screwdriver
- Clamps
- Sanding block
Step 1: Cutting the Wood
- Measure and mark the wood boards for the shelf and supports.
- Use a saw to cut the wood to the desired lengths. Ensure the cuts are precise and square for a clean and sturdy shelf.
Step 2: Sanding the Wood, Small woodworking plans
- Sand the edges and surfaces of the wood to smooth out any rough spots. Start with a coarse-grit sandpaper and gradually progress to a finer grit for a smooth finish.
- Sanding helps create a uniform surface for applying glue and paint or stain.
Step 3: Assembling the Shelf
- Apply wood glue to the edges of the shelf supports and the underside of the shelf.
- Carefully align the shelf supports with the shelf and clamp them together.
- Use wood screws to secure the shelf supports to the shelf. Drill pilot holes slightly smaller than the screw diameter to prevent splitting the wood.
Step 4: Finishing the Shelf
- If needed, fill any gaps or holes with wood filler. Let the filler dry completely before sanding.
- Sand the entire shelf again with fine-grit sandpaper to smooth out the filler and create a consistent surface.
- Apply a wood stain or paint, if desired. Allow the finish to dry completely before applying a sealant.
- Apply a finishing oil or varnish to protect the wood and enhance its natural beauty.
Tips for a Professional Finish
- Use a sharp saw blade for clean and precise cuts.
- Sand with the grain of the wood to avoid creating scratches.
- Apply glue evenly and clamp the pieces firmly together for a strong bond.
- Use a level to ensure the shelf is straight and even.
- Apply multiple thin coats of finish rather than one thick coat for a smoother, more durable finish.
Finishing Touches: Small Woodworking Plans
The final step in any woodworking project is adding the finishing touches. This involves applying a protective coating to the wood, enhancing its appearance, and giving it a desired look.
Sanding
Sanding is a crucial step before applying any finish. It creates a smooth surface, removes imperfections, and helps the finish adhere evenly. Different grits of sandpaper are used for different purposes:
- Coarse grit (40-80): Removes rough marks and shapes the wood.
- Medium grit (100-180): Smooths out imperfections and prepares the surface for finer sanding.
- Fine grit (220-400): Creates a smooth and polished finish, ready for staining or painting.
- Very fine grit (600-1200): Used for achieving an ultra-smooth finish, typically for high-end projects.
It’s important to sand with the grain of the wood to avoid scratches.
Staining
Staining adds color and depth to wood, enhancing its natural beauty. Different types of stains are available, each with its own characteristics:
- Water-based stains: Easy to apply, dry quickly, and have minimal odor.
- Oil-based stains: Penetrate deeply into the wood, providing a richer color and more durable finish.
- Gel stains: Thick consistency, ideal for filling in grain pores and creating a uniform color.
When applying stain, work in thin coats and allow each coat to dry completely before applying the next.
Painting
Painting provides a durable and versatile finish, allowing you to customize the color and appearance of your project.
- Latex paint: Water-based, easy to clean up, and dries quickly.
- Oil-based paint: Durable and provides a smooth, high-gloss finish.
- Spray paint: Ideal for achieving a smooth and even finish, especially on intricate designs.
When painting, use a high-quality brush or roller to ensure a smooth and even application.
Inspiration and Ideas
Let’s dive into the world of creative possibilities with small woodworking projects! This section will spark your imagination with a diverse gallery of projects, explore the art of repurposing and upcycling, and highlight inspiring examples of gifts and home decor.
Small Woodworking Projects Gallery
A diverse collection of small woodworking projects can inspire you to create your own unique pieces. Here’s a glimpse into the world of possibilities:
- Simple Shelves: Imagine a set of small shelves crafted from reclaimed wood, perfect for displaying cherished trinkets or showcasing a collection of miniature plants.
- Wooden Coasters: A set of handcrafted coasters, each with a unique design or wood grain pattern, can add a touch of warmth and personality to your home.
- Decorative Boxes: A small wooden box, adorned with intricate carvings or painted with vibrant colors, can serve as a charming storage solution for jewelry, keepsakes, or even tea bags.
- Wooden Toys: Handcrafted wooden toys, like puzzles, building blocks, or toy cars, offer a timeless and eco-friendly alternative to plastic toys.
- Birdhouses: A charming birdhouse, crafted from scrap wood and painted with cheerful colors, can attract feathered friends to your garden.
Repurposing and Upcycling
Repurposing and upcycling materials can be a sustainable and creative approach to small woodworking projects. Here are some ideas:
- Old Pallet Wood: Transform old pallet wood into a unique coffee table, a rustic bench, or a set of decorative wall shelves.
- Wine Barrel Staves: Create a stylish wine rack, a decorative wall art piece, or even a small planter from repurposed wine barrel staves.
- Recycled Glass Bottles: Turn old glass bottles into unique candle holders, decorative vases, or even small terrariums.
- Scrap Wood: Use scrap wood to create a collection of decorative coasters, a small jewelry box, or even a set of unique wooden magnets.
Gift Ideas and Home Decor
Small woodworking projects can make thoughtful and personalized gifts or charming additions to your home decor. Here are some examples:
- Personalized Cutting Boards: A custom-made cutting board, engraved with a name or special message, makes a practical and sentimental gift for a home cook.
- Wooden Picture Frames: Handcrafted wooden picture frames, with unique designs or finishes, can showcase cherished photographs and add a personal touch to your home.
- Decorative Wall Clocks: A unique wooden wall clock, with a vintage or modern design, can be a statement piece in any room.
- Wooden Ornaments: Hand-carved wooden ornaments, with intricate designs or festive themes, can add a touch of warmth and personality to your holiday decor.
- Wooden Jewelry Stands: A small wooden jewelry stand, designed to hold earrings, necklaces, or bracelets, makes a practical and elegant gift for a friend or loved one.
Closing Notes
Whether you’re seeking a new hobby, a way to personalize your home, or simply a chance to unleash your creativity, small woodworking plans offer a gateway to a world of possibilities. By starting with these manageable projects, you’ll build confidence, expand your knowledge, and discover the joy of crafting with wood. So, grab your tools, gather your materials, and let your woodworking journey begin!
Questions Often Asked
What are some of the most popular small woodworking projects?
Popular small woodworking projects include cutting boards, picture frames, small boxes, birdhouses, shelves, and simple furniture like stools or end tables.
Where can I find free small woodworking plans?
Many websites offer free woodworking plans, including Ana White, Woodworking for Mere Mortals, and Free Woodworking Plans. You can also find plans on Pinterest and YouTube.
What type of wood is best for small woodworking projects?
Softwoods like pine, fir, and cedar are good for beginners due to their affordability and ease of working. Hardwoods like maple, cherry, and walnut are more durable and provide a beautiful finish but can be more challenging to work with.
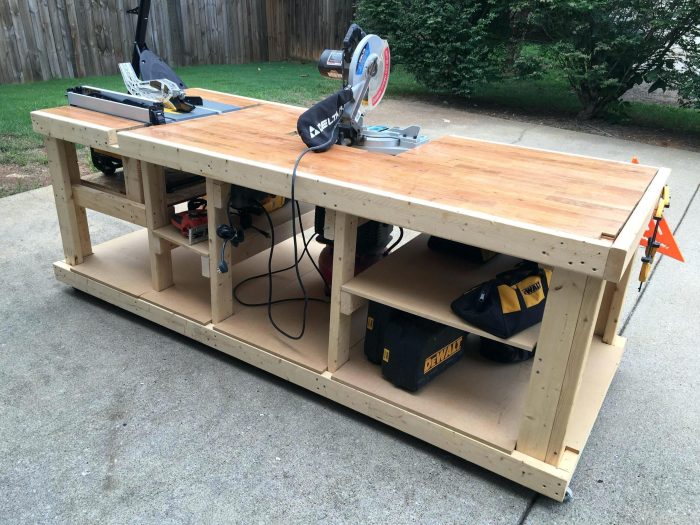
Small woodworking plans are great for beginners, letting you build simple projects that gain you confidence. A sturdy woodworking stand can be a real game-changer for your projects, providing a stable surface for your work. Once you’ve got your stand sorted, you can tackle more complex plans, like a birdhouse or a small bookshelf.
