Small woodworking projects offer a perfect blend of creativity and practicality, welcoming both beginners and experienced crafters. These projects provide a fantastic platform to hone your skills, build confidence, and explore the satisfaction of bringing your ideas to life. From functional pieces like cutting boards and spice racks to decorative delights like wooden signs and ornaments, the possibilities are as vast as your imagination. Let’s delve into the world of small woodworking and discover the joy of creating something beautiful and useful with your own hands.
Whether you’re looking to create a unique gift for a loved one, personalize your home décor, or simply enjoy the therapeutic process of woodworking, these projects offer a fulfilling and rewarding experience. The beauty of small woodworking lies in its accessibility, allowing you to experiment with different techniques, materials, and designs without overwhelming yourself. So, grab your tools, gather your wood, and prepare to embark on a journey of crafting, learning, and personal fulfillment.
Introduction to Small Woodworking Projects
Small woodworking projects offer a fantastic entry point into the world of woodworking, appealing to both beginners and seasoned crafters. Whether you’re looking to learn new skills, create functional pieces for your home, or simply enjoy the satisfaction of bringing wood to life, these projects provide a rewarding and accessible experience.
Benefits of Small Woodworking Projects
Starting with small projects offers several advantages, especially for beginners. These projects help build confidence by allowing you to learn fundamental techniques without the pressure of large-scale undertakings. Mastering basic woodworking skills like cutting, sanding, and finishing on smaller projects provides a solid foundation for more complex creations. Additionally, small projects minimize material waste, making them cost-effective and environmentally friendly.
Examples of Popular Small Woodworking Projects
The world of small woodworking projects is vast and diverse, offering a range of options for all skill levels and interests. Here are some popular examples that are both functional and aesthetically pleasing:
- Cutting Boards: These are essential kitchen tools that can be customized with various wood types, sizes, and designs. Simple cutting boards can be made with basic woodworking skills, while more intricate designs may require advanced techniques.
- Coasters: These small, decorative items are perfect for protecting furniture surfaces from hot drinks. Coasters can be crafted from various wood types and embellished with inlays, carvings, or paint.
- Wooden Boxes: Wooden boxes are versatile and can be used for storage, gifts, or decorative purposes. Simple box designs can be constructed with basic woodworking skills, while more elaborate boxes may involve joinery techniques and intricate designs.
- Picture Frames: Creating custom picture frames allows you to showcase your favorite photographs or artwork in a personalized manner. Frames can be made from various wood types and finished with stains, paints, or even decoupage techniques.
- Birdhouses: These charming structures provide a home for birds and add a touch of nature to your backyard. Birdhouses can be crafted from various wood types and decorated with intricate designs or colorful paint.
Essential Tools and Materials for Small Woodworking
You can’t create woodworking projects without the right tools and materials. This section will guide you through essential tools for small woodworking projects, including hand tools and power tools, and will introduce you to common woodworking materials like different types of wood, adhesives, finishes, and hardware.
Essential Tools for Small Woodworking
The tools you need will depend on the specific projects you want to tackle. But there are some essential tools that every woodworker should have.
| Tool | Description | Purpose | Tips for Use |
|---|---|---|---|
| Measuring Tape | A flexible tape measure with markings in inches and centimeters. | Accurate measurement of length, width, and depth. | Always double-check your measurements, especially when cutting wood. |
| Combination Square | A tool with a ruler and a protractor for measuring angles and lengths. | Marking accurate angles and lengths on wood. | Ensure the blade is tight and the tool is held securely for accurate measurements. |
| Pencil | A writing tool for marking wood. | Marking cutting lines, layout lines, and dimensions. | Use a sharp pencil for precise markings. |
| Hand Saw | A saw with a blade that is moved back and forth to cut wood. | Cutting wood to size and shape. | Use a sawing motion that is smooth and consistent. |
| Chisel | A tool with a sharp blade used for shaping and carving wood. | Removing wood, creating grooves, and shaping edges. | Always use a chisel with a sharp blade and use a mallet for striking. |
| Hammer | A tool with a heavy head used for driving nails and other fasteners. | Securing wood together, driving nails, and other tasks. | Use a hammer with a comfortable grip and a head that is the right size for the job. |
| Screwdriver | A tool with a handle and a tip used for driving screws. | Securing wood together, assembling furniture, and other tasks. | Use a screwdriver with a tip that fits the screw head. |
| Clamps | Tools used to hold wood together or in place. | Securing wood during assembly, gluing, and other tasks. | Use clamps that are strong enough to hold the wood securely. |
| Sandpaper | Abrasive paper used for smoothing wood surfaces. | Smoothing wood surfaces, removing imperfections, and creating a finished look. | Use different grits of sandpaper to achieve different levels of smoothness. |
| Safety Glasses | Protective eyewear that shields the eyes from flying debris. | Protecting the eyes from sawdust, wood chips, and other hazards. | Always wear safety glasses when working with woodworking tools. |
| Dust Mask | A mask that covers the nose and mouth to protect against dust and airborne particles. | Protecting the respiratory system from sawdust and other wood particles. | Use a dust mask that is properly fitted and provides adequate protection. |
Common Woodworking Materials
Choosing the right materials is just as important as having the right tools. Here’s a look at common materials used in small woodworking projects:
Wood
Wood is the primary material used in woodworking projects. Here are some common types of wood used in small projects:
- Pine: Affordable, softwood with a light color and a straight grain. It’s easy to work with and is commonly used for furniture, shelves, and trim.
- Oak: A hardwood with a rich color and a strong grain. It’s durable and is often used for furniture, flooring, and cabinets.
- Maple: A hardwood with a light color and a tight grain. It’s strong and is commonly used for furniture, cutting boards, and musical instruments.
- Cherry: A hardwood with a warm reddish-brown color and a straight grain. It’s durable and is often used for furniture, cabinets, and trim.
- Walnut: A hardwood with a rich brown color and a distinctive grain. It’s durable and is commonly used for furniture, cabinets, and veneers.
Adhesives
Adhesives are essential for bonding wood together. Here are some common types of adhesives used in small woodworking projects:
- Wood Glue: A strong, water-based adhesive that is specifically designed for wood. It dries clear and is easy to use.
- Epoxy: A two-part adhesive that is very strong and water-resistant. It’s ideal for bonding wood to other materials, such as metal or plastic.
- Construction Adhesive: A strong, flexible adhesive that is used for bonding wood to other surfaces, such as walls or floors.
Finishes
Finishes protect wood surfaces and enhance their appearance. Here are some common types of finishes used in small woodworking projects:
- Polyurethane: A durable, clear finish that protects wood from water, scratches, and stains. It’s available in both gloss and satin finishes.
- Lacquer: A quick-drying, clear finish that provides a durable and glossy finish. It’s often used for furniture and cabinets.
- Oil-Based Stain: A finish that penetrates wood and adds color. It’s available in a variety of colors and is often used to enhance the natural beauty of wood.
- Water-Based Stain: A finish that penetrates wood and adds color. It’s less toxic than oil-based stains and is available in a variety of colors.
Hardware
Hardware is used to attach wood together and to add functional elements to woodworking projects. Here are some common types of hardware used in small woodworking projects:
- Screws: Fasteners that are driven into wood using a screwdriver. They are available in a variety of sizes and materials.
- Nails: Fasteners that are driven into wood using a hammer. They are available in a variety of sizes and materials.
- Hinges: Metal components that allow doors, lids, and other objects to open and close. They are available in a variety of sizes and styles.
- Knobs and Pulls: Hardware used to open drawers, doors, and cabinets. They are available in a variety of styles and finishes.
Basic Woodworking Techniques

Mastering fundamental woodworking techniques is essential for crafting successful small projects. These techniques form the foundation of your woodworking journey, enabling you to create precise cuts, smooth surfaces, and secure joints. Let’s explore some of the most important techniques, breaking them down into manageable steps and offering tips for achieving professional results.
Measuring
Accurate measuring is crucial in woodworking, ensuring your pieces fit together perfectly. A tape measure is your primary tool, but consider using a ruler for smaller measurements and a combination square for precise angles.
| Technique | Description | Steps | Tips for Success |
|---|---|---|---|
| Measuring Length | Determining the length of a piece of wood. |
|
|
| Measuring Width | Determining the width of a piece of wood. |
|
|
| Measuring Angles | Determining the angle of a piece of wood. |
|
|
Cutting
Cutting wood accurately and safely is essential for any woodworking project. A variety of tools can be used for cutting, each with its own advantages and limitations.
Small woodworking projects are a great way to get started with woodworking, and there are tons of fun and easy ideas to choose from. If you’re looking for something a bit more challenging, you might want to try building a mirror.
There are some great mirror woodworking plans available online, and once you’ve mastered that, you can move on to other more complex projects like a coffee table or a bookshelf.
| Technique | Description | Steps | Tips for Success |
|---|---|---|---|
| Hand Saw Cutting | Cutting wood using a hand saw. |
|
|
| Jigsaw Cutting | Cutting intricate shapes and curves using a jigsaw. |
|
|
| Circular Saw Cutting | Cutting straight lines and bevels using a circular saw. |
|
|
Sanding
Sanding is essential for creating smooth, even surfaces on your woodworking projects. It removes imperfections and prepares the wood for finishing.
| Technique | Description | Steps | Tips for Success |
|---|---|---|---|
| Hand Sanding | Smoothing wood surfaces using sandpaper. |
|
|
| Belt Sander Sanding | Smoothing large surfaces using a belt sander. |
|
|
| Orbital Sander Sanding | Smoothing smaller surfaces and contours using an orbital sander. |
|
|
Joining
Joining wood pieces together securely is essential for creating stable and durable woodworking projects. Various joining techniques exist, each suited for specific applications.
| Technique | Description | Steps | Tips for Success |
|---|---|---|---|
| Glue Joints | Joining wood pieces using wood glue. |
|
|
| Dowel Joints | Joining wood pieces using dowels. |
|
|
| Pocket Hole Joints | Joining wood pieces using pocket holes. |
|
|
Popular Small Woodworking Project Ideas

Once you have a basic understanding of woodworking tools and techniques, you’re ready to start tackling some fun and rewarding projects. There are countless possibilities for small woodworking projects, ranging from simple and practical to more complex and decorative.
Functional Projects
Functional woodworking projects are perfect for beginners as they often involve straightforward designs and techniques. These projects can add practicality and style to your home and are great for learning basic woodworking skills.
- Cutting Boards: Cutting boards are a staple in any kitchen and are relatively easy to make. You can experiment with different wood types, sizes, and shapes to create a unique and functional cutting board.
- Spice Racks: Spice racks are a great way to organize your kitchen and add a touch of rustic charm. They can be made from simple pieces of wood and can be customized to fit your specific needs.
- Coasters: Coasters are a small but essential project that can protect your furniture from heat and spills. They can be made from various wood types and decorated with different finishes or inlays.
- Key Holders: Key holders are a practical way to keep your keys organized and within easy reach. They can be made from a single piece of wood or assembled from multiple pieces, depending on your desired design.
- Picture Frames: Picture frames are a great way to showcase your favorite photos or artwork. They can be made from simple wood strips and can be customized with different moldings, finishes, and embellishments.
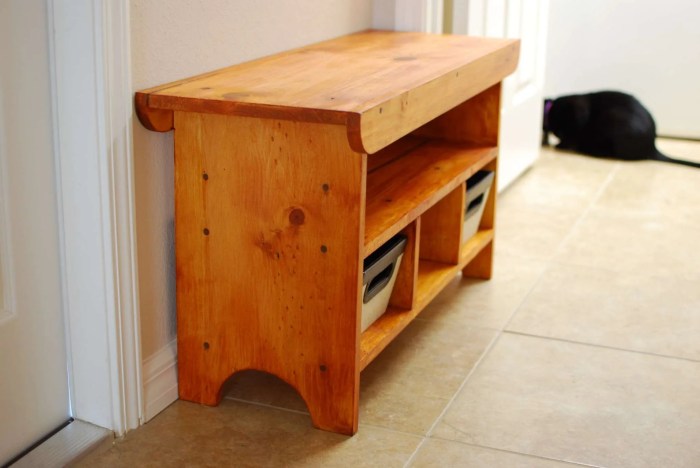
- Small Shelves: Small shelves can be used for a variety of purposes, such as storing books, displaying collectibles, or adding extra storage space in a small room. They can be made from a variety of wood types and can be designed to fit your specific needs.
Decorative Projects
Decorative woodworking projects are a great way to express your creativity and add a personal touch to your home. They can range from simple ornaments to more elaborate wall art and can be made from a variety of wood types and finishes.
- Wooden Signs: Wooden signs are a versatile decorative element that can be used for a variety of purposes, such as displaying inspirational quotes, adding a rustic touch to your home, or creating personalized gifts.
- Ornaments: Wooden ornaments are a charming and unique way to decorate your Christmas tree or add a festive touch to your home. They can be made in various shapes and sizes and can be painted, stained, or decorated with embellishments.
- Birdhouses: Birdhouses are a fun and rewarding project that can attract birds to your backyard. They can be made from a variety of wood types and can be designed to fit the specific needs of different bird species.
- Boxes: Wooden boxes are a versatile project that can be used for a variety of purposes, such as storing jewelry, holding small trinkets, or creating unique gifts. They can be made from a variety of wood types and can be decorated with different finishes, inlays, or hardware.
- Wall Art: Wooden wall art is a great way to add a touch of personality and style to your home. It can be created using various techniques, such as carving, burning, or painting.
Personalized Projects
Personalized woodworking projects are a great way to create unique and meaningful gifts for friends and family. They can be customized with names, dates, special messages, or other personal touches.
- Engraved Gifts: Engraved gifts are a thoughtful and lasting way to show someone you care. They can be engraved with names, dates, special messages, or designs.
- Custom Furniture: Custom furniture is a great way to create pieces that perfectly fit your space and style. It can be designed to your exact specifications and can be made from a variety of wood types and finishes.
- Toys: Wooden toys are a classic and timeless gift that can be passed down through generations. They can be made in a variety of shapes and sizes and can be painted, stained, or decorated with embellishments.
Tips for Successful Small Woodworking Projects
Small woodworking projects are a great way to learn new skills, create something beautiful, and have fun. However, like any craft, success in woodworking requires careful planning, attention to detail, and a little bit of patience. By following these tips, you can increase your chances of completing your projects successfully and enjoy the process along the way.
Planning and Preparation
Proper planning is essential for any woodworking project, regardless of size. Taking the time to think through the design, materials, and tools will help you avoid mistakes and ensure a smooth workflow.
- Design: Before you start cutting wood, take the time to sketch out your project. This will help you visualize the final product and identify any potential problems early on. You can use a pencil and paper, or a digital design program like SketchUp.
- Materials: Once you have a design, you need to choose the right materials. Consider the type of wood, its grain, and its hardness. You should also factor in the cost and availability of the materials.
- Tools: Make sure you have all the necessary tools before you begin. This includes hand tools like saws, chisels, and planes, as well as power tools like a drill, sander, and table saw.
Practice Makes Perfect
Learning basic woodworking techniques is crucial for success. Practice these techniques before starting a project to ensure you have the skills and confidence to execute your design.
- Cutting: Mastering different types of cuts, such as crosscuts, rip cuts, and miter cuts, is essential for accurate woodworking. Practice these cuts on scrap wood until you feel comfortable.
- Measuring and Marking: Accurate measuring and marking are vital for precise cuts and assembly. Use a measuring tape, a ruler, and a pencil or marker to mark your wood precisely.
- Joining: There are various ways to join pieces of wood, such as using screws, nails, glue, or dowels. Practice different joining techniques to learn their strengths and weaknesses.
Workspace and Safety
A well-lit and organized workspace is crucial for efficient and safe woodworking.
- Lighting: Adequate lighting is essential for seeing your work clearly. Use a combination of overhead lights and task lighting to illuminate your workspace.
- Organization: Keep your tools and materials organized to avoid clutter and make it easier to find what you need. Consider using toolboxes, shelves, and pegboards to store your tools and supplies.
- Safety: Woodworking can be dangerous if proper safety precautions are not taken. Always wear safety glasses, hearing protection, and a dust mask. Keep your workspace clean and free of clutter, and be aware of your surroundings.
Patience and Perseverance, Small woodworking projects
Woodworking is a process that takes time and patience.
- Take Your Time: Don’t rush your work. Take your time to measure accurately, cut precisely, and assemble carefully.
- Be Patient: Woodworking can be challenging, and there will be times when you make mistakes. Don’t get discouraged. Learn from your mistakes and keep practicing.
- Perseverance: Stay persistent and don’t give up on your project. Even if you encounter setbacks, keep working at it until you are satisfied with the results.
Experimentation and Learning
Woodworking is a creative process, and there is always room for experimentation. Don’t be afraid to try new techniques and explore different styles.
- Experimentation: Try different woods, finishes, and joinery techniques. You may discover new techniques or styles that you enjoy.
- Learning from Mistakes: Everyone makes mistakes, and that’s okay. Use your mistakes as learning opportunities. Analyze what went wrong and how you can avoid it in the future.
- Sharing and Feedback: Share your creations with others and seek feedback. This can help you identify areas for improvement and gain new insights.
Closing Summary

With a little patience, practice, and a touch of creativity, you can transform simple wood into stunning and functional pieces. As you progress through your small woodworking journey, remember to embrace the learning process, celebrate your successes, and don’t be afraid to experiment. The world of woodworking is full of endless possibilities, and your small projects can be the stepping stones to creating something truly extraordinary.
Frequently Asked Questions
What kind of wood is best for beginners?
Softwoods like pine and cedar are generally easier to work with for beginners due to their forgiving nature. They’re less likely to splinter or crack.
How do I prevent wood from warping?
Acclimate your wood to your workshop’s environment for a few days before working with it. This helps prevent warping caused by changes in humidity.
What are some good finishing options for small projects?
Simple finishes like oil-based polyurethane or wax provide durability and enhance the natural beauty of the wood. You can also experiment with paints, stains, or even decoupage for a unique look.
Where can I find woodworking project plans?
There are countless free and paid plans available online, in books, and at woodworking stores. Search for “small woodworking projects” or specific project types to find inspiration.
