
Stool woodworking plans open the door to creating unique, personalized seating that adds character to any space. From simple designs to intricate masterpieces, crafting a stool is a rewarding woodworking journey. Whether you’re a seasoned woodworker or just starting out, the process offers an opportunity to learn new skills, express your creativity, and build something beautiful and functional.
Stools have a rich history, evolving from simple, utilitarian objects to sophisticated pieces of furniture. They’ve served as platforms for work, relaxation, and social gatherings, reflecting the styles and needs of different cultures and eras. Today, stools are versatile additions to homes, offices, and outdoor areas, providing a range of seating options for various purposes.
Introduction to Stool Woodworking
Stool woodworking is a craft that involves the creation of stools from wood. Stools are simple yet versatile pieces of furniture that have been used for centuries in various cultures around the world. They can be found in homes, offices, restaurants, and many other places. Stool woodworking is a rewarding craft that allows you to create functional and beautiful pieces of furniture.
History and Evolution of Stools
Stools have a long and fascinating history, dating back to ancient times. Early stools were often simple, made from a single piece of wood or a few pieces lashed together. They were used for a variety of purposes, including seating, storage, and even as platforms for rituals. As woodworking techniques advanced, stools became more elaborate and sophisticated.
The evolution of stools can be seen as a reflection of the changing needs and aesthetics of different cultures and time periods.
Stools have evolved significantly over time, with different styles and designs emerging in different regions of the world. For example, in the Middle East, stools were often made from intricate wood carvings, while in Europe, stools were often made from simple, sturdy materials like oak and pine.
Types of Stools and Their Uses
Stools come in a wide variety of styles and sizes, each with its own unique purpose. Some common types of stools include:
- Bar stools: These stools are typically taller than standard stools and are designed for use at bars or counters.
- Kitchen stools: These stools are often smaller and more lightweight than bar stools and are designed for use in kitchens or dining areas.
- Folding stools: These stools are designed to be portable and can be easily folded away for storage.
- Ottoman stools: These stools are typically upholstered and are often used as footrests or as extra seating.
- Stools with storage: These stools have built-in storage compartments that can be used to store items such as books, blankets, or toys.
The use of stools varies depending on the type and style. For example, bar stools are often used in bars and restaurants, while kitchen stools are used in kitchens and dining areas. Folding stools are used for camping and outdoor events, while ottoman stools are used as footrests or extra seating. Stools with storage are used to provide extra storage space in homes or offices.
Choosing the Right Wood for Stools
The type of wood you choose for your stool will significantly impact its durability, appearance, and overall feel. It’s essential to consider the properties of different wood species and their suitability for specific stool designs.
Wood Properties and Considerations
Understanding the characteristics of various wood species is crucial for selecting the right one for your stool. Here’s a breakdown of common wood properties:
- Hardness: This refers to the wood’s resistance to dents and scratches. Hardwoods are generally more durable than softwoods, making them suitable for high-traffic areas or stools that will receive heavy use.
- Grain: The grain pattern of wood can add visual appeal and influence its strength. Straight grain is typically stronger than knotty grain, which can weaken the wood.
- Workability: Some woods are easier to work with than others. Softwoods are often easier to cut, shape, and sand, while hardwoods can be more challenging but offer greater durability.
- Color and Finish: Wood species vary in color and texture, offering a wide range of aesthetic options for your stool. Consider the desired look and how the wood will age and patina over time.
- Cost: Wood prices can fluctuate depending on availability, rarity, and quality. Set a budget and research prices before making your final decision.
Common Wood Species for Stools
Here are some popular wood species commonly used for stool construction, along with their advantages and disadvantages:
Hardwoods
- Oak: Known for its durability, strength, and beautiful grain patterns. Oak is a classic choice for furniture and can withstand heavy use. It’s also relatively easy to work with, making it suitable for beginners.
- Advantages: Durable, strong, beautiful grain patterns, relatively easy to work with.
- Disadvantages: Can be expensive, prone to warping if not properly dried.
- Maple: A strong, hard wood with a tight grain, often used for high-end furniture. Maple is also known for its beautiful, creamy color.
- Advantages: Strong, hard, beautiful creamy color, excellent for finishing.
- Disadvantages: Can be expensive, difficult to work with.
- Cherry: A strong, hard wood with a beautiful reddish-brown color that deepens with age. Cherry is known for its smooth texture and rich grain patterns.
- Advantages: Strong, hard, beautiful reddish-brown color, smooth texture, rich grain patterns.
- Disadvantages: Can be expensive, susceptible to scratches and dents.
- Walnut: A strong, hard wood with a distinctive rich brown color and intricate grain patterns. Walnut is prized for its beauty and durability.
- Advantages: Strong, hard, beautiful rich brown color, intricate grain patterns.
- Disadvantages: Can be expensive, prone to sapwood discoloration.
- Mahogany: A strong, hard wood with a rich reddish-brown color and beautiful grain patterns. Mahogany is often used for high-end furniture and is known for its durability and elegant appearance.
- Advantages: Strong, hard, rich reddish-brown color, beautiful grain patterns, durable, elegant appearance.
- Disadvantages: Can be expensive, susceptible to scratches and dents.
Softwoods
- Pine: A softwood known for its affordability and light color. Pine is relatively easy to work with but is not as durable as hardwoods.
- Advantages: Affordable, light color, easy to work with.
- Disadvantages: Not as durable as hardwoods, prone to scratches and dents.
- Cedar: A softwood known for its distinctive aroma and natural resistance to insects and decay. Cedar is often used for outdoor furniture but can also be used for indoor stools.
- Advantages: Distinctive aroma, natural resistance to insects and decay.
- Disadvantages: Not as durable as hardwoods, can be expensive.
- Redwood: A softwood known for its beautiful reddish-brown color and natural resistance to decay. Redwood is often used for outdoor furniture and can be a durable choice for stools.
- Advantages: Beautiful reddish-brown color, natural resistance to decay.
- Disadvantages: Can be expensive, not as strong as hardwoods.
Choosing the Right Wood for Your Stool Design
- Style and Function: Consider the intended style and function of your stool. For a rustic, farmhouse-style stool, pine or cedar might be suitable. For a more elegant, formal stool, oak, maple, or cherry could be a better choice.
- Durability and Use: If the stool will be used frequently or in a high-traffic area, choose a durable hardwood like oak or maple. For a less-used stool, a softer wood like pine might suffice.
- Budget: Wood prices can vary significantly. Set a budget and research prices before making your final decision.
- Availability: Some wood species may be more readily available in your area than others. Consider your local lumberyards or online retailers when making your choice.
Essential Tools and Equipment
Having the right tools is crucial for creating a sturdy and aesthetically pleasing stool. Whether you’re a seasoned woodworker or a beginner, investing in quality tools will make your project smoother and ensure a professional finish.
Essential Hand Tools
A basic set of hand tools is essential for any woodworking project, especially for beginners. These tools are versatile and can be used for various tasks, making them a valuable investment.
- Measuring Tape: Essential for accurate measurements of wood pieces. Choose a tape measure with clear markings and a sturdy locking mechanism.
- Pencil: For marking wood and transferring measurements. Use a pencil with a sharp point for precise markings.
- Combination Square: A versatile tool for checking angles and measuring distances. Choose a combination square with a sturdy blade and a clear scale.
- Hand Saw: For cutting wood to size. A crosscut saw is ideal for cutting across the grain, while a ripsaw is used for cutting with the grain. Consider the size and tooth count of the saw based on the type of wood you’re working with.
- Chisel Set: A set of chisels with different widths is necessary for shaping and cleaning up wood. Choose chisels with sharp blades and comfortable handles.
- Hammer: A claw hammer is a versatile tool for driving nails and removing them. Choose a hammer with a comfortable grip and a balanced head.
- Screwdriver Set: A set of screwdrivers with various sizes and tip types is essential for assembling the stool. Choose screwdrivers with strong blades and comfortable handles.
- Woodworking Clamps: Used to hold wood pieces securely while cutting or assembling. Choose clamps with strong jaws and a comfortable grip.
- Safety Glasses: Protect your eyes from flying debris while working with wood. Choose safety glasses with a comfortable fit and good impact resistance.
- Dust Mask: Protect your lungs from sawdust while working. Choose a dust mask with a comfortable fit and a good filtration system.
Essential Power Tools
Power tools can significantly speed up the woodworking process and provide greater precision. While not strictly necessary for a beginner, they can be valuable additions to your tool collection.
- Power Drill: Used for drilling holes and driving screws. Choose a drill with a variable speed setting and a comfortable grip.
- Circular Saw: A powerful tool for making precise cuts through wood. Choose a circular saw with a sturdy base and a safety guard.
- Router: Used for shaping edges and creating decorative details. Choose a router with a variable speed setting and a variety of bits.
- Sanding Block: Used for smoothing and finishing wood surfaces. Choose a sanding block with a comfortable grip and a variety of grits.
Choosing High-Quality Tools
Investing in high-quality tools is important for durability, precision, and safety. Look for tools made from durable materials, such as steel and hardwood, with comfortable grips and smooth operation. Consider brands with a reputation for quality and customer support. While initial investment might seem high, quality tools will last longer, perform better, and ultimately save you money in the long run.
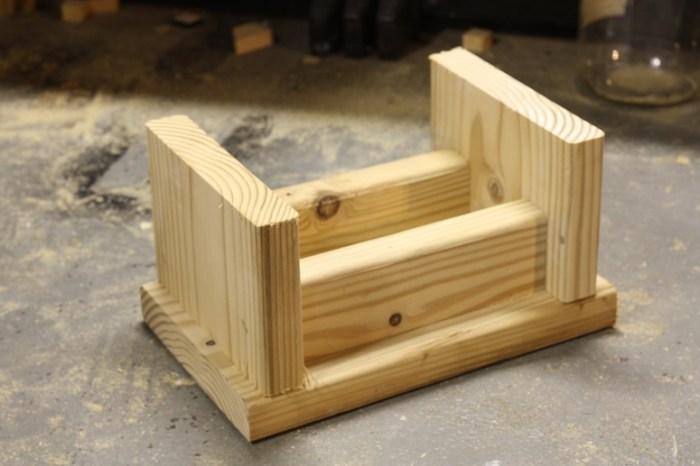
Basic Stool Woodworking Techniques
Building a stool requires mastering fundamental woodworking techniques. These techniques are essential for accurate measurements, precise cuts, and strong, durable joints. This section will guide you through the basics of measuring, cutting, and joining wood, equipping you with the skills to create a sturdy and visually appealing stool.
Measuring and Marking
Accurate measurements are crucial for a well-proportioned stool. A tape measure and a pencil are your primary tools for this task.
When measuring, ensure the tape measure is held straight and tight against the surface. Use a pencil to mark your measurements clearly and precisely. For intricate cuts, a marking gauge can help you transfer measurements accurately along the wood.
Cutting
Several tools can be used for cutting wood, each suited for specific tasks.
Using a Handsaw
Handsaws are versatile tools for making straight cuts.
* Holding the saw: Hold the saw with your dominant hand on the handle and your non-dominant hand near the blade’s end for stability.
* Starting the cut: Begin by making a small cut with the saw at a 45-degree angle to create a starting point.
* Sawing motion: Push the saw forward with your dominant hand while guiding it with your non-dominant hand.
* Maintaining a consistent angle: Keep the saw blade at a constant angle throughout the cut.
* Finishing the cut: As you approach the end of the cut, reduce the sawing pressure to avoid splintering.
Using a Circular Saw
Circular saws are power tools used for making quick and precise cuts.
* Safety Precautions: Always wear safety glasses and ear protection when using a circular saw.
* Setting the depth: Adjust the depth of the cut to match the thickness of the wood.
* Making the cut: Hold the circular saw firmly and guide it along the cutting line.
* Maintaining a consistent speed: Keep the saw moving at a steady pace throughout the cut.
Using a Jigsaw
Jigsaws are ideal for cutting curved and intricate shapes.
* Setting the blade: Choose the appropriate blade for the material and type of cut.
* Making the cut: Hold the jigsaw firmly and guide it along the cutting line.
* Maintaining a steady speed: Keep the jigsaw moving at a consistent speed to avoid uneven cuts.
Drilling
Drilling holes in wood is essential for creating pilot holes for screws and assembling parts.
Using a Drill Press
Drill presses offer precision and control for drilling holes.
* Setting the depth: Adjust the drill press’s depth gauge to the desired depth of the hole.
* Clamping the workpiece: Securely clamp the workpiece to the drill press table.
* Drilling the hole: Lower the drill bit into the workpiece slowly and apply steady pressure.
* Maintaining a consistent speed: Keep the drill bit moving at a consistent speed to prevent burning the wood.
Using a Hand Drill
Hand drills are portable and convenient for drilling holes in various locations.
* Selecting the drill bit: Choose a drill bit with the appropriate diameter for the hole.
* Starting the hole: Begin by making a small indentation with the drill bit to prevent it from slipping.
* Drilling the hole: Apply steady pressure to the drill bit and rotate it at a consistent speed.
Sanding
Sanding smooths the surface of the wood, removing imperfections and preparing it for finishing.
Using a Belt Sander
Belt sanders are powerful tools for sanding large surfaces quickly.
* Setting the sander’s speed: Choose an appropriate speed based on the type of wood and the desired finish.
* Sanding with the grain: Always sand with the grain of the wood to avoid scratches.
* Maintaining a consistent pressure: Apply even pressure to the sander to achieve a smooth finish.
Using a Random Orbital Sander
Random orbital sanders are ideal for sanding smaller areas and achieving a fine finish.
* Setting the sander’s speed: Choose an appropriate speed based on the type of wood and the desired finish.
* Sanding with the grain: Always sand with the grain of the wood to avoid scratches.
* Maintaining a consistent pressure: Apply even pressure to the sander to achieve a smooth finish.
Using a Hand Sander
Hand sanders are suitable for sanding smaller areas and achieving a fine finish.
* Selecting the sandpaper grit: Choose a sandpaper grit based on the desired level of smoothness.
* Sanding with the grain: Always sand with the grain of the wood to avoid scratches.
* Maintaining a consistent pressure: Apply even pressure to the sander to achieve a smooth finish.
Joining Wood
Joining wood is a fundamental woodworking technique that involves connecting two or more pieces of wood together. There are various types of joints, each designed for specific purposes and aesthetic considerations.
Mortise and Tenon Joint
The mortise and tenon joint is a strong and durable joint that involves cutting a rectangular recess (mortise) in one piece of wood and a corresponding projection (tenon) on the other piece. The tenon fits snugly into the mortise, creating a strong and stable connection.
Dovetail Joint
The dovetail joint is a decorative and strong joint that involves interlocking triangular shapes. It is typically used for drawers and boxes, providing both strength and a visually appealing appearance.
Lap Joint
The lap joint is a simple and strong joint that involves overlapping two pieces of wood. The overlap creates a flat surface, making it ideal for framing and furniture construction.
Butt Joint
The butt joint is the simplest joint, involving directly joining two pieces of wood end-to-end. While simple, it is not as strong as other joints and requires additional support, such as glue or screws.
Popular Stool Designs
There are many popular and well-regarded stool designs, each with its own unique features and construction methods. Choosing the right design for your needs depends on factors such as the intended use, desired style, and your woodworking skills. Here’s a look at some popular stool designs.
Classic Three-Legged Stool, Stool woodworking plans
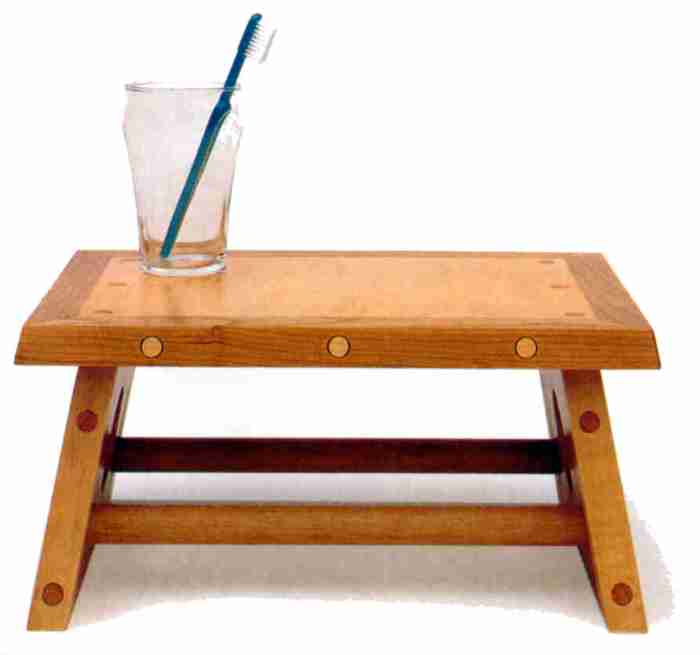
This design is simple and timeless, with three legs radiating from a central seat. Its simplicity makes it easy to build, and its stability is excellent due to the three-point base.
The classic three-legged stool is a versatile design that can be used in various settings, from kitchens and dining rooms to bedrooms and living rooms.
Features
- Simple construction with three legs and a seat
- Stable due to the three-point base
- Versatile and can be used in various settings
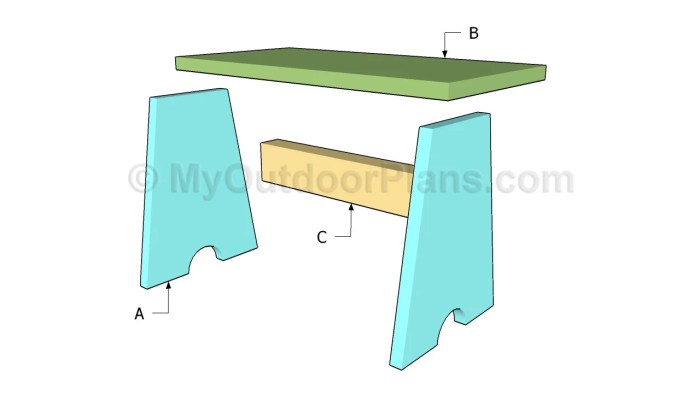
Construction
- The legs are typically cut to the desired length and joined to the seat using mortise-and-tenon joints, dowels, or screws.
- The seat can be made from a single piece of wood or multiple pieces joined together.
- The legs can be left plain or decorated with carvings, turning, or paint.
Visual Representation
Imagine a stool with three legs that are evenly spaced and meet at a central point beneath the seat. The seat is circular or square and sits atop the three legs. The stool can be made from various woods, such as oak, maple, or walnut, and can be finished with natural oils, waxes, or paint.
Ladder Back Stool
This design features a back support that resembles a ladder, providing additional comfort and support. It’s a popular choice for dining rooms and kitchens.
The ladder back stool is a stylish and comfortable option that adds a touch of traditional elegance to any space.
Features
- Features a back support with horizontal rungs resembling a ladder
- Provides additional comfort and support
- Often used in dining rooms and kitchens
Construction
- The back support is typically made from vertical rails connected by horizontal rungs.
- The legs are attached to the seat and the back support, creating a sturdy frame.
- The seat can be made from a single piece of wood or multiple pieces joined together.
Visual Representation
Picture a stool with a rectangular seat and four legs. Behind the seat, imagine a vertical back support with horizontal rungs that resemble a ladder. The back support is typically connected to the seat and legs, creating a sturdy and stylish design.
Windsor Stool
This design features a curved, contoured seat and a distinctive “spindle” back. The spindle back provides excellent support and comfort, making it a popular choice for dining and living rooms.
The Windsor stool is a classic design that combines comfort and elegance, making it a timeless addition to any home.
Features
- Features a curved, contoured seat for comfort
- Distinctive “spindle” back for support and style
- Often used in dining rooms and living rooms
Construction
- The seat is typically made from a single piece of wood, often bent and shaped to create a comfortable curve.
- The legs are joined to the seat using mortise-and-tenon joints or dowels.
- The spindle back is made from individual spindles that are inserted into holes in the seat and connected to the top rail.
Visual Representation
Imagine a stool with a curved, contoured seat that provides excellent support and comfort. The seat is connected to four legs, which are typically turned or shaped. Behind the seat, picture a distinctive “spindle” back made from individual spindles that are inserted into holes in the seat and connected to a top rail.
Bar Stool
This design is taller than a regular stool, designed to be used at bar counters and high tables. It often features a footrest for added comfort and a back support for additional support.
Bar stools are essential for creating a comfortable and stylish bar or kitchen island area.
Features
- Taller than a regular stool, designed for bar counters and high tables
- Often features a footrest for comfort
- May have a back support for additional support
Construction
- The legs are typically made from sturdy wood or metal and are joined to the seat using mortise-and-tenon joints, dowels, or screws.
- The seat can be made from wood, metal, or upholstered materials.
- The footrest is often attached to the legs or the base of the stool.
Visual Representation
Picture a stool that is significantly taller than a regular stool, designed to be used at bar counters or high tables. It often features a footrest for added comfort and a back support for additional support. The seat can be made from wood, metal, or upholstered materials, and the legs can be made from wood or metal.
Folding Stool
This design is portable and convenient, featuring a mechanism that allows it to fold flat for easy storage. It’s a great choice for camping, picnics, and other outdoor activities.
Folding stools are perfect for situations where space is limited or portability is essential.
Features
- Portable and convenient
- Features a mechanism that allows it to fold flat for easy storage
- Great for camping, picnics, and other outdoor activities
Construction
- The legs are typically connected to the seat using hinges or other folding mechanisms.
- The seat can be made from wood, metal, or fabric.
- The folding mechanism is designed to be sturdy and reliable.
Visual Representation
Imagine a stool that can be folded flat for easy storage and transport. The legs are connected to the seat using hinges or other folding mechanisms. The seat can be made from wood, metal, or fabric, and the folding mechanism is designed to be sturdy and reliable.
Stool Woodworking Projects: Stool Woodworking Plans
A stool is a versatile piece of furniture that can be used in various settings, from the kitchen to the living room. It is also a great project for beginners, as it is relatively simple to build. This section will showcase various stool woodworking projects, each offering a unique design and functionality.
Stool Woodworking Projects
Here are some popular stool woodworking projects that you can try:
| Project Name | Description | Visual Representation |
|---|---|---|
| Simple Wooden Stool | This project is perfect for beginners, as it is a simple and straightforward design. It features a square seat and four legs, constructed using basic woodworking techniques. | Imagine a sturdy stool with a square seat and four straight legs. The legs are connected to the seat using mortise and tenon joints, creating a solid and durable structure. The wood used can be any type of hardwood, such as oak or maple. |
| Rustic Farmhouse Stool | This stool has a more rustic look and feel, with a slightly wider seat and thicker legs. The legs can be slightly angled for a more traditional farmhouse style. | Envision a stool with a wider, slightly curved seat, and four sturdy, angled legs. The wood used for this project can be reclaimed barn wood or other rustic materials, adding to its unique character. |
| Modern Minimalist Stool | This stool has a clean and contemporary design, with a simple, sleek silhouette. It features a round or square seat and thin, tapered legs. | Imagine a stool with a round or square seat and four thin, tapered legs. The legs are connected to the seat using metal brackets or dowels, creating a minimalist and elegant design. |
| Adjustable Height Stool | This stool is designed to be versatile, with an adjustable height feature. This makes it ideal for use in various settings, from the kitchen to the office. | Picture a stool with a round or square seat and four legs connected to a threaded rod. The rod allows you to adjust the height of the stool by turning a knob or lever. This stool can be used in a variety of settings, from the kitchen to the office. |
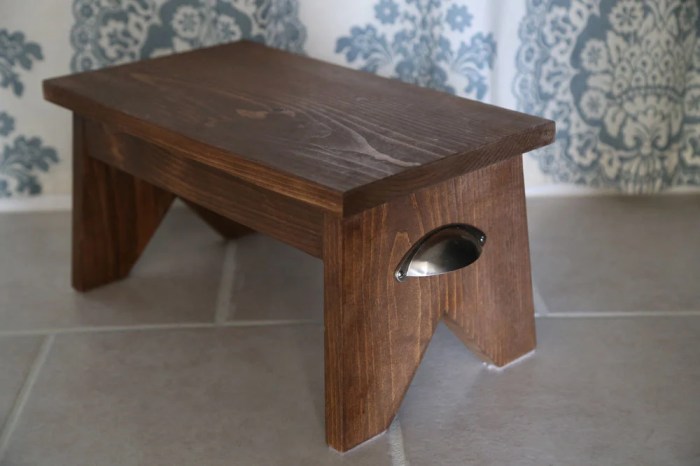
Finishing and Refinishing Stools
The final step in stool woodworking is finishing. Finishing not only enhances the aesthetics of the stool but also protects the wood from wear and tear, making it more durable and long-lasting. There are various finishing techniques you can choose from, each with its own unique properties and application methods.
Types of Finishes
Finishes are categorized based on their properties and intended effects. Here are some of the most common types:
- Stains: Stains are used to color the wood without obscuring its grain. They are typically oil-based or water-based and come in a wide range of colors. Stains can be applied with a brush, cloth, or spray. After staining, a sealant is often applied to protect the stain and provide a durable finish.
- Paints: Paints are used to cover the wood entirely, creating a solid color. They come in a variety of finishes, such as matte, gloss, and semi-gloss. Paints can be applied with a brush, roller, or spray. Paints are often used to create a specific color or to cover imperfections in the wood.
- Varnishes: Varnishes are clear finishes that protect the wood from scratches, moisture, and UV rays. They come in different gloss levels, ranging from matte to high gloss. Varnishes can be applied with a brush, roller, or spray. Varnishes are often used to enhance the natural beauty of the wood.
- Polyurethanes: Polyurethanes are durable finishes that provide excellent protection against wear and tear. They come in both oil-based and water-based formulations. Polyurethanes can be applied with a brush, roller, or spray. Polyurethanes are often used for high-traffic areas or for furniture that will be exposed to the elements.
- Lacquer: Lacquer is a fast-drying, durable finish that provides a high-gloss finish. It is often used for furniture and other decorative items. Lacquer can be applied with a brush, roller, or spray. Lacquer is known for its hardness and durability, but it can be difficult to apply without creating imperfections.
- Shellac: Shellac is a natural finish made from the resin of the lac bug. It is a good choice for furniture that will be exposed to food or drink. Shellac can be applied with a brush or spray. Shellac is known for its durability and its ability to create a warm, amber-colored finish.
Applying Finishes
The application method for a finish will depend on the type of finish and the desired effect. Here are some general tips for applying finishes:
- Preparation is key: Before applying any finish, make sure the wood is clean, dry, and free of dust. Sand the wood to the desired smoothness and remove any sanding dust. If you are applying a stain, apply a wood conditioner first to ensure even absorption.
- Apply thin coats: It is better to apply several thin coats of finish than one thick coat. This will help to prevent the finish from cracking or peeling. Allow each coat to dry completely before applying the next.
- Use the right tools: Use a brush, roller, or spray gun that is appropriate for the type of finish you are using. If you are using a brush, make sure it is clean and free of bristles. If you are using a roller, use a nap that is suitable for the finish. If you are using a spray gun, make sure it is properly calibrated and that you are wearing a respirator mask.
- Sand between coats: Sand lightly between coats of finish to smooth out any imperfections and to help the next coat adhere better. Use a fine-grit sandpaper for this step.
- Finish with a top coat: After applying the desired number of coats of finish, apply a top coat to provide extra protection and durability. A top coat can be a clear varnish, polyurethane, or lacquer. The type of top coat you choose will depend on the desired finish and the level of protection you need.
Safety Considerations in Stool Woodworking
Stool woodworking, like any woodworking project, involves using tools and materials that can be dangerous if not handled properly. It’s crucial to prioritize safety throughout the entire process to prevent injuries and ensure a safe working environment.
Essential Safety Practices
Safety practices are essential for woodworking projects. These practices help minimize risks and ensure a safe working environment.
- Always wear safety glasses: Protect your eyes from flying debris, sawdust, and wood chips.
- Use hearing protection: Woodworking tools can generate loud noises that can damage your hearing over time. Earplugs or earmuffs are recommended.
- Wear a dust mask: Protect your respiratory system from inhaling sawdust and wood dust, which can cause respiratory problems.
- Keep your work area clean and organized: A cluttered workspace increases the risk of tripping or falling.
- Use the right tools for the job: Using the wrong tool can lead to accidents.
- Follow the manufacturer’s instructions: Always read and understand the instructions for your tools and equipment.
- Never work while tired or under the influence of alcohol or drugs: This can impair your judgment and increase the risk of accidents.
Importance of Wearing Appropriate Safety Gear
Wearing appropriate safety gear is critical in woodworking. It provides protection against potential hazards and helps prevent injuries.
- Safety glasses: Protect your eyes from flying debris, sawdust, and wood chips.
- Hearing protection: Protect your ears from loud noises generated by woodworking tools.
- Dust mask: Protect your respiratory system from inhaling sawdust and wood dust.
- Work gloves: Protect your hands from cuts, splinters, and burns.
- Closed-toe shoes: Protect your feet from falling objects and debris.
Common Safety Hazards and Mitigation
Woodworking projects can present various safety hazards. Understanding these hazards and implementing appropriate mitigation measures is crucial.
- Sharp tools: Always handle sharp tools with care and use appropriate safety precautions.
- Flying debris: Wear safety glasses and avoid working near others to protect against flying debris.
- Wood dust: Wear a dust mask and keep your work area well-ventilated to minimize exposure to wood dust.
- Heavy objects: Use proper lifting techniques and ask for assistance when lifting heavy objects.
- Electrical hazards: Inspect electrical cords and tools regularly for damage and avoid using them near water.
- Fire hazards: Keep a fire extinguisher handy and be aware of potential fire hazards, such as sawdust buildup.
Inspiration and Resources

Stool woodworking is a rewarding craft that can be enjoyed by people of all skill levels. To fuel your passion and help you grow as a woodworker, it’s essential to explore various sources of inspiration and resources. This section will guide you through some valuable resources, inspiring examples, and tips to keep your woodworking journey exciting and fulfilling.
Recommended Resources
Finding the right resources can significantly impact your woodworking journey. Books, websites, and online communities can provide invaluable knowledge, techniques, and inspiration. Here are some recommendations to get you started:
- Books:
- The Complete Illustrated Guide to Woodworking by David Charles: This comprehensive guide covers various woodworking techniques, including stool making, with detailed illustrations and step-by-step instructions.
- The Woodworker’s Guide to Furniture Making by Michael Fortune: This book focuses on furniture making, offering insights into design, construction, and finishing techniques, relevant to stool woodworking.
- Stools: A Celebration of Design and Craft by Peter Lipka: This book showcases a wide range of stool designs from renowned artisans, inspiring creativity and providing a visual reference for your projects.
- Websites:
- Woodworking for Mere Mortals: This website offers a wealth of free woodworking plans, tutorials, and articles, covering various projects, including stools.
- Fine Woodworking: This website provides in-depth articles, project plans, and expert advice for woodworkers of all levels, including articles on stool making and design.
- Popular Woodworking: This website features project plans, techniques, and product reviews, covering a wide range of woodworking topics, including stool construction.
- Online Communities:
- Reddit’s r/woodworking: This online community is a great place to connect with other woodworkers, share projects, ask questions, and get feedback on your work.
- Woodworking Forums: Several online forums dedicated to woodworking offer a platform for discussions, sharing knowledge, and finding inspiration from other woodworkers.
- Facebook Groups: Numerous Facebook groups are dedicated to woodworking, providing a space to connect with fellow enthusiasts, share projects, and seek advice.
Inspiring Stool Woodworking Projects
Exploring the work of renowned artisans can be a powerful source of inspiration. Witnessing their craftsmanship and design ingenuity can spark new ideas and push your creative boundaries. Here are some inspiring examples:
- George Nakashima: Known for his unique and sculptural furniture designs, Nakashima’s stools often feature natural wood forms and intricate joinery, showcasing the beauty of wood’s natural grain and texture.
- Sam Maloof: Maloof’s signature style combines organic shapes with meticulous craftsmanship. His stools often feature flowing curves, hand-carved details, and a warm, inviting aesthetic.
- Thomas Moser: Moser’s work is characterized by its elegant simplicity and meticulous craftsmanship. His stools often feature clean lines, precise joinery, and a timeless design aesthetic.
Finding Inspiration and Expanding Skills
Inspiration can come from various sources, from nature to everyday objects. To expand your woodworking skills and find inspiration, consider these tips:
- Observe your surroundings: Pay attention to the shapes, forms, and textures in your environment. This can spark ideas for new designs and inspire you to explore different materials and techniques.
- Visit museums and galleries: Explore furniture exhibitions and collections to appreciate the artistry and craftsmanship of renowned woodworkers. This can provide valuable insights into design, construction, and finishing techniques.
- Attend woodworking workshops and classes: Learning from experienced woodworkers can expand your skillset and expose you to new techniques and approaches. This can be a great way to push your creative boundaries and explore new possibilities.
- Experiment with different materials and techniques: Don’t be afraid to try new things and experiment with different wood species, joinery methods, and finishing techniques. This can lead to unexpected discoveries and help you develop your own unique style.
Last Recap
With the right tools, techniques, and a touch of inspiration, you can transform basic wood into a sturdy and stylish stool. Stool woodworking plans provide a roadmap for success, guiding you through each step of the process, from selecting the perfect wood to applying the finishing touches. As you delve into the world of stool woodworking, you’ll discover a fulfilling craft that combines practicality and artistic expression, allowing you to create lasting pieces that you’ll cherish for years to come.
Quick FAQs
What types of wood are best for stool construction?
Hardwoods like oak, maple, and walnut are durable and aesthetically pleasing. Softer woods like pine and cedar are easier to work with but may require more care.
What are the essential tools for stool woodworking?
Essential tools include a saw, drill, sander, measuring tape, chisels, clamps, and safety gear.
What are some popular stool designs?
Popular designs include the classic bar stool, the simple three-legged stool, and the more elaborate Windsor stool.
How do I finish a stool?
You can finish a stool with stains, paints, varnishes, or oils, depending on the desired look and protection.
Stool woodworking plans are a great way to start your woodworking journey. They’re relatively simple to build and offer a chance to practice basic joinery techniques. If you’re looking for a slightly more challenging project, you can check out some chair woodworking plans.
Once you’ve mastered the basics, you can even try building a stool with a more intricate design, like a Windsor stool.
