Ready to ditch the complicated software and level up your photo editing skills? “The Affinity Photo Manual 2.0 A Step-by-Step New User’s Workbook” is your secret weapon, taking you from photo editing newbie to pro in no time. This manual is your guide to mastering the power of Affinity Photo, a powerful and affordable alternative to Photoshop, with clear instructions and tons of tips to make you a photo editing superstar.
Whether you’re a total beginner or just looking to take your skills to the next level, this book breaks down everything you need to know. From basic editing techniques like cropping and resizing to advanced features like layers, masks, and filters, this manual covers it all.
Get ready to create stunning images, edit like a pro, and unleash your inner creative genius!
Overview and Introduction
This workbook, “The Affinity Photo Manual 2.0: A Step-by-Step New User’s Workbook,” is your guide to mastering the world of photo editing with Affinity Photo. It’s designed for anyone who’s ever looked at a photo and thought, “I could make that look even better!” Whether you’re a complete newbie or have dabbled in other editing software, this manual will take you from zero to hero in no time.Think of this workbook as your personal photo editing coach.
We’ll break down the complex world of Affinity Photo into bite-sized, easy-to-digest chunks. You’ll learn how to use its powerful tools to enhance your photos, correct imperfections, create stunning effects, and even design your own graphics.
Key Features and Benefits of Affinity Photo
Affinity Photo is a powerful photo editing software that offers a wide range of features and benefits. It’s packed with professional-level tools, but it’s also user-friendly enough for beginners. Here are some of the key features that make Affinity Photo stand out:
- Non-destructive editing:This means you can make changes to your photos without permanently altering the original image. You can always go back and undo your edits or experiment with different effects without worrying about ruining your masterpiece.
- Layer-based editing:Think of layers like transparent sheets stacked on top of each other. This allows you to work on different elements of your image independently, making it easier to create complex effects and compositions.
- Advanced selection tools:Precisely select the areas of your image you want to edit, whether it’s a single object, a specific color, or a complex shape.
- Extensive filter library:Add artistic effects, sharpen details, adjust colors, and more with Affinity Photo’s extensive collection of filters.
- High-quality output:Export your photos in various formats, including RAW, JPEG, PNG, and TIFF, with support for high-resolution images.
- Affordable pricing:Compared to other professional photo editing software, Affinity Photo is incredibly affordable. You get a powerful tool without breaking the bank.
Book Structure and Content
This workbook is structured to provide a step-by-step learning experience. It’s broken down into clear and concise chapters, each covering a specific aspect of Affinity Photo.
- Chapter 1: Getting Started with Affinity Photo:This chapter will introduce you to the basics of Affinity Photo, including its interface, workspace, and essential tools.
- Chapter 2: Opening, Importing, and Exporting Images:You’ll learn how to open and import images from various sources, as well as how to save and export your edited photos in different formats.
- Chapter 3: Essential Editing Tools:This chapter dives into the core editing tools of Affinity Photo, including cropping, resizing, rotating, and straightening images.
- Chapter 4: Working with Layers:This chapter explores the power of layers, allowing you to manipulate different elements of your image independently and create stunning effects.
- Chapter 5: Selection Tools:Learn how to select specific areas of your image with precision, using tools like the Quick Selection Tool, the Magic Wand Tool, and the Lasso Tool.
- Chapter 6: Color Correction and Enhancement:This chapter covers essential techniques for adjusting colors, brightness, contrast, and other aspects of your image to achieve a perfect look.
- Chapter 7: Filters and Effects:Explore the vast library of filters and effects in Affinity Photo, from basic sharpening and blurring to artistic styles and creative distortions.
- Chapter 8: Text and Typography:Learn how to add text to your images, format it, and create stunning typography effects.
- Chapter 9: Creating and Editing Graphics:This chapter will teach you how to create and edit your own graphics using Affinity Photo’s powerful vector tools.
- Chapter 10: Advanced Techniques:This chapter delves into more advanced techniques, including masking, blending modes, and creating custom brushes.
Getting Started with Affinity Photo
Affinity Photo is a powerful image editing software that offers a wide range of features and tools for both beginners and professionals. It’s known for its user-friendly interface, non-destructive editing, and impressive performance. This section will guide you through the basics of using Affinity Photo, including navigating the interface, creating new documents, importing images, and working with the essential tools.
The Affinity Photo Interface
The Affinity Photo interface is designed to be intuitive and efficient. It consists of several key elements:
- Toolbar:This vertical bar on the left side of the screen contains the most commonly used tools, including selection, drawing, painting, and text tools. You can customize the toolbar by dragging and dropping tools to rearrange them.
- Document Window:This is the main area where you’ll work on your images. It displays the current image or document you’re editing.
- Context Toolbar:This bar appears below the toolbar and changes based on the selected tool. It provides options and settings specific to the currently active tool.
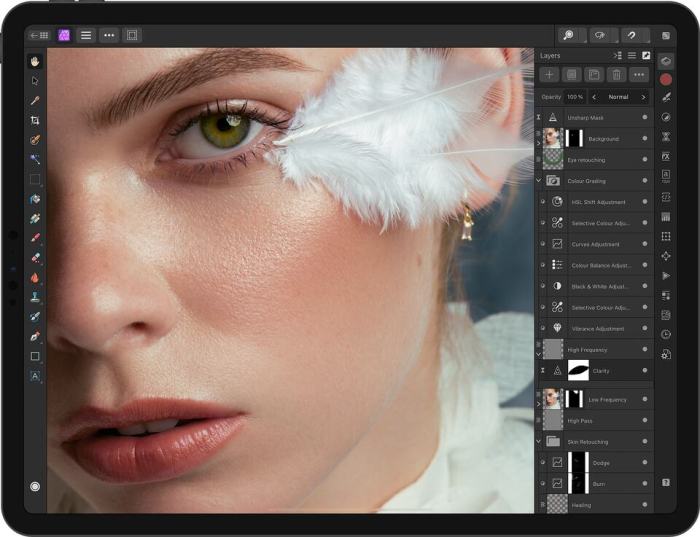
- Layers Panel:This panel on the right side of the screen displays all the layers in your document. You can use layers to organize your image, apply effects, and adjust different parts of your image independently.
- Studio Panel:This panel, also on the right side, provides access to various tools and features, including color adjustments, brushes, gradients, and more.
Creating a New Document
To create a new document in Affinity Photo, follow these steps:
- Click on the “File” menu in the top menu bar.
- Select “New” from the dropdown menu.
- In the “New Document” dialog box, specify the document’s dimensions, resolution, and color profile.
- Click “Create” to create the new document.
Importing Images
To import an image into Affinity Photo, you can use the following methods:
- Drag and Drop:Simply drag the image file from your computer’s file explorer and drop it onto the Affinity Photo document window.
- File Menu:Click on the “File” menu, select “Open,” and choose the image file you want to import.
- Place Command:Go to the “File” menu, select “Place,” and choose the image file. This will place the image as a new layer in your document, allowing you to resize and position it as needed.
Navigating the Workspace
The Affinity Photo workspace provides several tools to help you navigate and zoom in on your images:
- Hand Tool:This tool allows you to pan or move the image around the document window.
- Zoom Tool:This tool lets you zoom in or out of the image. You can use the mouse wheel to zoom in and out, or click and drag a rectangular area to zoom in on a specific region.
- Navigation Panel:This panel, located in the bottom right corner of the screen, provides controls for zooming and panning the image. It also displays the current zoom level and image size.
Basic Editing Techniques
Okay, let’s get down to the nitty-gritty of editing. This is where you take your raw images and transform them into something amazing. We’re talking about the tools that let you fix those little imperfections, make colors pop, and give your photos that “wow” factor.
Cropping
Cropping is like taking a pair of scissors to your image, but in a digital way. It lets you remove unwanted parts of your photo and focus on what really matters. Think of it as highlighting the best parts of your picture.You can crop your image using the “Crop Tool” in the toolbar.
- To crop an image, click on the Crop Tool icon in the toolbar.
- Drag the corners or sides of the crop selection to adjust the size and shape of the crop area.
- Press Enter to apply the crop.
Resizing
Resizing is about changing the dimensions of your image, making it bigger or smaller. It’s essential for making your photos fit different formats, like printing or sharing online.
- Go to the “Document” menu and select “Resize Document.”
- Enter the desired width and height in pixels or percentages.
- You can also choose to maintain the aspect ratio, which keeps the proportions of your image consistent.
- Click “OK” to resize the image.
Rotating
Rotating your image is like giving it a spin. This is helpful for fixing photos that were taken at an angle or for creating unique effects.
Okay, so you’re diving into the world of Affinity Photo with that awesome new user’s workbook, right? It’s like your own personal photo editing guru, guiding you through the ins and outs of making your pics pop. But sometimes, you just need a break from all that pixel-pushing, and that’s where a little creative coloring comes in.
Check out the Victorian Ladies Coloring Book Fashion Victorian Coloring Book Grayscale For Adults Relaxation to unleash your inner artist and chill out. Then, you can jump back into your Affinity Photo manual and rock those editing skills like a pro!
- Click on the “Rotate Tool” icon in the toolbar.
- Click and drag the image to rotate it.
- Press Enter to apply the rotation.
Adjusting Brightness and Contrast
Think of brightness as how much light is in your photo, and contrast as the difference between the darkest and lightest areas. Adjusting these elements can make your image more vibrant and impactful.
Yo, if you’re looking to level up your photo editing game, “The Affinity Photo Manual 2.0 A Step-by-Step New User’s Workbook” is your jam. It’s like having a super-chill photo guru right by your side, walking you through all the dope features.
And if you need a little boost of positivity while you’re mastering those skills, check out ” Colorful Affirmations Embrace Positivity 50 Beautiful Coloring Pages Inspiring Happiness for All Ages “. It’s like a coloring book for your soul, with vibrant pages filled with uplifting messages.
Then you can unleash your inner artist and create some epic photo edits that are totally #blessed.
- Go to the “Adjust” menu and select “Brightness & Contrast.”
- Use the sliders to adjust the brightness and contrast levels.
- Click “OK” to apply the changes.
Adjusting Color Balance
Color balance is all about ensuring your image has the right colors. It’s like finding the perfect white balance for your photo.
- Go to the “Adjust” menu and select “White Balance.”
- Use the sliders to adjust the color temperature and tint.
- Click “OK” to apply the changes.
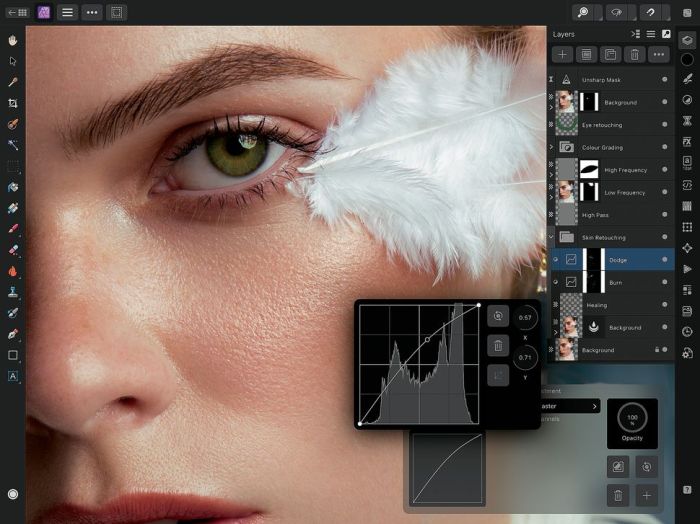
Removing Blemishes and Imperfections
We all have those pesky blemishes and imperfections that show up in our photos. Thankfully, Affinity Photo has some fantastic tools for removing them.
- Select the “Clone Tool” or “Healing Brush Tool” from the toolbar.
- Click and drag the tool over the blemish or imperfection.
- Affinity Photo will automatically sample nearby pixels and blend them seamlessly to cover the unwanted area.
- You can adjust the size and hardness of the brush to suit the size and type of blemish you’re trying to remove.
Advanced Editing Techniques

Ready to take your Affinity Photo skills to the next level? This section dives into the power tools that let you manipulate images like a pro. We’re talking about layers, masks, and selections – the holy trinity of image editing.
We’ll also explore filters and effects, showing you how to make your photos pop with just a few clicks. And if you’re feeling extra ambitious, we’ll even guide you through creating photo manipulations and composites, giving your images that “wow” factor.
Layers
Layers are the foundation of advanced image editing. They allow you to work on different parts of an image independently, without affecting other areas. Imagine layers as transparent sheets stacked on top of each other. You can adjust each sheet (layer) separately, without disturbing the others.
- You can add new layers for different elements, like text, shapes, or images.
- Each layer can have its own opacity, blend mode, and effects, allowing for creative control over the final image.
- Layers can be easily rearranged, copied, and deleted, making it simple to experiment and refine your edits.
Masks
Masks are like stencils that allow you to selectively edit specific areas of an image. Think of it like painting over a layer with a special brush that only affects the parts you want to edit.
So you’re ready to level up your photo editing game with Affinity Photo, huh? The “Affinity Photo Manual 2.0 A Step-by-Step New User’s Workbook” is your ultimate guide to mastering this powerful software, and it’s totally worth checking out.
You can even snag a copy of the audiobook Download And Listen Here and learn while you’re on the go. Once you’re a pro, you’ll be editing like a boss and leaving all the basic photo editors in the dust.
- Masks can be used to isolate parts of an image, making it easier to apply effects or adjustments to specific areas.
- You can create masks with various tools, including brushes, gradients, and selections.
- Masks can be used to blend images together seamlessly, create realistic effects, or isolate objects from their backgrounds.
Selections
Selections are like magic wands that allow you to isolate specific parts of an image. This is a key skill for any advanced editing task, whether you’re removing unwanted objects, applying effects, or combining multiple images.
- Selections can be made using a variety of tools, including the Quick Selection Tool, the Magic Wand Tool, and the Lasso Tool.
- Once you’ve made a selection, you can apply edits, adjustments, or effects to the selected area only.
- Selections can be refined using the Refine Selection Tool, allowing for precise control over the selected area.
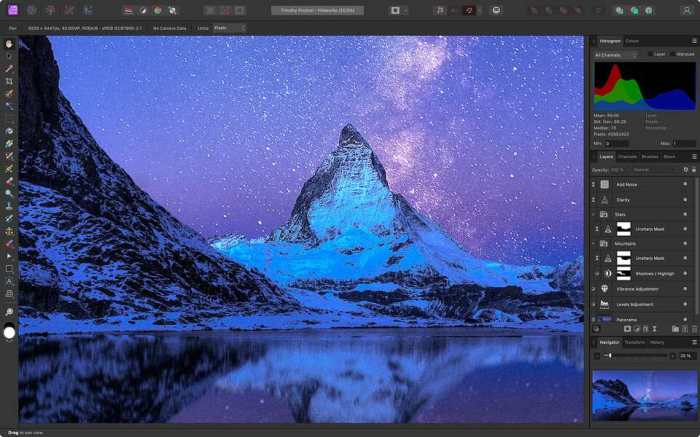
Filters and Effects
Filters and effects are the finishing touches that can transform an ordinary photo into something extraordinary. Affinity Photo offers a wide range of filters and effects that can add blur, sharpen, adjust color, and even create artistic styles.
- Filters can be applied to the entire image or just a selected area.
- Effects can be used to create realistic or abstract looks.
- Affinity Photo includes both built-in filters and effects, as well as the ability to install third-party plugins.
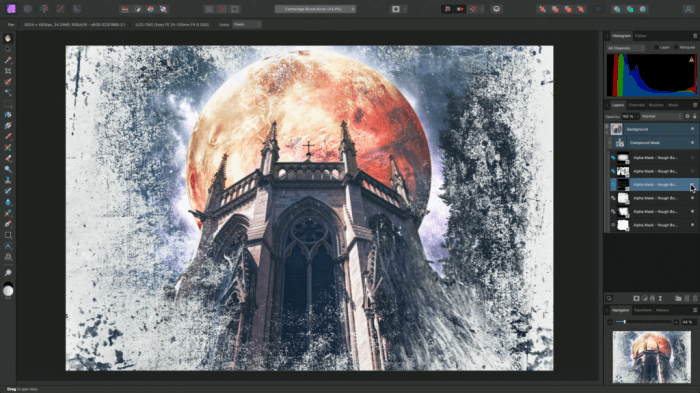
Photo Manipulations and Composites
Now for the fun stuff! Photo manipulations and composites allow you to combine multiple images to create entirely new scenes or modify existing ones. Think about it like putting together a puzzle, but with pictures instead of pieces.
- Photo manipulations can be used to create realistic or surreal images.
- Composites are often used to create advertising, magazine covers, and other creative projects.
- The key to successful photo manipulations and composites is to use layers, masks, and selections to blend the images together seamlessly.
Book Review
“The Affinity Photo Manual 2.0 A Step-by-Step New User’s Workbook” is a comprehensive guide for anyone looking to master the powerful image editing software, Affinity Photo. This book takes a practical approach, offering a structured learning experience that caters to both beginners and those seeking to enhance their skills.This book excels in its step-by-step approach, making complex techniques accessible to even the most novice users.
The detailed explanations and clear visuals make it easy to follow along and apply the concepts to your own projects.
Strengths of the Book
The book’s strengths lie in its comprehensive coverage, its focus on practical application, and its engaging writing style.
- Comprehensive Coverage: The book covers a wide range of topics, from basic editing techniques to advanced features like masking, layers, and adjustments. This comprehensive approach ensures that readers can learn everything they need to know to become proficient in Affinity Photo.
- Practical Application: The book emphasizes practical application through numerous examples and real-world scenarios. This hands-on approach helps readers understand how to use the software in real-world projects.
- Engaging Writing Style: The book is written in a clear and concise style, making it easy to understand and follow. The author’s friendly tone makes the learning process enjoyable.
Weaknesses of the Book
While the book is excellent overall, there are a few minor weaknesses that could be addressed in future editions.
- Limited Focus on Advanced Techniques: While the book covers a wide range of topics, it could benefit from more in-depth coverage of advanced techniques, such as creating complex composites or retouching portraits.
- Lack of a Dedicated Troubleshooting Section: The book could benefit from a dedicated section on troubleshooting common issues that users might encounter while using Affinity Photo. This would provide valuable support for readers who are struggling with specific problems.
Comparison to Other Resources
“The Affinity Photo Manual 2.0 A Step-by-Step New User’s Workbook” stands out from other Affinity Photo resources due to its comprehensive coverage, practical approach, and engaging writing style. While online tutorials and videos can provide quick answers to specific questions, this book offers a structured learning experience that helps users develop a deep understanding of Affinity Photo’s capabilities.
The Affinity Photo Manual 2.0 is like your new BFF for mastering photo editing, but sometimes you just need to chill out, ya know? That’s where the Boho Vintage Floral Coloring Book Minimal Retro Wildflower Designs to Relax & Color for Adults & Teens comes in handy.
It’s the perfect way to unwind after a long session of learning those Affinity Photo skills, letting your inner artist shine while you relax and de-stress. Then, when you’re feeling refreshed, you can jump back into the manual and conquer those photo editing challenges!
Last Word

“The Affinity Photo Manual 2.0 A Step-by-Step New User’s Workbook” is the ultimate guide for anyone who wants to master this powerful photo editing software. With its clear explanations, step-by-step instructions, and tons of practical examples, this book will help you transform your photos and take your creativity to the next level.
So, grab your copy, open Affinity Photo, and get ready to create some amazing images!
FAQ Section
Is this book only for complete beginners?
Nope! While it’s perfect for newbies, even experienced users can find new tips and tricks in this manual.
Do I need to have any prior experience with photo editing?
Absolutely not! This book is designed for beginners, so no prior experience is required. Everything is explained in a clear and easy-to-understand way.
What are the system requirements for using Affinity Photo?
You can find the system requirements for Affinity Photo on their official website. It’s compatible with both Windows and Mac computers.
Is Affinity Photo a free software?
Affinity Photo is not free, but it’s much more affordable than Photoshop. You can find more information about pricing on their website.
