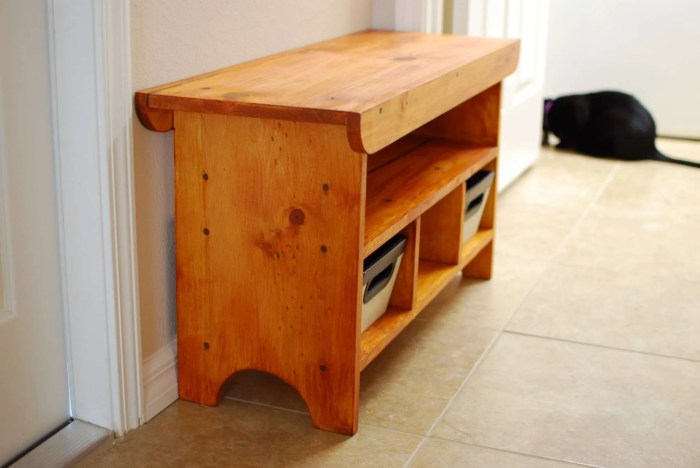
Woodwork projects offer a fulfilling way to unleash creativity and transform wood into beautiful and functional objects. From simple crafts to intricate furniture, woodworking has a rich history and continues to captivate enthusiasts with its endless possibilities. The process of woodworking, from planning to finishing, allows individuals to hone their skills, express their artistic vision, and create lasting pieces that bring joy and value to their lives.
Whether you’re a seasoned craftsman or a curious beginner, woodworking provides a rewarding experience. It’s a hobby that encourages patience, precision, and problem-solving, while fostering a sense of accomplishment with each completed project. This guide delves into the world of woodworking, offering insights into different project types, essential tools, techniques, and safety practices, ensuring a safe and enjoyable journey for all aspiring woodworkers.
Introduction to Woodwork Projects
Woodworking is a hobby that has been enjoyed by people for centuries. It is a rewarding and fulfilling activity that can be enjoyed by people of all ages and skill levels.
Woodworking is a craft that involves the shaping and joining of wood to create functional and decorative objects. From simple projects like birdhouses to complex furniture, woodworking offers endless possibilities for creativity and expression.
The Appeal of Woodworking Projects
Woodworking projects are appealing for a variety of reasons. Many people find the process of working with wood to be therapeutic and relaxing. The tactile nature of woodworking allows you to connect with the material in a way that is both physical and creative. Woodworking projects can also be a great way to express your creativity and build something unique and personal.
Types of Woodwork Projects
Woodworking projects come in all shapes and sizes, catering to various skill levels and interests. Whether you’re a beginner looking to build a simple birdhouse or an experienced craftsman tackling intricate furniture pieces, there’s a woodworking project out there for you.
Types of Woodwork Projects
Woodworking projects can be broadly categorized based on their purpose, complexity, and required skills. Here’s a table outlining different project types, their skill levels, materials, and tools:
| Project Type | Skill Level | Materials | Tools |
|---|---|---|---|
| Furniture | Beginner to Advanced | Hardwoods like oak, maple, cherry, walnut, softwoods like pine, plywood, and MDF | Hand tools (saws, chisels, planes), power tools (sander, drill, jigsaw), clamps, measuring tools, finishing supplies |
| Toys | Beginner to Intermediate | Softwoods like pine, plywood, MDF, paint, stain | Hand tools (saws, chisels), power tools (drill, jigsaw), clamps, measuring tools |
| Decorative Items | Beginner to Advanced | Hardwoods, softwoods, plywood, MDF, decorative hardware, paint, stain | Hand tools (saws, chisels), power tools (drill, jigsaw, sander), clamps, measuring tools, finishing supplies |
| Home Improvement Projects | Beginner to Advanced | Hardwoods, softwoods, plywood, MDF, hardware, paint, stain | Hand tools (saws, hammers, screwdrivers), power tools (drill, saw, sander), clamps, measuring tools, finishing supplies |
Planning and Designing Woodwork Projects
Planning and designing woodworking projects is crucial for success. It ensures that you have a clear vision, minimize mistakes, and create a project that meets your expectations. This section will explore the importance of planning and design and provide practical tips for creating detailed woodworking plans.
Creating Detailed Woodworking Plans
Creating detailed woodworking plans involves breaking down the project into smaller, manageable steps. This process ensures accuracy and efficiency in construction. Here are some key steps:
- Determine the Project’s Purpose and Function: Define the project’s intended use and its specific requirements. For example, if you are building a bookshelf, consider the number of shelves, the size of books to be stored, and the overall style.
- Sketch and Draw: Start by sketching out your ideas on paper. This allows you to visualize the project’s overall shape, dimensions, and design elements. You can then create detailed drawings using drafting tools or software.
- Choose Materials: Carefully select the appropriate wood species for your project. Consider factors such as strength, durability, appearance, and cost.
- Create a Bill of Materials: List all the materials needed, including the type, quantity, and dimensions. This ensures you have everything on hand before you start building.
- Create a Cut List: This list Artikels all the wood pieces needed for the project, including their dimensions, shape, and quantity.
- Create Assembly Instructions: Include detailed instructions on how to assemble the project, including diagrams, photos, and written explanations.
Using Software for Designing Woodworking Projects
Software tools can significantly enhance the planning and design process. They offer features that streamline the creation of detailed plans and 3D models.
- 3D Modeling Software: Programs like SketchUp, Fusion 360, and SolidWorks allow you to create realistic 3D models of your project. This helps you visualize the final product and identify potential design flaws.
- CAD Software: Computer-aided design (CAD) software, such as AutoCAD and DraftSight, provides tools for creating precise 2D drawings and technical diagrams. These programs are particularly useful for creating detailed plans for complex projects.
- Project Planning Software: Software like Google Sheets and Microsoft Excel can be used to create spreadsheets for managing your project’s budget, materials list, and schedule.
Essential Woodworking Tools and Techniques
Having the right tools and understanding their proper use is crucial for successful woodworking projects. This section will guide you through essential woodworking tools, their functions, usage tips, and safety precautions.
Essential Woodworking Tools
A basic set of woodworking tools is necessary for most projects. Here are some of the most essential tools:
| Tool | Function | Usage Tips | Safety Precautions |
|---|---|---|---|
| Saw | Cutting wood to desired length and shape | Use the correct type of saw for the task. Use a saw guide for straight cuts. Maintain a firm grip on the saw. | Always wear safety glasses. Keep fingers away from the blade. Avoid using a saw with a dull blade. |
| Drill | Creating holes in wood for fasteners, dowels, or other purposes. | Use the correct drill bit for the material and task. Start slowly and increase pressure gradually. Use a drill press for more accurate and consistent holes. | Always wear safety glasses. Use a drill press with a safety guard. Avoid drilling into a piece of wood that is not securely clamped. |
| Sanders | Smoothing and finishing wood surfaces. | Use the correct type of sandpaper for the desired finish. Sand with the grain for a smooth finish. Use a sanding block for more consistent results. | Always wear a dust mask. Avoid sanding too aggressively, which can damage the wood. Use a sanding block to prevent uneven sanding. |
| Clamps | Holding wood pieces together during assembly or while working on them. | Use the correct type of clamp for the task. Apply pressure evenly to avoid warping. Avoid overtightening the clamps. | Avoid clamping fingers or other body parts. Use caution when working with power tools near clamps. |
| Measuring Tools | Accurately measuring wood pieces and ensuring precise cuts. | Use a tape measure for linear measurements. Use a ruler or combination square for more precise measurements. Double-check measurements before making cuts. | Handle measuring tools carefully to avoid damage. Use a sharp pencil to mark cuts clearly. |
Woodworking Techniques
Woodworking techniques are the methods used to create woodworking projects. Here are some common woodworking techniques:
- Cutting: Cutting wood is essential for shaping and sizing wood pieces. Use a saw to cut wood to desired length and shape. Use a saw guide for straight cuts. Always wear safety glasses when cutting wood. Keep fingers away from the blade. Avoid using a saw with a dull blade.
- Drilling: Drilling is used to create holes in wood for fasteners, dowels, or other purposes. Use the correct drill bit for the material and task. Start slowly and increase pressure gradually. Use a drill press for more accurate and consistent holes. Always wear safety glasses when drilling. Use a drill press with a safety guard. Avoid drilling into a piece of wood that is not securely clamped.
- Sanding: Sanding is used to smooth and finish wood surfaces. Use the correct type of sandpaper for the desired finish. Sand with the grain for a smooth finish. Use a sanding block for more consistent results. Always wear a dust mask when sanding. Avoid sanding too aggressively, which can damage the wood. Use a sanding block to prevent uneven sanding.
- Gluing: Gluing is used to join wood pieces together. Use the correct type of glue for the wood and the task. Apply glue evenly to both surfaces. Clamp the pieces together until the glue dries. Avoid getting glue on your hands.
- Finishing: Finishing is the final step in woodworking, which protects and enhances the wood. There are many different types of finishes, such as paint, stain, varnish, and wax. Apply the finish according to the manufacturer’s instructions. Always wear a respirator when working with finishes.
Wood Selection and Preparation

Choosing the right wood and preparing it properly is crucial for a successful woodworking project. The type of wood you select will significantly impact the final look, durability, and workability of your project. Proper preparation ensures that the wood is ready for cutting, shaping, and finishing.
Types of Wood
The type of wood you choose will depend on the specific project you are undertaking. Some woods are better suited for certain applications than others.
- Hardwoods are generally denser and stronger than softwoods, making them suitable for furniture, flooring, and other high-stress applications. Examples of hardwoods include oak, maple, cherry, walnut, and mahogany.
- Softwoods are typically lighter and easier to work with, making them ideal for construction, crafts, and projects where strength is not a primary concern. Examples of softwoods include pine, fir, cedar, and spruce.
Wood Characteristics
Each type of wood has unique characteristics that influence its suitability for different projects.
- Grain pattern refers to the arrangement of wood fibers, which can create visually appealing patterns. Some woods have a straight grain, while others have a more intricate grain pattern.
- Hardness is a measure of a wood’s resistance to indentation or scratching. Harder woods are more durable and resistant to wear and tear.
- Workability refers to how easily a wood can be cut, shaped, and sanded. Some woods are easier to work with than others.
Wood Preparation
Preparing wood before starting a project is essential for achieving a high-quality finish.
- Drying: Wood contains moisture, and excessive moisture can lead to warping, cracking, and other problems. Drying wood to the proper moisture content is essential for stability. Air drying is a traditional method, while kiln drying is a faster and more controlled process.
- Sanding: Sanding helps to smooth the surface of the wood and remove imperfections. Start with coarse-grit sandpaper and progressively move to finer grits to achieve a smooth finish.
- Finishing: Applying a finish protects the wood from moisture, dirt, and scratches, enhancing its appearance. Common finishes include paint, stain, varnish, and oil.
Woodworking Techniques and Joints

Mastering woodworking techniques and understanding the different types of joints are essential for building sturdy and aesthetically pleasing projects. This section will explore common woodworking techniques, including cutting, shaping, sanding, and finishing. It will also delve into various woodworking joints, examining their advantages and disadvantages.
Cutting Techniques
Cutting is a fundamental woodworking technique used to shape and size wood. Common cutting tools include hand saws, circular saws, table saws, and jigsaws. Each tool has its unique characteristics and applications. For example, hand saws are versatile for precise cuts, while circular saws are ideal for making quick, straight cuts.
- Hand saws are manually operated saws that provide precise control over the cutting line. They are available in various sizes and tooth configurations, making them suitable for different wood types and cutting tasks.
- Circular saws are powered saws that use a rotating blade to make quick, straight cuts. They are commonly used for ripping (cutting along the grain) and crosscutting (cutting across the grain) wood.
- Table saws are stationary power tools with a circular blade that cuts wood precisely as it passes through the saw’s table. They are excellent for making accurate cuts, especially when cutting multiple pieces to the same size.
- Jigsaws are portable power tools with a blade that oscillates up and down, allowing for intricate cuts and curves. They are often used for cutting out shapes, making puzzle pieces, and creating decorative elements.
Shaping Techniques
Shaping wood involves creating specific forms and contours. This can be achieved using various hand tools and power tools.
- Chisels are hand tools with a sharp blade that can be used to carve wood, remove material, and create intricate details. They are available in various sizes and shapes, allowing for different applications.
- Planes are hand tools with a sharp blade that is used to smooth and flatten wood surfaces. They are often used to remove unevenness, create a consistent thickness, and shape edges.
- Routers are power tools that use a rotating cutter to shape and carve wood. They are highly versatile and can be used to create various profiles, edges, and decorative elements.
- Sanding is a finishing technique that involves smoothing and refining wood surfaces. It can be done manually using sandpaper or with power sanders. Sanding removes imperfections, creates a smooth finish, and prepares the wood for further treatments.
Finishing Techniques
Finishing wood protects it from damage, enhances its appearance, and provides a durable surface. Common finishing techniques include staining, painting, and varnishing.
- Staining is a process of applying a colored solution to wood to enhance its natural grain patterns and color. It can be used to create various shades and tones, adding depth and richness to the wood’s appearance.
- Painting is a technique that involves applying a thin layer of paint to wood surfaces to cover the natural grain and create a solid color. Paint can be used to protect the wood from moisture, sunlight, and other environmental factors.
- Varnishing is a process of applying a clear, protective coating to wood surfaces. Varnish enhances the wood’s natural beauty and provides a durable finish that resists scratches, water damage, and UV rays.
Woodworking Joints
Woodworking joints are used to connect different pieces of wood together. There are numerous types of joints, each with its advantages and disadvantages. The choice of joint depends on the project’s requirements, the strength needed, and the desired aesthetic appeal.
Dovetail Joints, Woodwork projects
Dovetail joints are strong and visually appealing joints used to connect two pieces of wood at a 90-degree angle. They are commonly used in drawer construction and furniture making.
- Advantages: Strong, secure, visually appealing, resist separation, can be glued or pinned for additional strength.
- Disadvantages: Requires precise cutting, time-consuming to create, can be difficult to repair if damaged.
Mortise and Tenon Joints
Mortise and tenon joints are strong and durable joints used to connect two pieces of wood at a 90-degree angle. They are commonly used in furniture construction and woodworking projects where strength and stability are essential.
- Advantages: Strong, secure, can be disassembled and reassembled, good for long, straight connections, can be glued or pinned for additional strength.
- Disadvantages: Requires precise cutting, time-consuming to create, can be difficult to repair if damaged.
Butt Joints
Butt joints are the simplest type of joint, where two pieces of wood are joined end to end. They are often used in simple projects where strength is not a primary concern.
- Advantages: Easy to create, requires minimal tools, suitable for simple projects.
- Disadvantages: Weak, prone to separation, requires additional reinforcement for strength.
Finishing Woodwork Projects

The final step in any woodworking project is finishing. This is where you add the final touches to your project, protecting it from damage and enhancing its appearance. There are many different types of finishes available, each with its own advantages and disadvantages.
Types of Wood Finishes
The type of finish you choose will depend on the type of wood you are using, the look you are trying to achieve, and the level of protection you need.
| Finish Type | Application Method | Advantages | Disadvantages |
|---|---|---|---|
| Paint | Brush, roller, or spray | Durable, hides imperfections, wide range of colors | Can hide the natural beauty of the wood, can be difficult to apply evenly, can chip or peel |
| Stain | Brush, cloth, or spray | Enhances the natural grain of the wood, can be used to create a variety of colors | Can be difficult to apply evenly, may not be as durable as paint |
| Varnish | Brush, roller, or spray | Provides a durable, protective coating, enhances the natural beauty of the wood | Can be difficult to apply evenly, can yellow over time |
| Wax | Rubbed on with a cloth | Easy to apply, enhances the natural beauty of the wood, can be easily repaired | Not as durable as paint or varnish, can be difficult to remove |
Woodworking Projects for Beginners
Woodworking is a rewarding hobby that allows you to create beautiful and functional objects. It’s a great way to learn new skills, express your creativity, and build something with your own hands. If you’re new to woodworking, there are many beginner-friendly projects that are perfect for getting started.
Beginner-Friendly Woodworking Projects
Here are some beginner-friendly woodworking projects that you can try:
-
Simple Cutting Board
A cutting board is a practical and useful project that is relatively easy to make. You can choose from a variety of wood types, such as maple, cherry, or walnut.
* Materials:
* 1 piece of hardwood (12″ x 18″ x 1″)
* Wood glue
* Mineral oil (for finishing)
* Tools:
* Table saw or circular saw
* Hand plane or jointer (optional)
* Sandpaper (various grits)
* Clamps
* Steps:
1. Cut the wood to the desired size and shape.
2. Sand the edges and surface of the wood to remove any rough spots.
3. Apply wood glue to the edges of the board and clamp them together.
4. Let the glue dry completely.
5. Sand the surface of the board again to create a smooth finish.
6. Apply mineral oil to the board to protect it from moisture and stains.* Image: Imagine a rectangular piece of wood with smooth, rounded edges. The surface is polished and has a natural wood grain.
-
Wooden Box
A wooden box is a versatile project that can be used for storage, gifts, or decoration. You can choose from different wood types, sizes, and styles.
* Materials:
* Wood planks (for the sides, bottom, and top)
* Wood glue
* Finishing nails or screws
* Wood stain or paint (optional)
* Tools:
* Miter saw or hand saw
* Clamps
* Sandpaper
* Hammer or drill
* Steps:
1. Cut the wood planks to the desired size for the sides, bottom, and top of the box.
2. Sand the edges and surface of the wood to remove any rough spots.
3. Use wood glue to join the sides of the box.
4. Clamp the sides together until the glue dries.
5. Attach the bottom and top of the box using finishing nails or screws.
6. Sand the entire box again to create a smooth finish.
7. Apply wood stain or paint if desired.* Image: Imagine a simple, rectangular box with a lid. The box is made of natural wood and has a smooth, polished finish.
-
Wooden Coasters
Wooden coasters are a great way to protect your furniture and add a touch of style to your home. You can use scrap wood or purchase pre-cut pieces from a craft store.
* Materials:
* Scrap wood or pre-cut pieces (4″ x 4″)
* Wood glue
* Cork sheet (for the bottom)
* Wood stain or paint (optional)
* Tools:
* Circular saw or hand saw
* Sandpaper
* Clamps
* Scissors
* Steps:
1. Cut the wood to the desired size and shape for the coasters.
2. Sand the edges and surface of the wood to remove any rough spots.
3. Cut a piece of cork sheet to the same size as the coaster.
4. Apply wood glue to the bottom of the coaster and attach the cork sheet.
5. Clamp the cork sheet in place until the glue dries.
6. Sand the entire coaster again to create a smooth finish.
7. Apply wood stain or paint if desired.* Image: Imagine a small, square coaster made of wood. The top surface is smooth and polished, while the bottom has a cork layer to protect furniture.
Woodworking Safety

Woodworking is a rewarding hobby or profession, but it can also be dangerous if proper safety practices are not followed. Accidents can happen quickly, so it is essential to be aware of the potential hazards and take steps to protect yourself.
Importance of Safety Gear
Wearing appropriate safety gear is crucial to prevent injuries while woodworking. Here are some essential items:
- Safety Glasses: Protect your eyes from flying debris, sawdust, and wood chips. Choose glasses with side shields for added protection.
- Hearing Protection: Power tools and machinery can generate loud noises that can damage your hearing over time. Use earplugs or earmuffs to reduce noise exposure.
- Dust Mask: Wood dust can irritate your lungs and can be harmful to your health. A dust mask will filter out airborne particles and protect your respiratory system.
- Work Gloves: Gloves protect your hands from cuts, splinters, and burns. Choose gloves that provide a good grip and are appropriate for the task at hand.
- Closed-Toe Shoes: Protect your feet from falling objects and sharp tools. Steel-toe boots are recommended for added protection.
Proper Use and Maintenance of Woodworking Tools
Using woodworking tools correctly and maintaining them regularly is essential for safety and efficiency.
- Read the Instructions: Always read the manufacturer’s instructions before using any new tool. This will help you understand how to use it safely and effectively.
- Keep Tools Sharp: Sharp tools are safer than dull ones. A dull tool can slip or bind, increasing the risk of injury. Regular sharpening will also make your work easier and more precise.
- Use the Right Tool for the Job: Don’t try to force a tool to do a job it’s not designed for. This can lead to damage to the tool and potential injury. Choose the right tool for the task and use it according to the manufacturer’s instructions.
- Inspect Tools Regularly: Check for damage or wear before each use. Replace any damaged or worn parts immediately.
- Store Tools Safely: Store tools in a designated area, away from children. Use tool holders, racks, or cases to keep tools organized and prevent accidental injury.
General Safety Practices
In addition to wearing safety gear and using tools correctly, there are several other safety practices to follow:
- Keep Work Area Clean: A cluttered workspace can lead to accidents. Clean up sawdust, debris, and tools after each use.
- Use a Workbench: A sturdy workbench provides a stable platform for working on projects. It also helps to keep your tools and materials organized.
- Avoid Distractions: Focus on your work and avoid distractions like phones or conversations. Don’t work when you are tired or under the influence of drugs or alcohol.
- Be Aware of Your Surroundings: Be aware of your surroundings and any potential hazards. Keep your workspace well-lit and free of obstacles.
- Use Safety Equipment: Always use safety equipment, such as guards, shields, and clamps, when operating machinery or power tools.
Resources and Inspiration

The journey of woodworking is filled with endless possibilities, and it’s always a good idea to have resources to guide you along the way. This section will explore various resources and sources of inspiration to fuel your woodworking endeavors.
Websites and Online Resources
Online resources are a treasure trove of woodworking knowledge. Here are some websites and online communities that offer valuable information, tutorials, and inspiration:
- Woodworking for Mere Mortals: This website offers a wealth of free woodworking plans, tutorials, and articles for all skill levels. It features a comprehensive collection of resources for beginners and experienced woodworkers alike.
- Fine Woodworking: This website provides in-depth articles, project plans, and video tutorials from renowned woodworkers. It’s a great source of inspiration and technical information.
- Popular Woodworking: This website features articles, project plans, and video tutorials covering a wide range of woodworking topics. It’s a valuable resource for both beginners and experienced woodworkers.
- Woodworking Magazine: This magazine offers a wide range of woodworking articles, project plans, and techniques. It’s a great source of inspiration and practical information.
- The Wood Whisperer: This YouTube channel features a variety of woodworking tutorials, project plans, and tips. It’s a great resource for learning new techniques and getting inspiration for your next project.
Online Woodworking Communities and Forums
Online communities and forums are excellent places to connect with other woodworkers, ask questions, and share your projects.
- Lumberjocks: This website is a large online community of woodworkers from around the world. It’s a great place to share your projects, ask questions, and get feedback from other woodworkers.
- Woodworking Talk: This forum is a popular destination for woodworkers to discuss all things woodworking. It’s a great place to find answers to your questions and learn from the experience of other woodworkers.
- Reddit’s r/woodworking: This subreddit is a vibrant community of woodworkers who share their projects, ask questions, and offer advice. It’s a great place to get inspiration and learn from other woodworkers.
Inspiring Woodworking Projects from Renowned Artists
The world of woodworking is filled with talented artists who create breathtaking pieces. Their work serves as a constant source of inspiration for aspiring woodworkers.
- Sam Maloof: Known for his elegant and organic furniture designs, Sam Maloof’s work exemplifies the beauty and craftsmanship of woodworking. His signature style features flowing curves and intricate details, often incorporating natural materials like wood and leather.
- George Nakashima: A pioneer of contemporary woodworking, George Nakashima’s work is characterized by its minimalist aesthetic and respect for the natural beauty of wood. His furniture pieces often feature unique wood grains and natural edges, showcasing the inherent beauty of the material.
- Garrett Hack: A contemporary woodworker known for his innovative designs and use of traditional techniques, Garrett Hack’s work often incorporates intricate joinery and complex shapes. His furniture pieces are both functional and artistic, pushing the boundaries of what is possible with wood.
Outcome Summary
As you embark on your woodworking journey, remember that patience, practice, and a passion for the craft are key ingredients for success. Don’t be afraid to experiment, learn from your mistakes, and seek inspiration from the vast community of woodworkers. With dedication and a willingness to explore, you can transform your woodworking dreams into tangible masterpieces.
Clarifying Questions
What are some basic woodworking tools I need to get started?
Essential tools for beginners include a saw, a drill, a hammer, measuring tape, sandpaper, and clamps.
What kind of wood is best for beginners?
Softwoods like pine or fir are easier to work with and more forgiving for beginners.
Where can I find woodworking plans?
There are numerous online resources and woodworking magazines that offer free and paid woodworking plans.
How do I finish a woodworking project?
Wood finishes can include paint, stain, varnish, or wax. Choose the finish based on the desired look and protection for your project.
Woodwork projects can be super rewarding, but sometimes you need a little extra guidance. If you’re looking for detailed plans and video tutorials, you might want to check out a tedswoodworking review to see if it’s the right fit for you.
There’s a ton of info out there, but Tedswoodworking has a reputation for being a solid resource for all kinds of woodworking projects, from beginner to advanced.
