Woodworking plans for outdoor furniture offer a rewarding way to transform your backyard into a personal oasis. Building your own furniture not only allows you to create pieces that perfectly match your style and needs, but also provides a sense of accomplishment and a unique connection to your outdoor space.
From sturdy benches and tables to cozy chairs and elegant swings, the possibilities are endless. Whether you’re a seasoned woodworker or just starting out, these plans guide you through every step, from choosing the right wood to applying the perfect finish.
Essential Tools and Materials

Building sturdy and long-lasting outdoor furniture requires a well-equipped workshop and a selection of suitable materials. This section will guide you through the essential tools and materials you’ll need to bring your outdoor furniture designs to life.
Essential Tools, Woodworking plans for outdoor furniture
Having the right tools is crucial for woodworking projects, especially when creating outdoor furniture that will withstand the elements.
- Power Tools:
- Circular Saw: For precise cuts along straight lines, making it ideal for cutting lumber to size.
- Jig Saw: Used for intricate cuts, curves, and shaping, making it suitable for creating unique furniture designs.
- Drill: Essential for drilling holes for fasteners, creating pilot holes for screws, and driving screws and bolts.
- Router: Used for creating decorative edges, grooves, and other intricate details on your furniture pieces.
- Belt Sander: For smoothing and shaping wood surfaces, achieving a polished and refined finish.
- Random Orbit Sander: Used for sanding intricate areas and achieving a smooth, consistent finish.
- Hand Tools:
- Hand Saw: A versatile tool for making cuts in wood, especially for smaller pieces and intricate shapes.
- Chisels: Used for carving, shaping, and cleaning up wood surfaces.
- Hammer: For driving nails and other fasteners.
- Clamps: Essential for holding wood pieces together during assembly and for securing workpieces during cutting and sanding.
- Measuring Tape: Accurate measurements are crucial for ensuring precise cuts and proper assembly.
- Level: Ensures that your furniture pieces are built with straight lines and even surfaces.
- Pencil: For marking cuts and transferring measurements to your wood.
- Safety Glasses: Protect your eyes from flying debris and sawdust.
- Ear Protection: Protect your hearing from the noise of power tools.
Wood Finishes for Outdoor Furniture
Choosing the right wood finish is essential for protecting your outdoor furniture from the elements and enhancing its beauty.
- Oil-Based Finishes:
- Penetrating Oil: Soaks into the wood, providing moisture resistance and enhancing the natural grain.
- Varnish: Forms a protective layer over the wood, offering durability and resistance to moisture, UV rays, and scratches.
- Water-Based Finishes:
- Polyurethane: A durable and water-resistant finish, often used for outdoor furniture due to its UV protection and scratch resistance.
- Acrylic Lacquer: A fast-drying and durable finish, offering good protection against moisture and UV rays.
- Other Finishes:
- Stain: Enhances the wood’s natural color and grain pattern while offering some protection against moisture and UV rays.
- Paint: Provides a solid color and a protective barrier against the elements.
Wood Species for Outdoor Furniture
The choice of wood species significantly influences the durability, aesthetics, and overall performance of your outdoor furniture.
| Wood Species | Properties | Uses |
|---|---|---|
| Teak | Naturally resistant to rot, insects, and weathering; durable; beautiful grain pattern | Decks, patio furniture, outdoor structures |
| Cedar | Naturally insect-resistant; aromatic; durable | Siding, fences, outdoor furniture |
| Redwood | Naturally resistant to rot and decay; durable; attractive reddish-brown color | Decks, fences, outdoor furniture |
| Ipe | Extremely hard and durable; resistant to rot, insects, and weathering; beautiful grain pattern | Decks, outdoor furniture, landscaping |
| Mahogany | Beautiful reddish-brown color; durable; relatively easy to work with | Outdoor furniture, boats, trim |
| Oak | Hard and durable; strong grain pattern; can be treated for outdoor use | Outdoor furniture, flooring, trim |
Construction Techniques
Building outdoor furniture involves various construction techniques, each suited for different project types and design elements. This section delves into the most common techniques, providing a step-by-step guide for building a basic bench and highlighting key jointing techniques.
Building a Basic Bench
Constructing a simple bench provides a foundation for understanding fundamental woodworking techniques. Here’s a step-by-step guide:
Step 1: Preparing the Materials
- Cut the lumber to the required lengths for the bench’s seat, legs, and supports. Ensure accurate measurements using a measuring tape and a pencil.
- Sand the lumber to smooth out any rough edges and prepare it for finishing. Use a belt sander or a random orbital sander for efficient sanding.
- Apply wood glue to the surfaces that will be joined together. Wood glue is a strong adhesive, and it helps to create a durable bond.
Step 2: Assembling the Bench
- Attach the legs to the seat using wood screws. Make sure the screws are long enough to penetrate through the seat and into the legs. Drill pilot holes to prevent the wood from splitting.
- Attach the supports to the seat and legs using wood screws. The supports provide additional stability and strength to the bench.
- Clamp the pieces together until the glue dries completely. Clamping ensures a strong and secure bond.
Step 3: Finishing the Bench
- Once the glue has dried, remove the clamps. Sand the entire bench to smooth out any rough edges and create a consistent finish.
- Apply a sealant or paint to the bench. This will protect the wood from the elements and enhance its appearance. Use a brush or a roller to apply the sealant or paint evenly.
Jointing Techniques
Outdoor furniture construction often utilizes various joints to create strong and durable connections. Here are some common jointing techniques:
Mortise and Tenon Joint
This classic joint is known for its strength and stability. It involves creating a rectangular hole (mortise) in one piece of wood and a corresponding projection (tenon) on the other piece.
Dovetail Joint
Dovetail joints are highly visible and aesthetically pleasing, offering superior strength and resistance to pulling apart. They involve creating a series of interlocking, tapered “dovetail” shapes that fit together tightly.
Pocket Hole Joint
Pocket hole joints are a modern and convenient method for joining pieces of wood at a 90-degree angle. They involve drilling angled holes into the edges of the wood and using specialized screws to join the pieces.
Butt Joint
Butt joints are the simplest type of joint, joining two pieces of wood end-to-end. However, they are not as strong as other joints, and require additional reinforcement like glue or screws.
Working with Wood
Achieving precise cuts and measurements is crucial for building durable and aesthetically pleasing outdoor furniture.
Using Measuring Tools
Accurate measurements are the foundation of woodworking. Utilize a measuring tape, a ruler, and a pencil for precise measurements.
Making Precise Cuts
- A miter saw is ideal for making precise angled cuts.
- A table saw is used for making accurate crosscuts and rip cuts.
- A circular saw is versatile for making various cuts, but requires more precision and care.
Tips for Working with Wood
- Always use sharp tools for clean cuts. Dull tools can cause tear-out and inaccuracies.
- Clamp your workpieces securely before cutting to prevent movement.
- Work in a well-lit and organized workspace to improve accuracy and safety.
- Take your time and be patient. Woodworking requires attention to detail and precision.
Finishing and Maintenance
Proper finishing is crucial for outdoor furniture as it provides a protective barrier against the elements, ensuring its longevity and beauty. Without proper finishing, wood can become susceptible to weathering, decay, and insect infestation, leading to premature deterioration.
Applying Wood Stains and Sealants
Wood stains enhance the natural beauty of the wood while providing a layer of protection against UV rays and moisture. Sealants, on the other hand, create a waterproof barrier that prevents water absorption, minimizing swelling and warping.
- Choosing the Right Stain and Sealant: Selecting the appropriate stain and sealant depends on the type of wood, desired color, and level of protection required. Oil-based stains penetrate deeper, providing richer color and better water resistance. Water-based stains are easier to apply and clean up but may offer less protection. For sealants, polyurethane is a popular choice due to its durability and water resistance. Other options include acrylic, oil-based, and wax-based sealants, each with its own advantages and disadvantages.
- Preparing the Wood: Before applying stain and sealant, the wood surface must be thoroughly cleaned and sanded smooth. This ensures proper adhesion and a uniform finish. Sanding with progressively finer grit sandpaper removes imperfections and creates a smooth surface for the stain and sealant to adhere to.
- Applying the Stain: Stain can be applied using a brush, cloth, or spray. Apply a thin, even coat, following the wood grain. Allow the stain to dry completely before applying the sealant. Multiple coats may be necessary to achieve the desired color depth.
- Applying the Sealant: Apply the sealant in thin, even coats using a brush, roller, or spray. Allow each coat to dry completely before applying the next. Multiple coats are generally recommended for optimal protection.
Maintaining Outdoor Furniture
Regular maintenance is key to prolonging the life of outdoor furniture.
- Cleaning: Clean the furniture regularly with mild soap and water. Avoid harsh chemicals that can damage the finish.
- Re-staining and Re-sealing: Depending on the type of finish and exposure to the elements, the furniture may require re-staining and re-sealing every few years. Inspect the finish for signs of wear, fading, or cracking. If necessary, apply a new coat of stain and sealant to restore the protective layer.
- Storing During Harsh Weather: If possible, store the furniture indoors during extreme weather conditions, such as heavy rain, snow, or freezing temperatures. This will help prevent damage and extend the furniture’s lifespan.
- Protecting from Sun Damage: Prolonged exposure to direct sunlight can cause fading and cracking. Consider using a furniture cover or placing the furniture in a shaded area to minimize sun damage.
Final Thoughts: Woodworking Plans For Outdoor Furniture

Building your own outdoor furniture is a journey that combines creativity, craftsmanship, and a touch of nature. With the right plans, tools, and a bit of patience, you can create pieces that will enhance your outdoor living for years to come. So, grab your wood, sharpen your tools, and let your backyard become a testament to your woodworking skills!
Key Questions Answered
What type of wood is best for outdoor furniture?
Hardwoods like teak, cedar, and redwood are known for their durability and natural resistance to rot and insects. However, pressure-treated pine is a more affordable option that also offers good outdoor performance.
How do I protect my outdoor furniture from the weather?
Applying a high-quality wood sealant or stain helps protect your furniture from rain, sun, and moisture. Regular cleaning and maintenance are also essential for longevity.
Where can I find woodworking plans for outdoor furniture?
You can find a wide range of free and paid plans online, in woodworking magazines, and at local lumberyards.
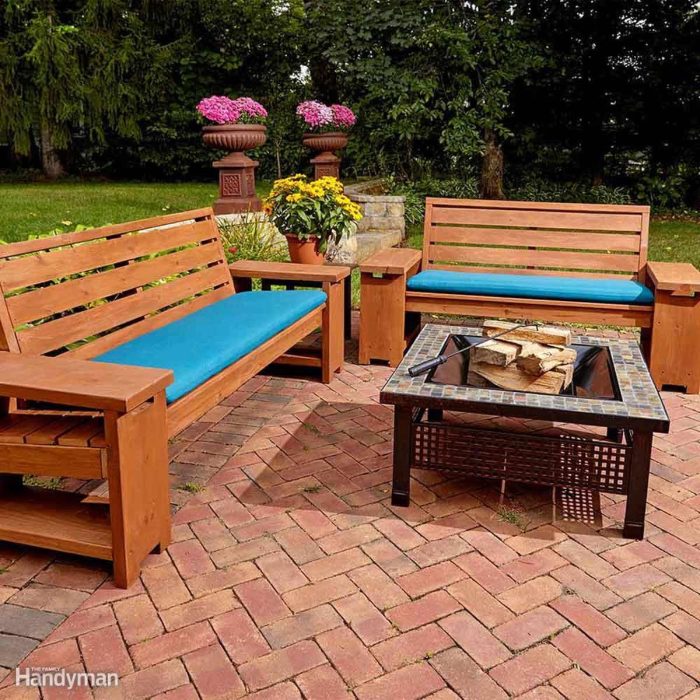
Building outdoor furniture can be a rewarding project, and there are tons of woodworking plans available to help you get started. If you’re looking to add a comfortable seating option to your patio or garden, you might want to check out some bench woodworking plans.
These plans will guide you through building a sturdy and stylish bench that will be the perfect addition to your outdoor space. Whether you’re looking for a simple design or something more intricate, there’s a bench plan out there for you.
