A woodworking project plan sets the stage for a successful and enjoyable woodworking journey. It’s not just about the final product, but the process itself. From crafting a detailed scope to selecting the right materials, tools, and techniques, a well-defined plan ensures you’re equipped to tackle any woodworking challenge with confidence.
This guide will walk you through the essential steps of creating a comprehensive woodworking project plan. We’ll cover everything from defining your project goals to budgeting and managing your time, empowering you to bring your woodworking visions to life.
The Importance of Planning
Planning is an essential step in any woodworking project, no matter how simple or complex. A well-thought-out plan can help you avoid costly mistakes, save time, and ensure that your project turns out exactly as you envisioned.
The Benefits of Planning
A woodworking project plan can provide numerous benefits, including:
- Clearer Understanding of the Project: A plan helps you visualize the project’s final outcome and the steps required to achieve it. This clarity reduces confusion and potential errors.
- Efficient Material Usage: Planning helps you accurately calculate the required materials, minimizing waste and saving you money.
- Improved Time Management: A plan allows you to estimate the time needed for each stage of the project, leading to better time management and a more efficient workflow.
- Reduced Risk of Errors: By anticipating potential challenges and considering solutions beforehand, you can avoid costly mistakes and rework.
- Enhanced Satisfaction: A successful project, achieved through careful planning, brings a sense of accomplishment and satisfaction.
The Consequences of Not Planning
Failing to plan can lead to several negative consequences:
- Wasted Time and Resources: Without a plan, you might find yourself making multiple trips to the store for forgotten materials or reworking sections due to design flaws.
- Increased Costs: Improper material usage and rework can significantly increase project costs.
- Frustration and Discouragement: When a project becomes more challenging than anticipated, it can lead to frustration and a loss of motivation.
- Unsatisfactory Results: A project without a plan might not meet your expectations, leading to disappointment.
Common Mistakes Avoided by Planning
Here are some common woodworking project mistakes that can be avoided with proper planning:
- Incorrect Material Selection: Planning helps you choose the right materials for your project based on its intended use and the environment it will be exposed to.
- Inadequate Joint Design: A plan allows you to select appropriate joints based on the project’s structural requirements and aesthetic considerations.
- Incorrect Measurements and Cutting: Planning helps you take accurate measurements and create precise cutting diagrams, reducing the risk of errors.
- Overlooked Finishing Details: A plan helps you account for finishing details like sanding, staining, and painting, ensuring a professional-looking result.
- Lack of Safety Precautions: Planning includes considering safety measures, like using appropriate tools and protective gear, reducing the risk of accidents.
Project Scope and Definition
Defining the project scope is crucial for any woodworking project. It ensures that the project remains focused and manageable, preventing scope creep and unnecessary complications. This section will guide you through creating a detailed project scope document, defining the target audience, and outlining the intended use and functionality of your woodworking piece.
Project Scope Document
A well-structured project scope document provides a clear roadmap for your project. It Artikels the specific goals, objectives, and deliverables, ensuring everyone involved understands the project’s boundaries.
- Project Goals: State the overall purpose of the project. What do you aim to achieve with this woodworking piece? For example, “To build a sturdy and aesthetically pleasing coffee table for my living room.”
- Project Objectives: Break down the goals into specific, measurable, achievable, relevant, and time-bound objectives. These objectives serve as milestones for your project. For instance, “To complete the table frame within two weeks,” or “To use sustainable and locally sourced wood for the table top.”
- Deliverables: Clearly define the tangible outputs of the project. This includes the finished woodworking piece, any accompanying instructions, or design plans. For example, “A fully assembled coffee table with a smooth finish and a protective coating.”
- Project Timeline: Establish a realistic timeline for the project, including key milestones and deadlines. This helps ensure the project stays on track. For instance, “Complete the design phase within a week, the construction phase within two weeks, and the finishing phase within one week.”
- Project Budget: Artikel the estimated cost of materials, tools, and any additional expenses. This helps you stay within budget and avoid surprises. For example, “Allocate $200 for wood, $50 for tools, and $30 for finishing materials.”
- Project Resources: List the resources needed for the project, including tools, materials, and expertise. For example, “Access to a workshop with basic woodworking tools, a list of required wood types, and a guide on wood finishing techniques.”
- Project Constraints: Identify any limitations or restrictions that might impact the project. This could include time constraints, budget limitations, or availability of specific materials. For instance, “Limited access to a workshop during specific hours,” or “Need to use a specific type of wood for the table top.”
- Project Risks: Identify potential risks that could jeopardize the project’s success. This could include delays in material delivery, tool malfunctions, or unexpected changes in the design. For instance, “Potential for delays in wood delivery due to weather conditions,” or “Risk of wood warping due to improper drying.”
- Project Communication Plan: Artikel how project updates and information will be shared among team members or stakeholders. This could include regular meetings, email updates, or a shared online platform. For example, “Weekly progress reports will be shared via email,” or “A shared online folder will be used for project documents and communication.”
Target Audience and End User
Defining your target audience is crucial for ensuring your woodworking piece meets their needs and preferences. This involves understanding their lifestyle, tastes, and specific requirements.
- Lifestyle: Consider the end user’s lifestyle and how the woodworking piece will fit into their daily routine. For example, if you are building a bookshelf for a family with young children, it should be sturdy, accessible, and potentially have safety features.
- Tastes: Understand the end user’s aesthetic preferences, including their preferred color schemes, materials, and design styles. For example, if you are building a coffee table for a minimalist home, it should have clean lines and a simple design.
- Specific Requirements: Identify any specific requirements or needs the end user may have. This could include accessibility needs, size constraints, or specific functionalities. For example, if you are building a desk for someone with mobility issues, it should be adjustable in height and have a spacious work surface.
Intended Use and Functionality
Clearly define the intended use and functionality of the finished woodworking piece. This ensures the project meets the end user’s needs and expectations.
- Primary Function: State the primary function of the woodworking piece. For example, “The coffee table will be used for serving drinks and displaying decorative items.”
- Secondary Functions: Identify any secondary functions the piece might have. For example, “The coffee table can also be used as a storage space for magazines and remote controls.”
- Usability: Consider how user-friendly the piece is. For example, “The coffee table should have a comfortable height for sitting and a spacious surface for placing items.”
- Durability: Determine the level of durability required for the piece. For example, “The coffee table should be sturdy enough to withstand daily use and potential spills.”
- Aesthetics: Artikel the desired aesthetic qualities of the piece. For example, “The coffee table should have a modern design with a natural wood finish.”
Materials and Supplies

A comprehensive list of materials and supplies is crucial for any woodworking project. This ensures you have everything you need before starting, minimizing delays and potential frustration.
Wood Selection
The type of wood you choose will significantly impact the final product’s appearance, durability, and cost.
- Hardwoods: Hardwoods are denser and more durable than softwoods, making them ideal for furniture, flooring, and other high-wear applications. Popular hardwoods include oak, maple, cherry, walnut, and mahogany. They are typically more expensive than softwoods but offer superior strength and beauty.
- Softwoods: Softwoods are lighter and less expensive than hardwoods, making them suitable for projects like shelving, boxes, and crafts. Popular softwoods include pine, fir, spruce, and cedar. They are generally easier to work with but may not be as durable as hardwoods.
- Plywood: Plywood is an engineered wood product made by layering thin sheets of wood veneer with alternating grain directions. This construction provides greater strength and stability than solid wood. Plywood is available in various grades and thicknesses, making it versatile for a wide range of projects.
- Medium-Density Fiberboard (MDF): MDF is a manufactured wood product made by combining wood fibers with resin and pressing them into a dense sheet. MDF is known for its smooth surface, consistent density, and affordability. It is commonly used for furniture, cabinets, and other projects where a smooth finish is desired.
Hardware and Fasteners
Hardware and fasteners play a critical role in holding your project together.
- Screws: Screws are essential for securing wood pieces together. They come in various lengths, diameters, and materials. Choose screws that are appropriate for the thickness of the wood and the type of joint you are creating.
- Nails: Nails are another common fastener for woodworking. They are available in various sizes, materials, and finishes. Choose nails that are appropriate for the type of wood and the application.
- Glue: Wood glue is essential for creating strong, durable joints. It comes in various formulas, each with its strengths and weaknesses. Choose a glue that is appropriate for the type of wood and the application.
- Hinges: Hinges are used to attach doors, lids, and other movable parts to a project. They come in various styles, sizes, and materials. Choose hinges that are appropriate for the weight and size of the door or lid.
- Drawer Slides: Drawer slides allow drawers to open and close smoothly. They come in various lengths, materials, and weight capacities. Choose drawer slides that are appropriate for the size and weight of the drawer.
Tools and Equipment
Having the right tools and equipment is essential for successful woodworking.
- Hand Tools: Basic hand tools include a hammer, saw, chisel, plane, screwdriver, and measuring tape. These tools are essential for cutting, shaping, and assembling wood.
- Power Tools: Power tools can significantly speed up the woodworking process. Common power tools include a drill, jigsaw, sander, and table saw. Choose power tools that are appropriate for the size and complexity of your project.
- Safety Gear: Safety gear is essential for protecting yourself while working with wood. Essential safety gear includes safety glasses, ear protection, dust mask, and work gloves.
Finishing Supplies
Finishing supplies enhance the appearance and durability of your woodworking project.
- Stains: Stains are used to color wood without obscuring its grain pattern. They come in various colors and finishes. Choose a stain that complements the type of wood and the overall design of your project.
- Finishes: Finishes protect wood from scratches, moisture, and other damage. Common finishes include varnish, polyurethane, and lacquer. Choose a finish that provides the desired level of protection and sheen.
- Paint: Paint can be used to cover wood and create a solid color. It comes in various colors, finishes, and types. Choose a paint that is appropriate for the type of wood and the application.
Tools and Equipment
Having the right tools and equipment is crucial for a successful woodworking project. This section Artikels the essential tools and equipment you’ll need, along with their functions, safety precautions, and maintenance tips.
Tools and Equipment List
The following is a list of common woodworking tools and equipment, along with their specific functions:
- Hand Tools
- Hammer: Used for driving nails, chisels, and other tools.
- Screwdriver: Used for driving and removing screws.
- Pliers: Used for gripping, twisting, and cutting wire or small objects.
- Chisel: Used for carving and shaping wood.
- Plane: Used for smoothing and shaping wood surfaces.
- Saw: Used for cutting wood.
- Level: Used for ensuring surfaces are level.
- Tape Measure: Used for measuring distances and lengths.
- Pencil: Used for marking and drawing lines on wood.
- Power Tools
- Power Drill: Used for drilling holes in wood.
- Circular Saw: Used for making straight cuts in wood.
- Jigsaw: Used for making curved cuts in wood.
- Router: Used for shaping and trimming edges.
- Sander: Used for smoothing and finishing wood surfaces.
- Table Saw: Used for making precise, straight cuts in wood.
- Safety Equipment
- Safety Glasses: Protect your eyes from flying debris.
- Hearing Protection: Protect your ears from loud noises.
- Dust Mask: Protect your lungs from wood dust.
- Work Gloves: Protect your hands from cuts and splinters.
- First Aid Kit: For treating minor injuries.
Safety Precautions
Safety is paramount when working with woodworking tools and equipment. Here is a table outlining the safety precautions for each tool:
| Tool | Safety Precautions |
|---|---|
| Hammer | Wear safety glasses to protect your eyes from flying debris. Use a nail holder to prevent your fingers from being hit by the hammer. |
| Screwdriver | Use the right size screwdriver for the screw. Avoid using a screwdriver with a damaged handle. |
| Pliers | Avoid using pliers to cut wire or metal. Use pliers with insulated handles when working with electricity. |
| Chisel | Use a mallet or hammer to strike the chisel. Keep your fingers out of the way of the chisel. |
| Plane | Use a push stick to guide the plane and keep your fingers out of the way of the blade. |
| Saw | Use a saw with a sharp blade. Keep your fingers out of the way of the blade. |
| Level | Use a level on a stable surface. Ensure the level is clean and free of debris. |
| Tape Measure | Use a tape measure with a locking mechanism to prevent it from retracting. |
| Pencil | Use a pencil with a sharp point for accurate marking. |
| Power Drill | Wear safety glasses to protect your eyes from flying debris. Use a drill bit that is the correct size for the job. |
| Circular Saw | Wear safety glasses and hearing protection. Use a saw with a sharp blade. Keep your fingers out of the way of the blade. |
| Jigsaw | Wear safety glasses and hearing protection. Use a jigsaw with a sharp blade. Keep your fingers out of the way of the blade. |
| Router | Wear safety glasses and hearing protection. Use a router with a sharp bit. Keep your fingers out of the way of the bit. |
| Sander | Wear safety glasses and a dust mask. Use a sander with a clean sanding disc. |
| Table Saw | Wear safety glasses and hearing protection. Use a saw with a sharp blade. Keep your fingers out of the way of the blade. |
Tool Maintenance and Storage
Proper maintenance and storage are essential for ensuring the longevity and safety of your woodworking tools and equipment.
- Cleaning: Clean your tools after each use. Remove sawdust, wood chips, and other debris with a brush, cloth, or compressed air.
- Sharpening: Sharpen your blades and bits regularly to ensure they cut cleanly and efficiently.
- Lubrication: Lubricate moving parts, such as hinges and slides, with oil or grease to prevent rust and corrosion.
- Storage: Store your tools in a dry, clean, and organized manner. Use tool chests, cabinets, or racks to keep your tools safe and accessible.
Design and Construction
This section delves into the heart of your woodworking project, transforming your plan into a tangible creation. We’ll break down the construction process into manageable steps, guiding you through each stage with clarity and precision.
Detailed Construction Steps
This section Artikels the specific steps involved in building your project, ensuring a smooth and successful construction process.
- Step 1: Prepare the Work Area
- Ensure a clean and well-lit workspace.
- Set up your workbench or work surface, providing ample room for your project.
- Gather all necessary tools and materials within easy reach.
- Step 2: Cut and Prepare the Wood
- Carefully measure and mark the wood according to your project plans.
- Use a saw (circular saw, table saw, or hand saw) to cut the wood to the desired dimensions.
- Sand the cut edges smooth to prevent splinters and ensure a clean finish.
- Step 3: Assemble the Project Components
- Use clamps to hold the pieces together while you secure them with glue, screws, or nails.
- Ensure all joints are properly aligned and tight.
- Check for squareness and accuracy throughout the assembly process.
- Step 4: Finish the Project
- Sand the entire project to achieve a smooth and even surface.
- Apply a finish (stain, paint, or varnish) according to your desired look and protection.
- Allow the finish to dry completely before handling the project.
Common Challenges and Solutions
During the construction process, you may encounter various challenges. Here are some common issues and practical solutions:
- Wood Movement: Wood expands and contracts with changes in humidity. To minimize this, use well-seasoned wood and avoid placing your project in direct sunlight or high-humidity areas.
- Joint Alignment: Ensuring joints are properly aligned is crucial for a strong and visually appealing project. Use clamps to secure pieces during assembly and check for squareness regularly.
- Glue Cleanup: Excess glue can mar the finished project. Clean up any spills immediately with a damp cloth. For stubborn glue, use a wood-safe glue remover.
Finishing Touches

The final step in any woodworking project is applying finishing touches. This involves preparing the surface, applying the desired finish, and protecting it for years to come. Proper finishing can enhance the natural beauty of the wood, add color and protection, and increase the longevity of your project.
Sanding
Sanding is essential to create a smooth surface that allows the finish to adhere properly. The process involves progressively using sandpaper of different grits, starting with a coarser grit to remove imperfections and ending with a finer grit for a smooth finish.
- Start with a coarse grit sandpaper (80-120 grit) to remove any major imperfections, scratches, or tool marks.
- Gradually move to finer grits (150-220 grit) to smooth out the surface and remove sanding marks from the previous step.
- Finish with a very fine grit (400-600 grit) to achieve a super smooth surface that will allow the finish to flow evenly.
- Sand with the grain of the wood to avoid scratches and ensure a consistent finish.
- Use a sanding block to apply even pressure and prevent dips or bumps.
Staining
Staining is a process that adds color to wood without obscuring its natural grain pattern. It is often used to enhance the wood’s natural beauty or to create a desired color scheme.
- Choose a stain that is compatible with the type of wood you are using.
- Apply the stain evenly using a brush, cloth, or sponge.
- Wipe off excess stain after the recommended drying time.
- Apply multiple coats if desired for a deeper color.
- Allow each coat to dry completely before applying the next.
Painting
Painting is a technique used to add color and protection to wood. It is often used to cover up imperfections or to create a specific color scheme.
- Prepare the surface by sanding it smooth and cleaning it with a damp cloth.
- Apply a primer if necessary to improve paint adhesion and provide a smooth surface.
- Choose a paint that is compatible with the type of wood you are using.
- Apply the paint evenly using a brush, roller, or spray gun.
- Allow each coat to dry completely before applying the next.
Sealing
Sealing is the final step in the finishing process, which protects the wood from moisture, dirt, and scratches. It also enhances the durability and longevity of the project.
- Choose a sealant that is compatible with the type of finish you have applied.
- Apply the sealant evenly using a brush, cloth, or sponge.
- Allow the sealant to dry completely before handling the project.
- Reapply the sealant periodically to maintain its effectiveness.
Safety Precautions
Finishing techniques often involve the use of chemicals that can be harmful if not handled properly. It is essential to take the following safety precautions:
- Always work in a well-ventilated area.
- Wear appropriate safety gear, such as gloves, eye protection, and a respirator.
- Follow the manufacturer’s instructions for the specific finishing products you are using.
- Keep finishing products out of reach of children and pets.
- Dispose of finishing products properly according to local regulations.
Project Budget and Timeline: Woodworking Project Plan
A well-defined budget and timeline are crucial for successful woodworking projects. They provide a framework for managing resources, tracking progress, and ensuring project completion within reasonable constraints.
Budgeting for Your Project
A detailed budget helps you allocate funds effectively and avoid unexpected expenses.
- Material Costs: This is the most significant part of your budget. Create a comprehensive list of all materials needed, including wood, fasteners, finishes, and any specialized components. Research prices from different suppliers to find the best deals.
- Tool Rental Fees: If you don’t own all the necessary tools, factor in rental costs. Estimate the duration of tool rentals and consider the cost of consumables like blades or drill bits.
- Labor Expenses: If you’re hiring someone to assist with the project, include their labor costs in your budget. This might involve hourly wages, project-based fees, or a combination of both.
- Contingency Fund: Always allocate a percentage of your budget for unexpected expenses. This could cover unforeseen material needs, tool repairs, or potential delays.
Creating a Realistic Timeline
A timeline helps you visualize the project’s progress and identify potential bottlenecks.
- Project Breakdown: Divide the project into smaller, manageable tasks. This allows for better organization and tracking of individual milestones.
- Time Estimates: Allocate realistic timeframes for each task. Consider the complexity of the work, your skill level, and any potential delays.
- Milestone Deadlines: Establish clear deadlines for completing each task or phase of the project. This keeps you on track and prevents procrastination.
- Flexibility and Contingency: Be prepared for unexpected delays. Build in buffer time for unforeseen circumstances, such as material availability issues or weather conditions.
Managing Project Costs
Effective cost management ensures your project stays within budget.
- Shop Around for Deals: Compare prices from different suppliers to find the best deals on materials and tools. Look for discounts, sales, or bulk purchase options.
- Prioritize Essential Tools: Avoid unnecessary tool purchases. Consider renting or borrowing tools you’ll only use once or twice.
- Minimize Waste: Plan your cuts carefully and utilize scrap wood whenever possible. This reduces material costs and minimizes environmental impact.
- Track Expenses: Maintain a detailed record of all project expenses. This helps you stay informed about your spending and identify potential areas for cost optimization.
Documentation and Resources

A well-organized documentation file is essential for any woodworking project, serving as a reference point for future projects and a record of your journey. It helps you track your progress, troubleshoot issues, and even inspire future creations.
Online Resources and Woodworking Communities
The internet is a treasure trove of information for woodworkers, offering a vast array of resources and communities to support your endeavors.
- Online Forums and Communities: These platforms provide a space to connect with fellow woodworkers, share your projects, seek advice, and learn from experienced individuals. Popular examples include Woodworking Talk, Lumberjocks, and Reddit’s r/woodworking.
- YouTube Channels: Many talented woodworkers share their knowledge and skills through video tutorials on YouTube. Channels like The Wood Whisperer, Paul Sellers, and Fine Woodworking provide a wealth of instructional content.
- Woodworking Blogs and Websites: Numerous websites and blogs dedicated to woodworking offer articles, tutorials, and project plans. Some notable examples include Popular Woodworking, Fine Woodworking, and Woodworking for Mere Mortals.
Examples of Successful Woodworking Projects, Woodworking project plan
Here’s a table showcasing some inspiring woodworking projects, along with links to their plans and tutorials.
| Project | Description | Link to Plan/Tutorial |
|---|---|---|
| Mid-Century Modern Coffee Table | A sleek and stylish coffee table with a minimalist design. | Ana White |
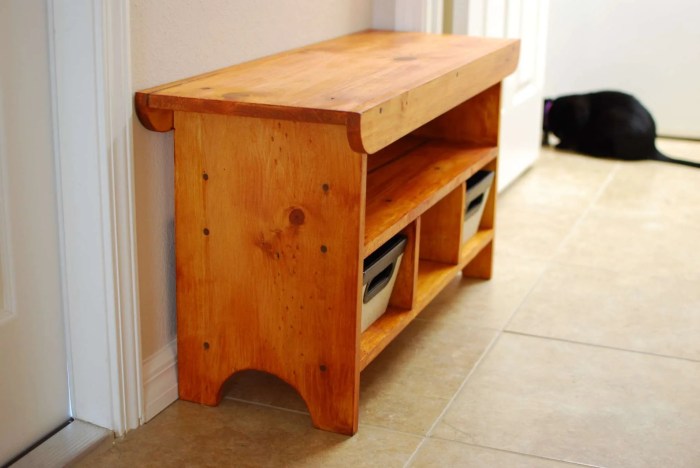
| Rustic Wooden Bench | A sturdy and charming bench perfect for outdoor spaces. | The Wood Whisperer |
| Simple Wooden Toy Box | A classic toy box with a timeless design. | Popular Woodworking |
Last Point
By investing the time and effort to create a thorough woodworking project plan, you’re setting yourself up for a rewarding experience. You’ll gain a clear understanding of your project, minimize potential errors, and ultimately, achieve a finished product that you can be proud of. So, grab your pencil and paper, and let’s dive into the world of woodworking project planning!
Question & Answer Hub
What are some common mistakes to avoid when woodworking?
Skipping safety precautions, not measuring accurately, rushing the process, and not considering the wood’s grain direction are common mistakes that can be avoided with proper planning.
How can I find woodworking plans online?
There are many online resources for woodworking plans, including websites like Ana White, Woodworking for Mere Mortals, and Lumberjocks.
What are some essential woodworking tools for beginners?
Essential tools for beginners include a measuring tape, hand saw, hammer, screwdriver, drill, and safety glasses.
A woodworking project plan is like a recipe for your project, guiding you step-by-step. If you’re looking for inspiration, check out kids woodworking projects free for some fun and easy ideas. Once you’ve got your project in mind, you can start planning out the materials, tools, and steps you’ll need to make it a reality.
