Woodworking projects for children offer a fantastic way to spark creativity, develop fine motor skills, and foster a sense of accomplishment. These hands-on activities provide an opportunity for kids to learn basic woodworking techniques while creating unique and personalized projects. From simple birdhouses to intricate toy boxes, the possibilities are endless, making woodworking an engaging and educational experience for young minds.
Safety is paramount when it comes to woodworking projects for children. Always ensure adult supervision and provide children with the necessary safety equipment, such as safety glasses and appropriate tools. By following basic woodworking safety rules and emphasizing careful handling of tools, children can enjoy the fun and learning benefits of woodworking in a safe and responsible manner.
Safety First
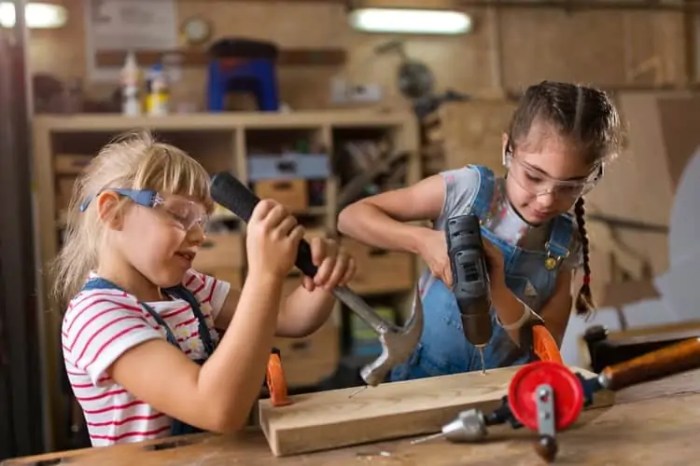
Woodworking is a fun and rewarding hobby, but it’s important to remember that safety should always come first. Working with wood involves sharp tools and potentially dangerous equipment, so it’s crucial to have adult supervision and follow proper safety procedures.
Adult Supervision
It’s important to have an adult present when working with wood. They can help you use the tools safely and guide you through the project. They can also intervene if something goes wrong.
Safety Equipment
There are several essential safety items that should be used when working with wood. These items will help protect you from injury.
- Safety glasses: Safety glasses protect your eyes from flying wood chips and sawdust.
- Hearing protection: Woodworking can be noisy, so it’s important to protect your ears with earplugs or earmuffs.
- Gloves: Gloves protect your hands from splinters and sharp edges.
- Dust mask: A dust mask helps prevent you from inhaling sawdust, which can irritate your lungs.
Safety Rules
Here are some important safety rules to follow when working with wood:
- Always wear safety glasses when working with wood.
- Keep your fingers away from the blade of any cutting tool.
- Use the correct tool for the job.
- Make sure the tools are sharp and in good working order.
- Don’t wear loose clothing or jewelry that could get caught in machinery.
- Keep your work area clean and organized.
- Always unplug power tools before making adjustments or changing blades.
- Be aware of your surroundings and make sure there is nothing in your way that could cause you to trip or fall.
Simple and Fun Projects
Woodworking is a great hobby for kids of all ages, and it’s a fun way to learn about tools, materials, and design. Here are some simple and fun woodworking projects that you can do with your kids.
Birdhouses
Birdhouses are a classic woodworking project that’s perfect for beginners. They’re relatively easy to make, and they’re a great way to attract birds to your backyard.
Here are the tools and materials you’ll need:
- Wood (1/2-inch plywood or cedar is a good choice)
- Saw (a handsaw or jigsaw will work)
- Hammer
- Nails or screws
- Measuring tape
- Pencil
- Sandpaper
- Paint or stain (optional)
Here are the steps for building a birdhouse:
- Cut out the pieces for the birdhouse according to your chosen design. There are many free birdhouse plans available online.
- Sand the edges of the wood to smooth them out.
- Assemble the pieces of the birdhouse using nails or screws.
- Add a perch for the birds to land on.
- Paint or stain the birdhouse (optional).
- Hang the birdhouse in a safe and accessible location.
Picture Frames
Picture frames are another easy woodworking project that kids can enjoy. They’re a great way to display their artwork or favorite photos.
Here are the tools and materials you’ll need:
- Wood (1/2-inch pine or poplar is a good choice)
- Saw (a handsaw or jigsaw will work)
- Hammer
- Nails or screws
- Measuring tape
- Pencil
- Sandpaper
- Paint or stain (optional)
- Glass or acrylic sheet (optional)
Here are the steps for building a picture frame:
- Cut out the pieces for the picture frame according to the size of the picture you want to frame.
- Sand the edges of the wood to smooth them out.
- Assemble the pieces of the picture frame using nails or screws.
- Add a backing board to the frame.
- If you’re using glass or acrylic, cut it to size and attach it to the frame.
- Paint or stain the picture frame (optional).
Toy Boxes, Woodworking projects for children
Toy boxes are a great way to keep a child’s room organized and tidy. They’re also a fun project that kids can help build.
Here are the tools and materials you’ll need:
- Wood (1/2-inch plywood or pine is a good choice)
- Saw (a handsaw or jigsaw will work)
- Hammer
- Nails or screws
- Measuring tape
- Pencil
- Sandpaper
- Hinges
- Paint or stain (optional)
Here are the steps for building a toy box:
- Cut out the pieces for the toy box according to your chosen design. There are many free toy box plans available online.
- Sand the edges of the wood to smooth them out.
- Assemble the pieces of the toy box using nails or screws.
- Attach the hinges to the lid of the toy box.
- Paint or stain the toy box (optional).
Creative Design and Decoration
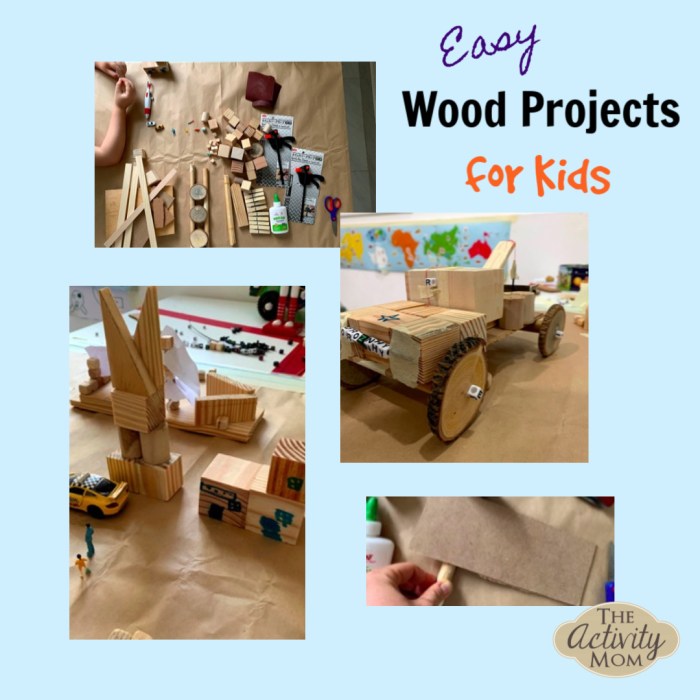
Woodworking projects are a great way for children to express their creativity and individuality. By adding paint, stain, or other decorative elements, they can personalize their creations and make them truly unique. This process encourages them to think outside the box and develop their artistic skills, transforming simple wooden objects into works of art.
Woodworking projects for children are a great way to spark creativity and teach valuable skills. You can find all the supplies you need at a woodworking store , from basic tools like hammers and saws to more specialized items like wood glue and sandpaper.
With a little guidance, kids can create anything from simple birdhouses to intricate model cars.
Examples of Creative Design Ideas
There are endless possibilities when it comes to decorating woodworking projects. Here are some examples of creative design ideas to inspire children:
- Animal Shapes: Children can carve or paint animal shapes onto their wooden objects, such as a birdhouse with a bird perched on the roof or a wooden box decorated with playful animal faces.
- Patterns: Geometric patterns, floral motifs, or even abstract designs can add visual interest to wooden projects. Children can use stencils, stamps, or freehand drawing techniques to create unique patterns.
- Inlays: For a more intricate design, children can use contrasting wood pieces to create inlays. This technique involves cutting out shapes from different types of wood and fitting them together to create a decorative pattern.
- Textured Surfaces: Creating textured surfaces on wood can add depth and dimension to projects. Children can use sandpaper, carving tools, or even textured paint to achieve different effects.
Using Different Finishes
Finishes play a crucial role in enhancing the appearance of wooden objects. They can protect the wood from damage, add color, and create a desired sheen. Here are some common finishes used in woodworking:
- Paint: Paint is a versatile finish that allows for a wide range of colors and effects. Children can use acrylic paint, which dries quickly and is easy to clean up, or water-based paint for a more durable finish.
- Stain: Stain is a transparent finish that enhances the natural beauty of wood by adding color and depth. It allows the wood grain to show through, creating a warm and natural look.
- Varnish: Varnish is a clear protective coating that seals the wood and protects it from scratches, spills, and moisture. It can also enhance the natural sheen of the wood.
- Polyurethane: Polyurethane is a durable and water-resistant finish that provides excellent protection for wood. It comes in different finishes, including satin, semi-gloss, and gloss.
Exploring Different Woodworking Techniques
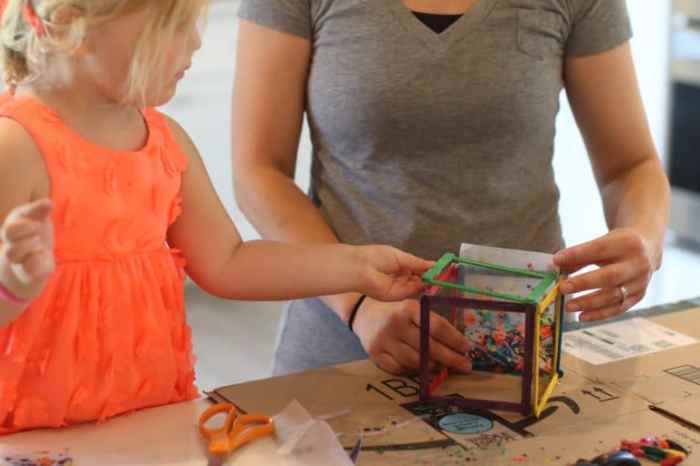
Woodworking is all about using tools to shape and create beautiful things from wood. It’s a fun and rewarding hobby that can be enjoyed by people of all ages, even kids!
Sanding
Sanding is a crucial step in woodworking. It helps to smooth out rough surfaces, remove imperfections, and create a polished finish. You can use sandpaper with different grits for different purposes.
Here’s how to sand:
* Start with a coarse-grit sandpaper (like 80 grit) to remove major scratches or rough spots.
* Work your way up to finer grits (like 120, 220, and 400 grit) to create a smoother surface.
* Sand in the direction of the wood grain for a better finish.
* Use a sanding block to help you sand evenly.
You can try sanding a small piece of wood to create a smooth surface.
Drilling
Drilling is a way to create holes in wood. You can use drills for different purposes, like attaching pieces of wood together or creating holes for screws.
Here’s how to drill:
* Choose the right drill bit for the size of hole you need.
* Use a drill press to keep the drill bit straight and prevent it from wobbling.
* Always wear safety glasses when drilling.
* Use a drill bit that’s slightly smaller than the screw you’ll be using to create a pilot hole.
You can try drilling a few holes in a scrap piece of wood.
Cutting
Cutting is a basic woodworking technique that allows you to shape and size wood pieces. You can use different tools for cutting, like a saw, a jigsaw, or a table saw.
Here’s how to cut:
* Use a saw to cut straight lines in wood.
* Use a jigsaw to cut curves and shapes in wood.
* Use a table saw to cut wood to precise dimensions and make straight cuts.
* Always wear safety glasses when cutting wood.
You can try cutting a small piece of wood with a saw to practice.
Making a Simple Birdhouse
A birdhouse is a great project for kids to try. It combines all the techniques we’ve learned!
Here’s how to make a simple birdhouse:
* Cut out the pieces of wood using a saw or jigsaw.
* Sand the edges of the pieces to make them smooth.
* Drill holes for the entrance and any other features you want to add.
* Glue the pieces together using wood glue.
* Let the glue dry completely before painting or decorating the birdhouse.
This is just a basic introduction to woodworking techniques. There are many other techniques and tools you can learn as you get more experience!
Building Confidence and Skills
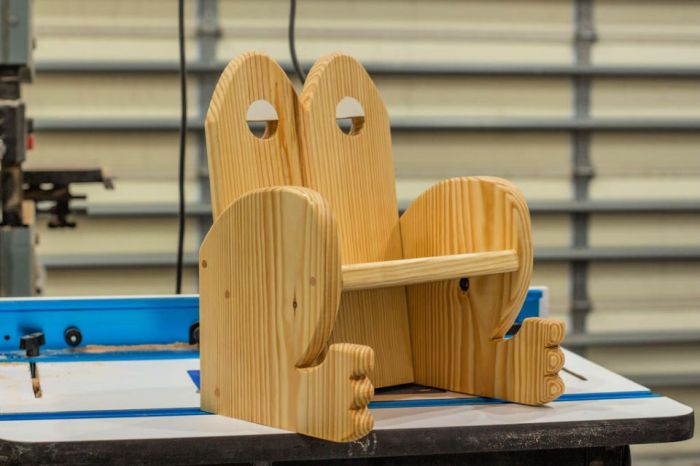
Woodworking projects offer children a unique opportunity to develop valuable skills and build confidence, empowering them to tackle challenges and achieve a sense of accomplishment. The hands-on nature of woodworking provides a tangible platform for learning and growth, fostering a sense of pride and accomplishment in children.
Developing Fine Motor Skills
Woodworking projects provide an excellent opportunity for children to develop their fine motor skills. The intricate movements required for tasks such as sawing, sanding, and hammering promote dexterity, hand-eye coordination, and precision. These skills are essential for a wide range of activities, from writing and drawing to playing musical instruments and using technology.
- Sawing: Holding and guiding a saw requires precise hand movements and control, improving coordination and dexterity.
- Sanding: Sanding wood to achieve a smooth finish requires consistent pressure and controlled movements, enhancing hand-eye coordination and tactile sensitivity.
- Hammering: Swinging a hammer with accuracy and force to drive nails requires both strength and precision, developing fine motor skills and coordination.
Problem-Solving and Creativity
Woodworking projects often involve problem-solving and creative thinking. Children are encouraged to analyze designs, identify challenges, and come up with solutions. This process fosters critical thinking, adaptability, and resourcefulness.
- Design and Planning: Creating woodworking projects involves planning and visualizing the final product, developing spatial reasoning and problem-solving skills.
- Adapting to Challenges: When encountering unexpected issues or errors, children learn to adapt their approach, find alternative solutions, and persevere, building resilience and problem-solving abilities.
- Exploring Creative Solutions: Woodworking encourages children to explore different design possibilities, experiment with materials, and personalize their projects, fostering creativity and self-expression.
Integration into Educational Settings
Woodworking projects can be seamlessly integrated into educational settings, providing hands-on learning experiences that complement traditional classroom instruction.
- Science and Technology: Woodworking projects can be used to teach concepts related to physics, engineering, and design, such as force, leverage, and structural integrity.
- Mathematics: Measuring, cutting, and assembling wood pieces provide practical applications for geometry, fractions, and measurement skills.
- Arts and Crafts: Woodworking projects offer a creative outlet for self-expression, allowing children to design and create unique pieces that reflect their individual interests and talents.
Final Conclusion
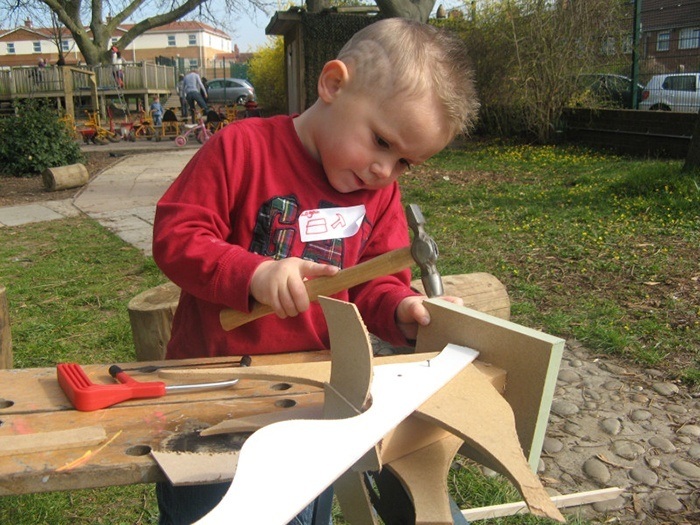
Woodworking projects for children are a rewarding and enriching experience that can ignite a passion for creativity and craftsmanship. Through hands-on learning, children develop essential skills, build confidence, and create lasting memories. Whether it’s a simple birdhouse or a personalized toy box, each project becomes a testament to their imagination and growing abilities. So, grab some wood, gather your tools, and embark on a journey of woodworking with your children – a journey filled with fun, learning, and lasting memories.
Q&A: Woodworking Projects For Children
What are some age-appropriate woodworking projects for beginners?
Simple projects like picture frames, small wooden boxes, or even decorative ornaments are great for beginners. Start with projects that use basic tools and techniques.
What are some essential safety tips for children working with wood?
Always supervise children, ensure they wear safety glasses, teach them how to use tools correctly, and keep sharp tools out of reach when not in use.
How can I make woodworking projects more engaging for children?
Incorporate their interests into the projects, let them choose colors and designs, and make the process interactive by explaining each step and encouraging their participation.
